
A Pre-Chat window is where your visitors need to enter their information before initiating a chat request. It helps agents to know more about visitors before accepting their chats. You can customize the pre-chat window according to your needs.
By default, the pre-chat window is disabled. Follow the instructions below to enable and customize your pre-chat window.
Step by Step Instructions
- Log in to the Comm100 Control Panel.
- In the left navigation bar, go to the Live Chat tab.
- In the Campaign drop-down menu, select a campaign.Note: If you have multiple campaigns, you need to first choose the one you are using.
- Go to the Pre-chat tab and turn on the Pre-chat toggle key to enable your Pre-chat window
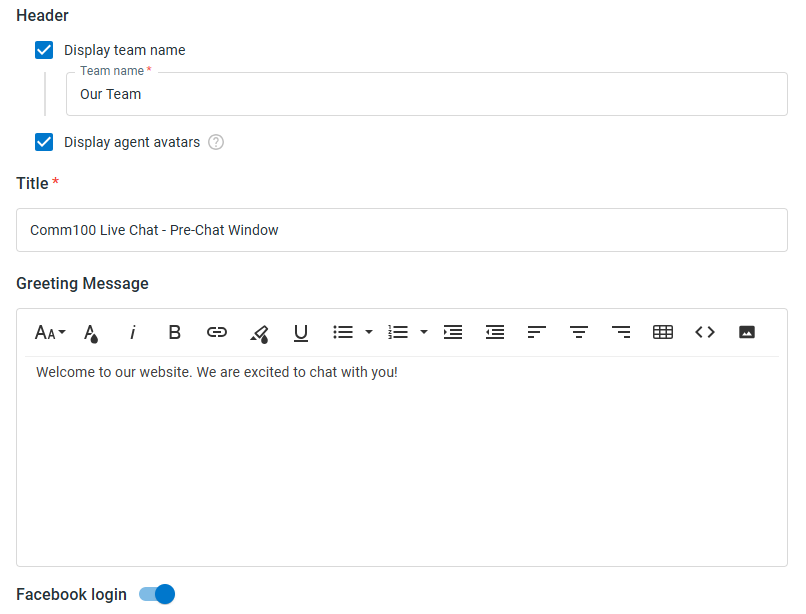
- Set the Header, Title, define Greeting Message and enable the Facebook login option if needed.Note: If you want to set up the Window Title, you must use the Popup Chat Window type.
- Scroll down the page and set the Visible and Required fields for the pre-chat window. You can also add more fields to collect visitor data based on your business needs.Note: There are character limits for both the field name length and the visitors' input area.
- The maximum length for the field name is 256 characters.
- For a text box type field, the maximum input area length is 128 characters.
- For a text area type field, the maximum input area length is 2048 characters.
- Click Save.



Now you have successfully customized your pre-chat window. The new settings will take effect automatically and immediately. You can refresh your website and see how the settings work to your satisfaction.