Chat Window is the window on which your visitors chat with your agents. It is fully customizable. You can tailor the window and make it match the style of your website.
Step-by-Step Instructions
- Log in to the Comm100 Control Panel.
- In the left navigation bar, go to the Live Chat tab.
- Select a campaign from the Campaign drop-down list, and go to Chat Window. If you have multiple campaigns, you should choose the right one from the Campaign drop-down list.
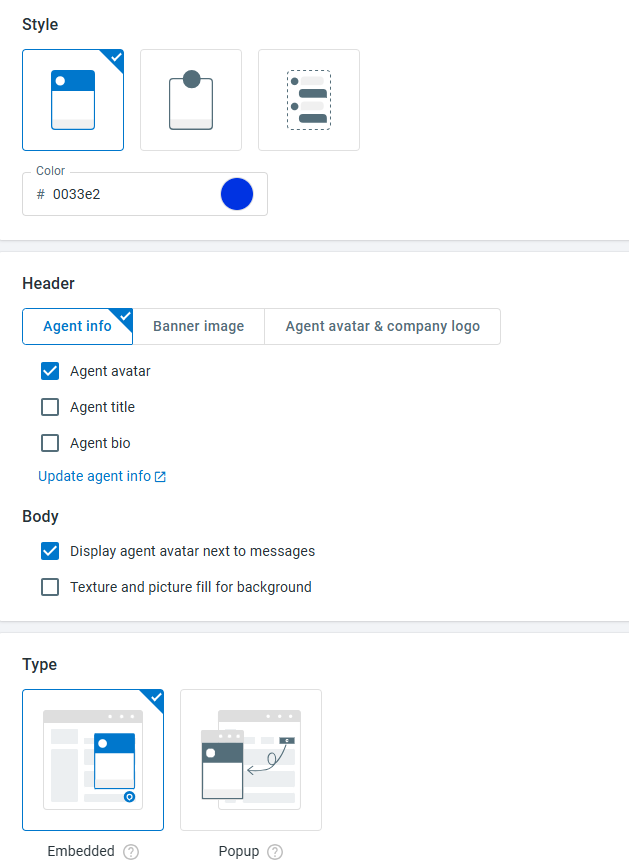
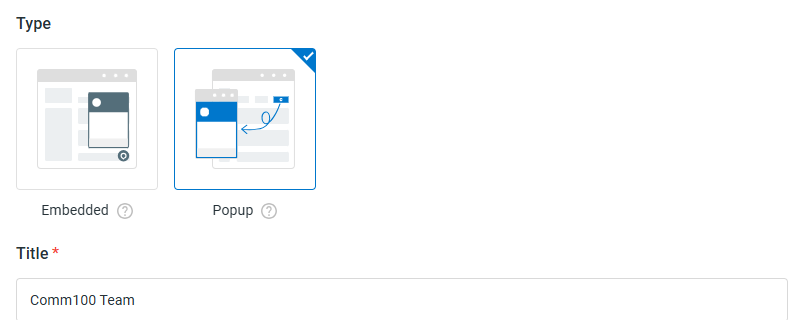
- You can choose the chat window's Style, set the chat window's Header, configure the chat window's Body, and change window Type (Embedded or Popup Chat Window) according to your needs.Note: To set up the chat window Title, you need to use Popup Chat Window type.
- You can use the Customize Style with Your Own CSS option to use your own CSS.
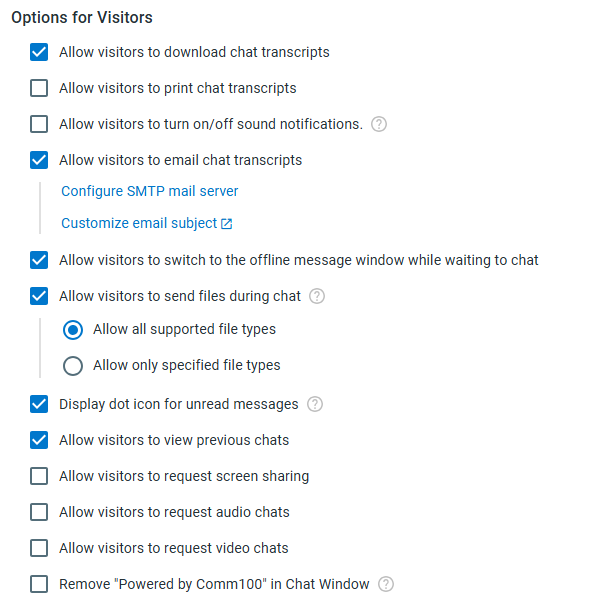
To learn how to customize chat window with CSS code, see this article. - Expand the Options for Visitors section to adjust which operation(s) will be available to visitors.
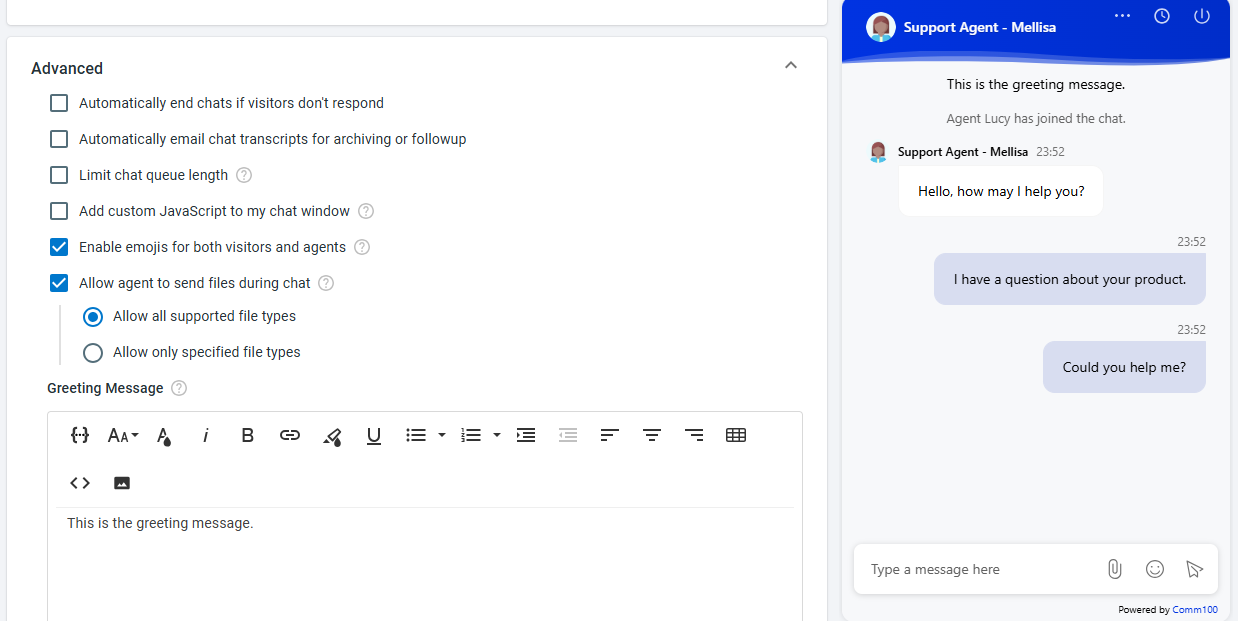
- Expand the Advanced section to adjust operation(s) to end the chat automatically when the visitor doesn't respond, send the chat transcript over email, limit the chat queue length, add custom JavaScript to the chat window, enable emojis for visitors and agents, allow agents to send files during chat, or define greeting message that will be displayed at the top of the chat window.
- Click Save.

After saving, the changes will take effect automatically and immediately. You can go to your website and initiate a chat to see how the settings work to your satisfaction.