Visitor Segmentation allows you to categorize visitors into different groups based on predefined rules. Segments update in real time, enabling agents to immediately identify a visitor’s segment and respond accordingly.
For example, you can create a segment for VIP clients and notify your VIP support team as soon as a VIP visitor arrives.
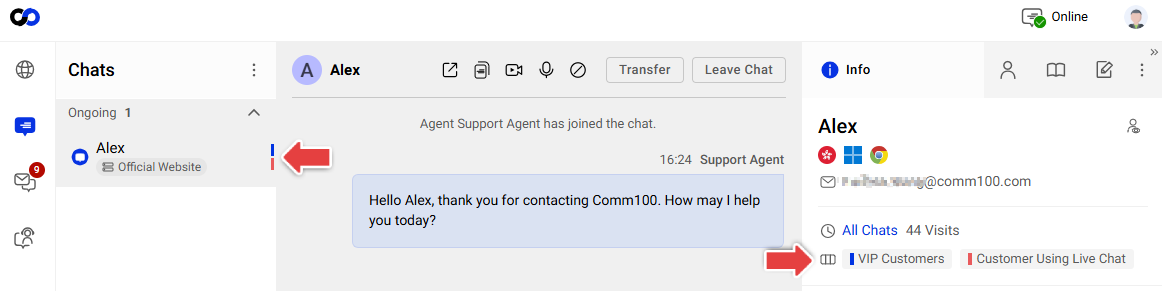
Segment information is displayed in the Agent Console and updates automatically as the visitor browses your website, ensuring agents always have the latest segment details.
Step-by-Step Instructions
- Log in to your Comm100 Control Panel.
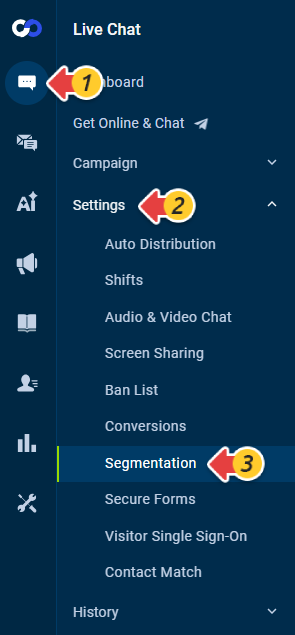
- From the left navigation menu, go to Live Chat > Settings > Segmentation.
- Turn on the Segmentation toggle.
- Click New Segment.
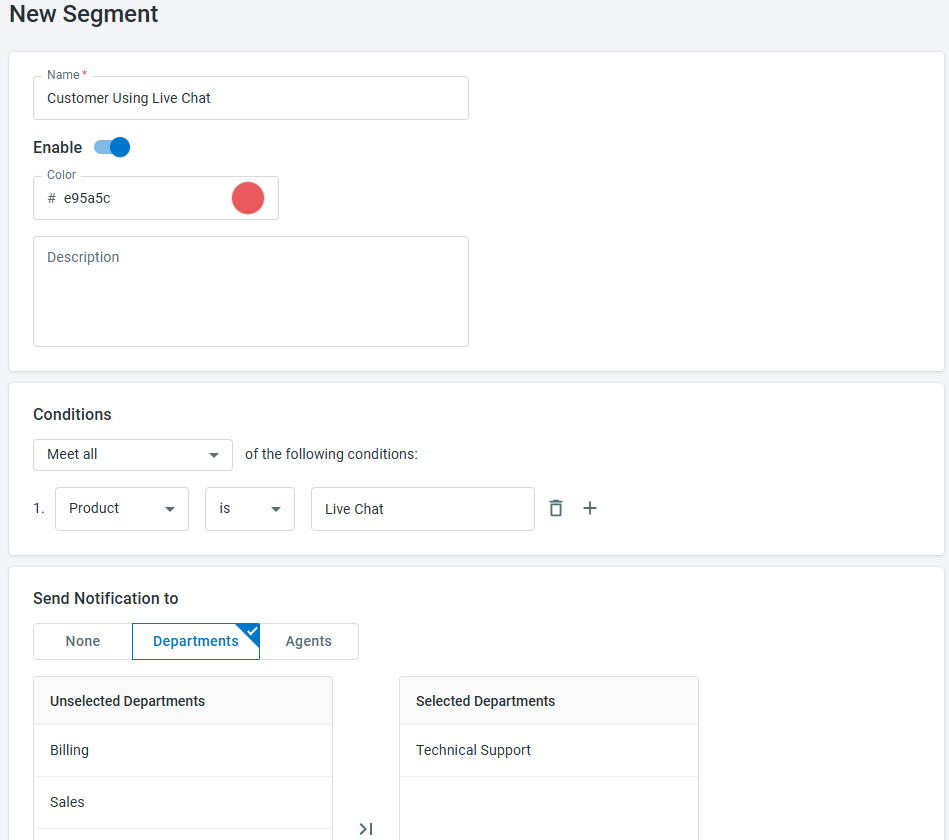
- Configure the segment details:
- Enter a name that can be easily recognized by agents.
- Enable the segment if you want to get it live as soon as you finish the setup.
- Choose a color to represent this segment.
- Add a description to help you quickly recall the segment’s purpose in the future.
- Define Conditions for the Segment
You can build highly flexible segmentation rules using a wide range of visitor data. Available data types include:
Visitor – Number of visits, Landing Page URL, Country/Region, State/Province, Language, Campaign, and more.
Chat - Request Page URL.
Contact – Contact information stored in the Contact system.
Custom Variable – Values passed from your website or systems. To learn how to set up Custom Variables, see this article.
OfflineMessage - Custom fields from your offline message window.
PreChat - Custom fields from your pre-chat window.
PostChat – Custom fields from your post-chat window - Cconfigure whether a notification should be sent for this segment and select which departments or agents should receive the alert. Both visual pop-up and audio notifications are available, and agents can manage these notifications in their own Agent Console settings.
- Click Save.

You can create as many segments as you need by repeating the steps above and prioritize them based on your business needs. Segments are evaluated in the order displayed, and priority determines which segments are matched first. At most, three segments will be displayed for one visitor at the same time. That means if one visitor already matches three segments, the program will stop matching the visitor with segments of lower priority.
Segments in Agent Console
- Visitor Segments in the Visitors tab
The visitor segment info is displayed as a column in the Visitors tab. You can quickly glance at the visitor segment in real-time and take whatever actions are needed as soon as possible.
Hover your mouse cursor over the color-coded blocks to view the associated labels of these segments. This helps in case you forget which color represents which segment. - Visitor Segments in the Live Chat tab
Segments also appear in the Live Chat tab. Each segment is displayed in the right-hand Info panel with its name and color. - Visitor Segment Notifications
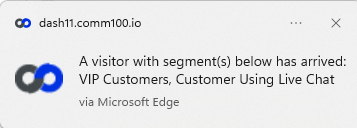
You can configure notifications to alert specific agents or departments when visitors are identified as belonging to a segment. This helps your team respond quickly and provide targeted support.