The Shifts feature in Comm100 Live Chat helps you ensure agents are online at the right time to serve customers efficiently. With Shifts, you can create and manage agent schedules, assign multiple shifts across agents and departments, and automatically update agent availability based on working hours, holidays, and time off.
By using Shifts, you can:
- Schedule agent working hours by day and time zone
- Create multiple shifts for agents and departments
- Automatically update agent status outside scheduled working hours
- Send system notifications when shifts start or end
- Schedule holidays and time off to prevent missed chats
When agents are available as planned, customers are less likely to experience delays or unanswered chats.
Step-by-Step Instructions
To create a shift for your agents, follow these steps:
- Log in to your Comm100 Control Panel.
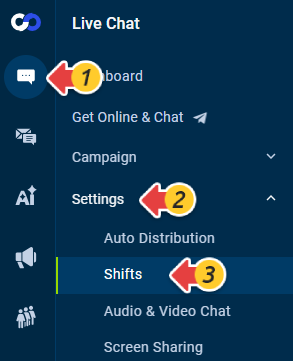
- From the left navigation menu, go to Live Chat > Settings > Shifts.
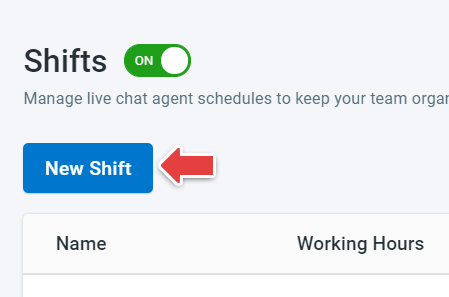
- Turn on the Shifts toggle.
- Click New Shift.
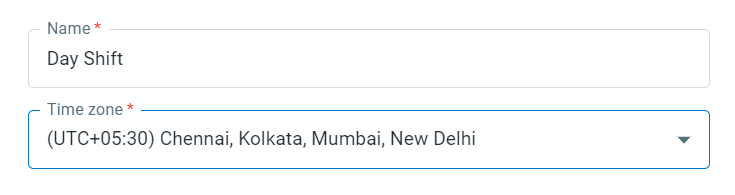
- On the New Shift page, enter a shift name and select the time zone for the shift.
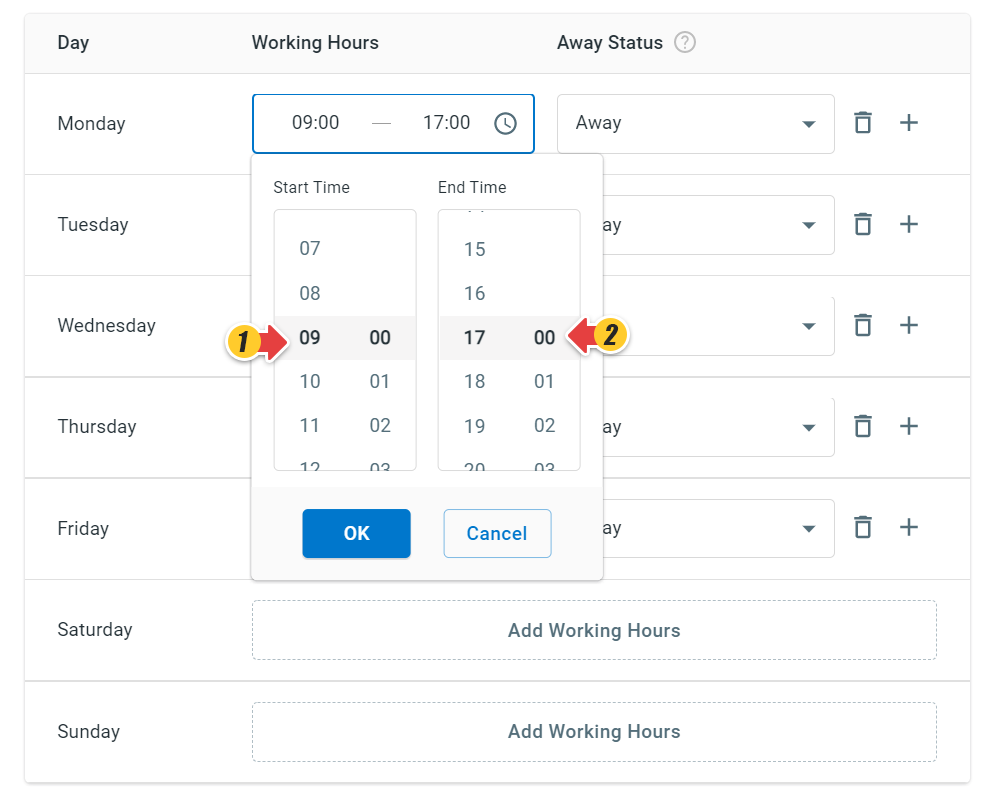
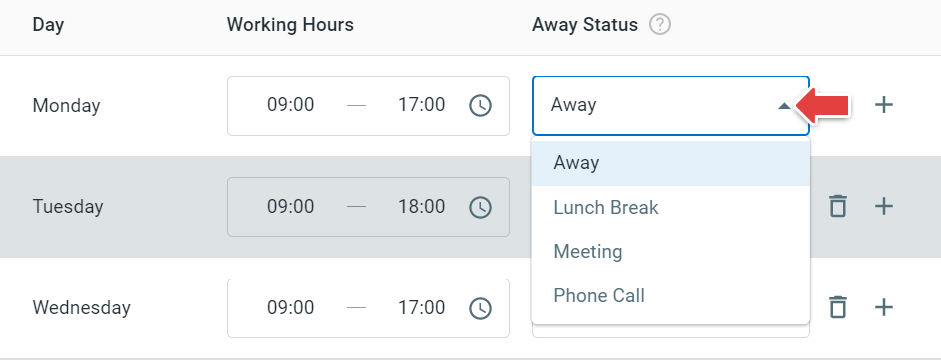
- In the Working Hours section, select Start Time and End Time for each weekday.
- In the Away Status section, choose the Away Status to apply outside scheduled working hours. By default, the Away Status is set to Away.Note:
- Outside scheduled working hours, Comm100 Live Chat automatically switches the logged-in agent’s status to the selected Away Status.
- You can create multiple schedules with different Away Status settings for each weekday by clicking the Plus icon.
- If you have configured Custom Away Status under Global Settings > People > Custom Away Status, they will appear in the Away Status drop-down list.
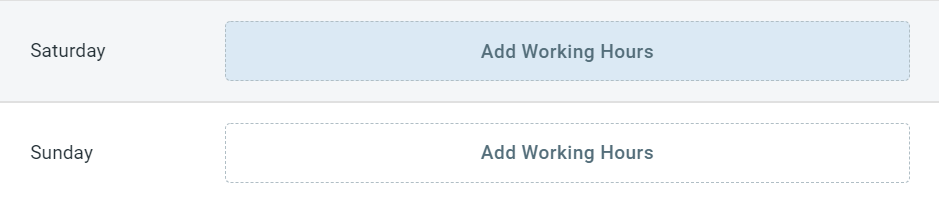
- Configure Working Hours and Away Status for weekends based on your business needs.
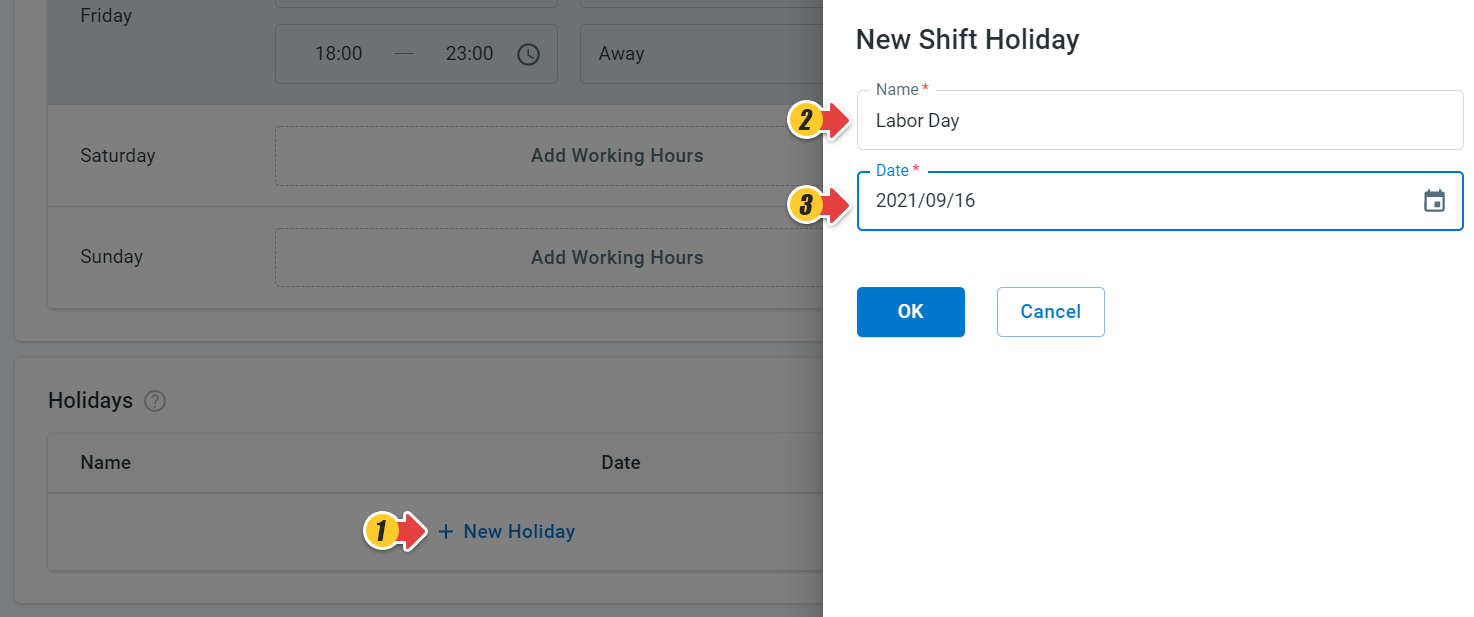
- In the Holidays section, click New Holiday. The New Shift Holiday drawer opens. Note: Holidays define dates when your business or agents are unavailable. If an agent's holiday starts but they are still logged in, their login status will be automatically switched to Away.
- Enter a holiday name and select a date from the Date drop-down list.
- Click OK.
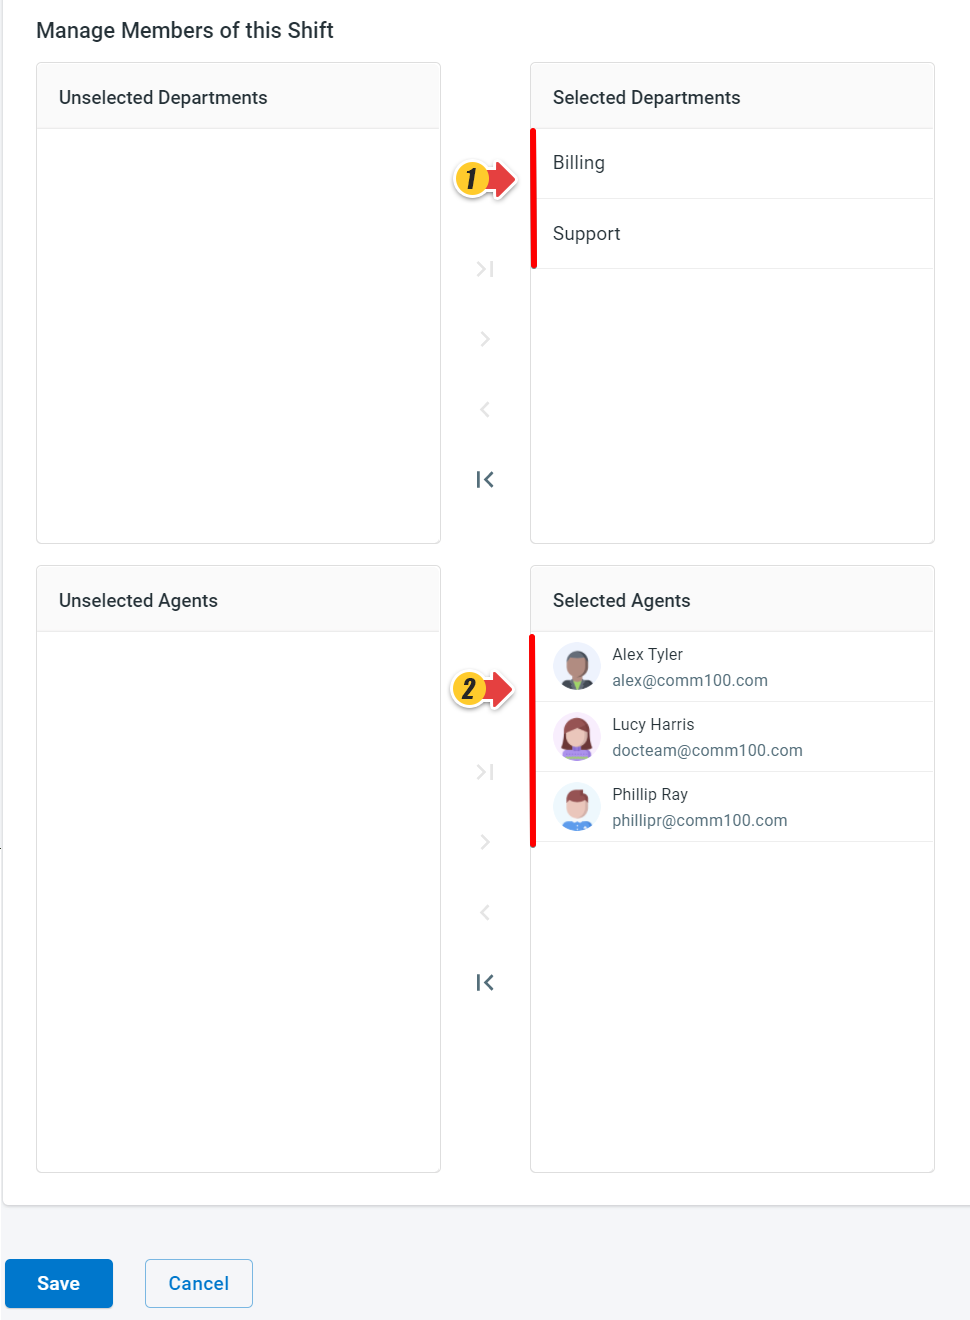
- In the Manage Members of this Shift section, you can select departments, agents, or both for the shift.
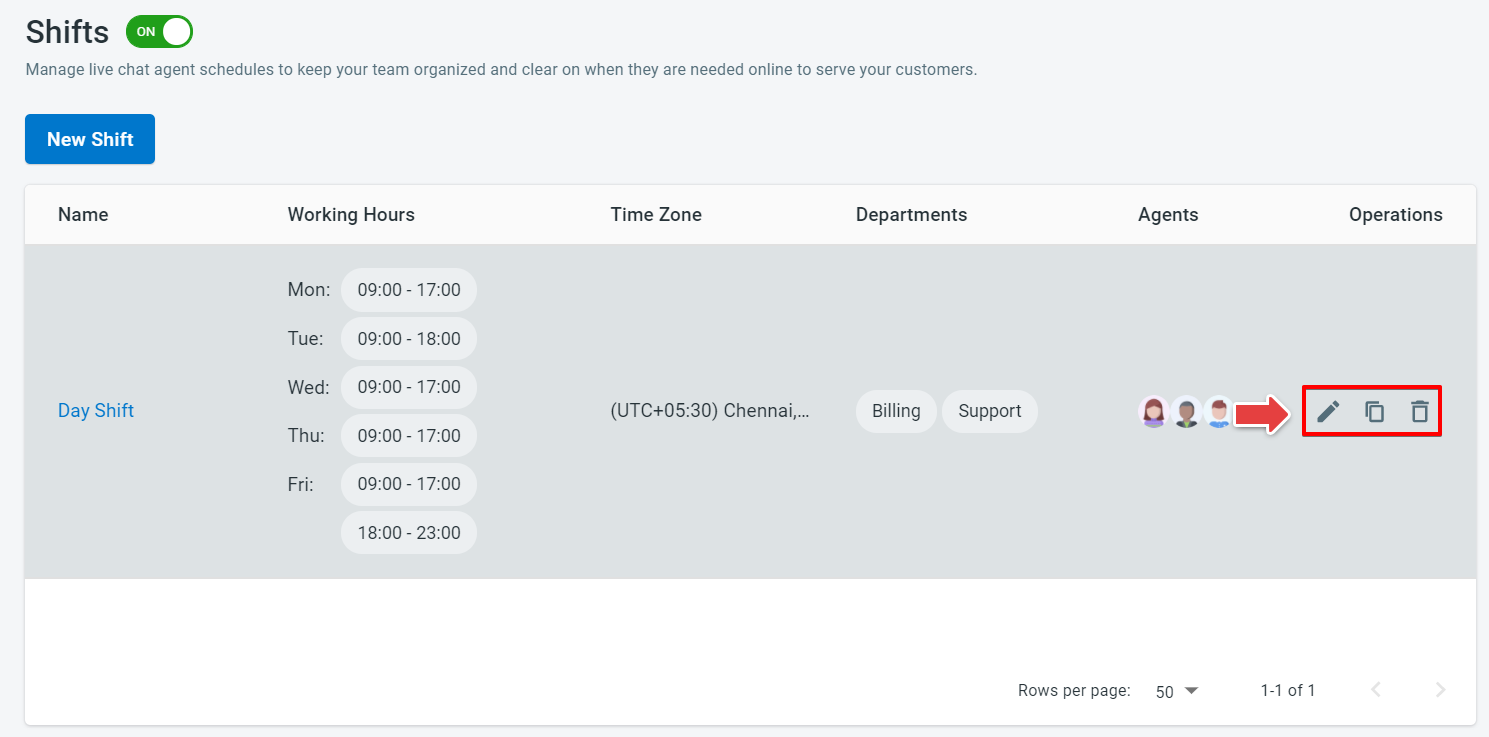
- Click Save. The new shift is created and displayed on the Shifts page.
You can manage existing shifts using Edit, Copy, and Delete actions to keep schedules up to date.
Shift Started and Shift Ended Notification
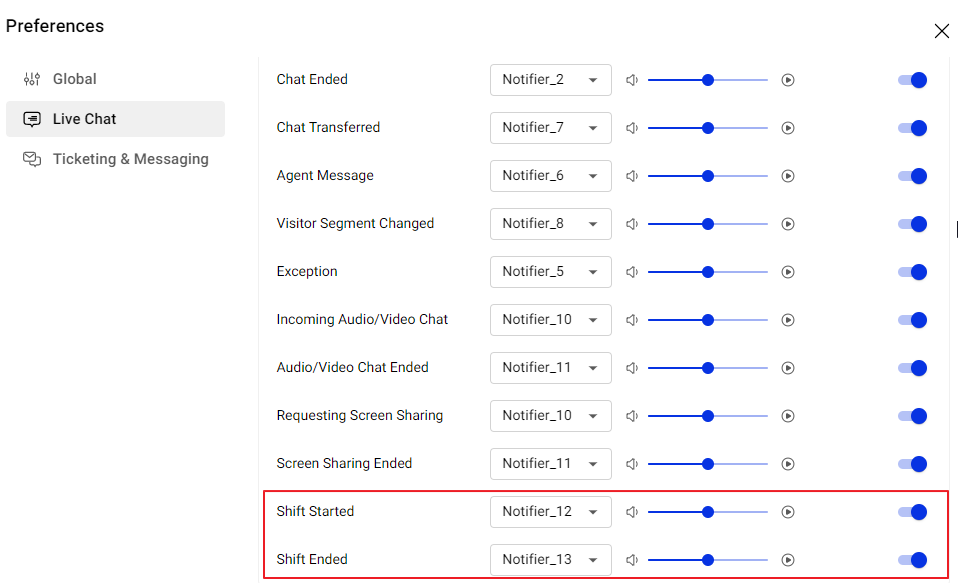
To receive shift notifications, agents must ensure that Shift Started and Shift Ended notifications are enabled. Agents can verify the settings by clicking their avatar in the top right corner of the Agent Console > Preferences > Live Chat > Notification. The notifications are enabled by default.
You can observe the following scenarios for Shift Started and Shift Ended notification:
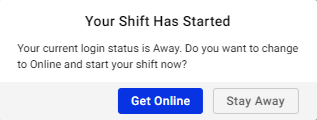
- You receive a Shift Started notification when your shift has started, but you are logged in with Away status. You can either choose to Stay Away or Get Online.
- You do not receive any notification when your shift has started and you are already Online.
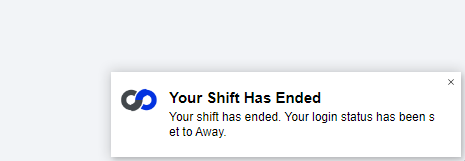
- You receive a Shift Ended notification when your shift has ended, but you are still Online. Your status is automatically switched to Away.
- You do not receive any notification when your shift has ended and you are already Away.
- You receive a Shift Ended notification at the start of your holiday, but you are already Online, your login status is automatically switched to Away.
The shift feature is only available in Comm100 Ultra Edition. Contact us if you want to set up your shifts.