Creating articles is the first step in building your Knowledge Base. Comm100 Knowledge Base provides an easy-to-use WYSIWYG editor and flexible organization options, allowing you to organize articles by category and tag so they are easy to find, manage, and maintain.
Step-by-Step Instructions
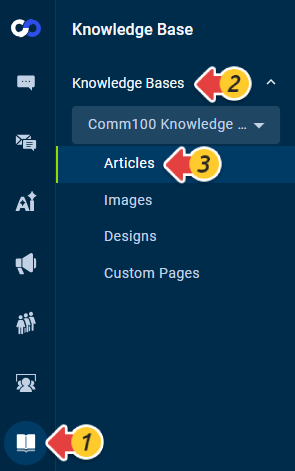
To create an article, follow these steps:
- Log in to your Comm100 account.
- From the left navigation menu, go to Knowledge Base > Knowledge Bases > Articles.
- Click New Article.
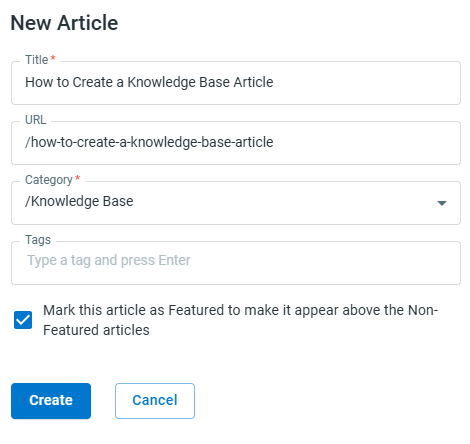
- The New Article drawer appears. Configure the following options, then click Create.
- Title – Enter the title of the article.
- Category – Select the category where the article will be published.
- URL (optional) - By default, the system generates the URL using the article title as the main component. You can modify the URL if needed.
- Tags (optional) – Add tags to help identify and filter articles in the Knowledge Base backend. Tags are for internal use only and are not visible to readers.
- Mark this article as Featured to make it appear above the Non-Featured articles (optional).
- Click Edit Content to add your article content. Articles are created with Draft status by default. If you have prepared the article source code elsewhere, you can click the Code View button on the toolbar and paste the code into the editor.
- Click Preview to see how the article will appear to readers.
- When the article is ready, click Publish. Articles in Draft status are not visible on your Knowledge Base.


The article is created and published successfully.