Comm100 Anytime Chat enables asynchronous conversations, allowing your team and customers to communicate at their own pace. Customers can send messages and return later to continue the same conversation, reducing missed interactions and providing greater flexibility for both customers and support teams.
This article explains how to create, configure, and manage Anytime Chat in both the Control Panel and Agent Console.
In the Control Panel, you can create and manage Anytime Chat widgets, customize the visitor experience, configure channel-specific settings, and monitor channel activity through reports and audit logs.
Create a New Chat Widget
To create a new Anytime Chat Widget, follow these steps:
- Log in to your Comm100 Control Panel.
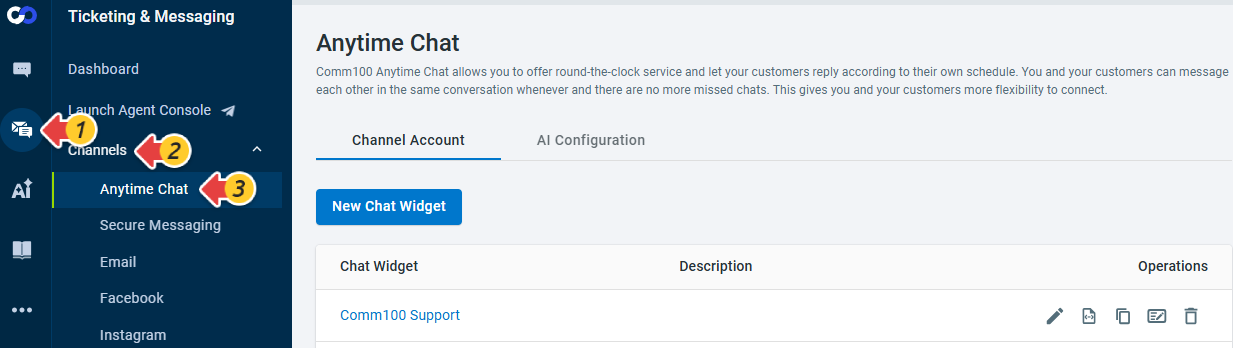
- From the left navigation menu, go to Ticketing & Messaging > Channels > Anytime Chat.
- Click New Chat Widget.
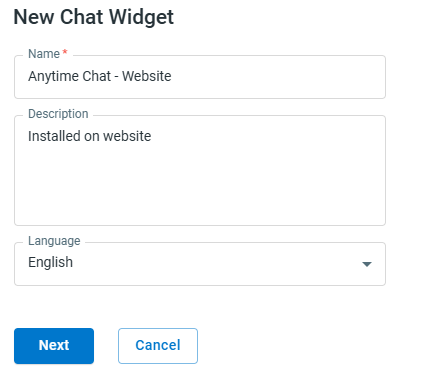
- In the New Chat Widget drawer, enter the Name, Description, select a Language, and then click Next.
- In the Chat Launcher tab, customize the appearance and position of the Anytime Chat launcher, and click Save.
To learn more about configuring the Chat Launcher, see this article. - Click the Chat Window tab, customize its Header, Body, and Options for Visitors sections based on your requirements, and click Save.
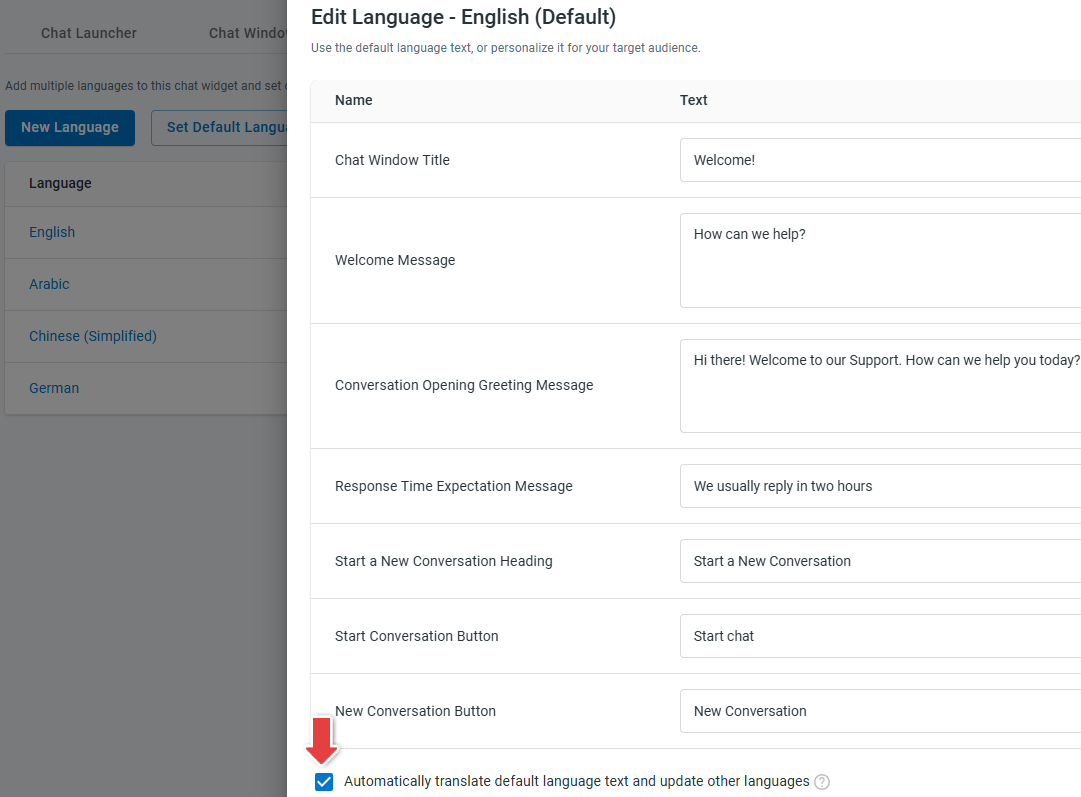
To learn more about customizing the Anytime Chat Window, see this article. - Click the Language tab. You can add multiple languages to a chat widget and set one as the default. The chat window will automatically match the visitor’s browser language when that language is supported.Note:
- When updating the default language, you can choose to automatically translate the default language text and update other configured languages for the same widget.
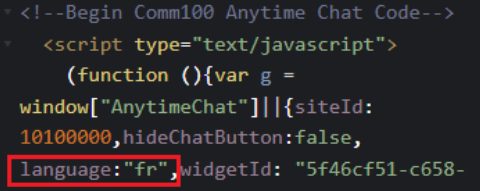
- If you want a widget to display a specific language on certain webpages, you can define the language in the installation code. For example, language: "fr"
Alternatively, you can set the language through the JavaScript API. For example, Comm100AnytimeChat.set("anytimeChat.language", "fr"). If the specified language is not supported, the widget falls back to the visitor's browser language and then to the widget's default language. - Right-to-left (RTL) languages, such as Arabic, Hebrew, Persian, Yiddish, Kurdish Sorani, and Urdu, are displayed right-to-left automatically.
- When updating the default language, you can choose to automatically translate the default language text and update other configured languages for the same widget.
After creating a chat widget, you can manage it from the Operations column on the Anytime Chat page.
Manage Chat Widgets
To manage an existing chat widget, navigate to the Operations column on the Anytime Chat page and choose one of the following actions:
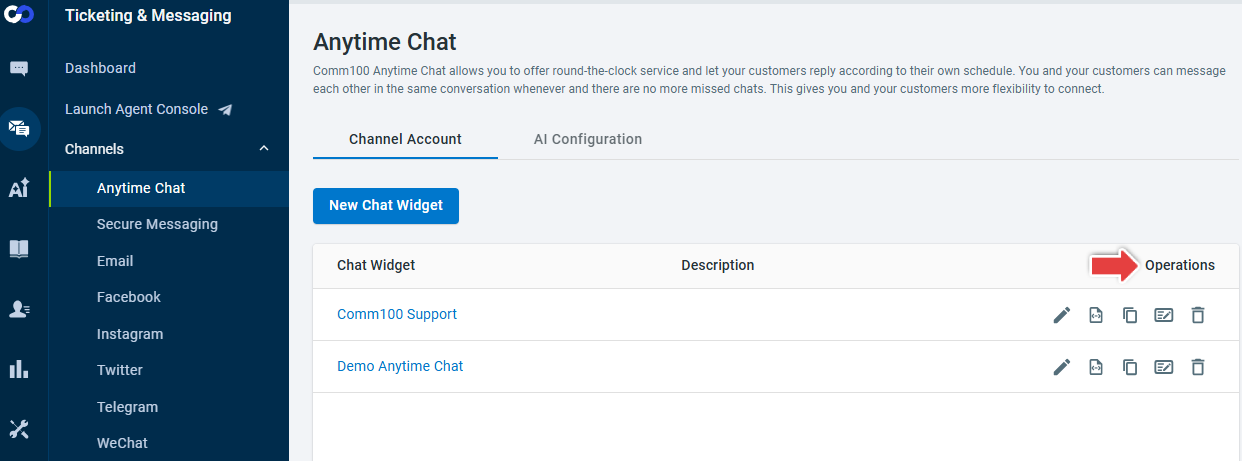
- Edit: Modify an existing chat widget's configuration.
- Install Code: Access the Installation tab and manage the installation code.
- Copy: Create a copy of an existing chat widget.
- Rename: Update the chat widget's name and description.
- Delete: Remove a chat widget.
Configure Anytime Chat and Monitor Activity
After you have created an Anytime Chat widget, you can further configure channel-related settings and monitor channel activity. Anytime Chat supports dedicated conditions in Routing Rules, Triggers, and SLA Policies. You can also enable Credit Card Masking for Anytime Chat tickets and review channel activity through Audit Logs and Reports.
- Routing Rules
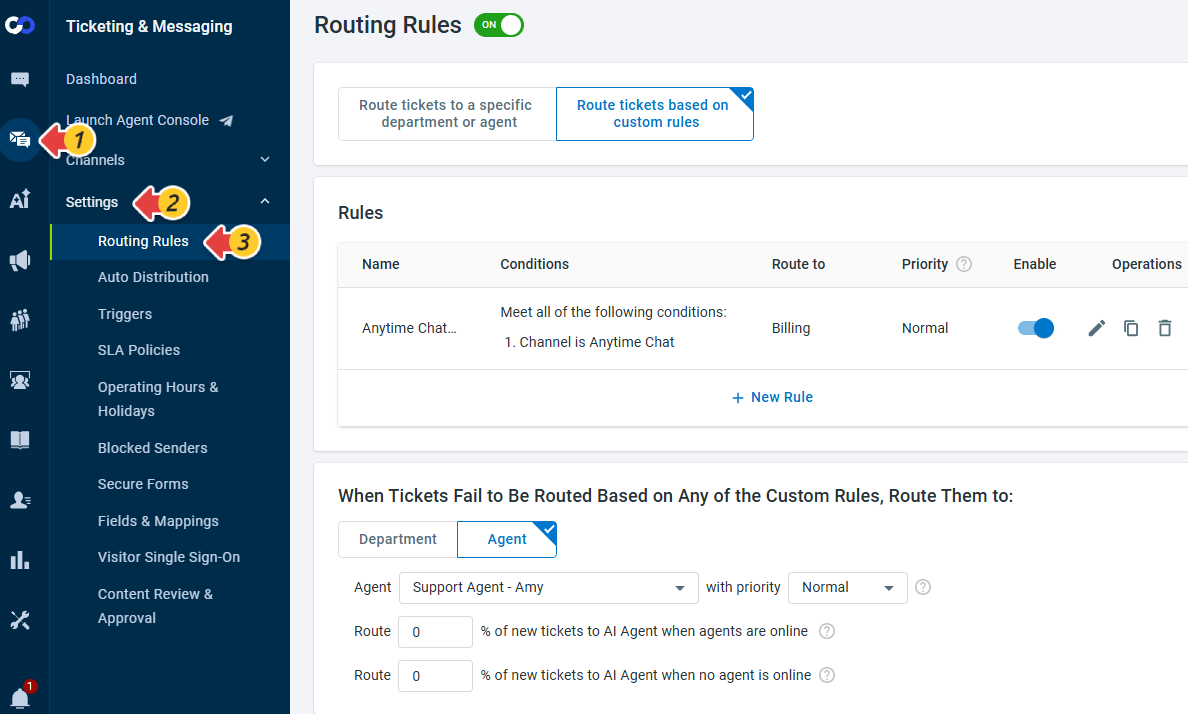
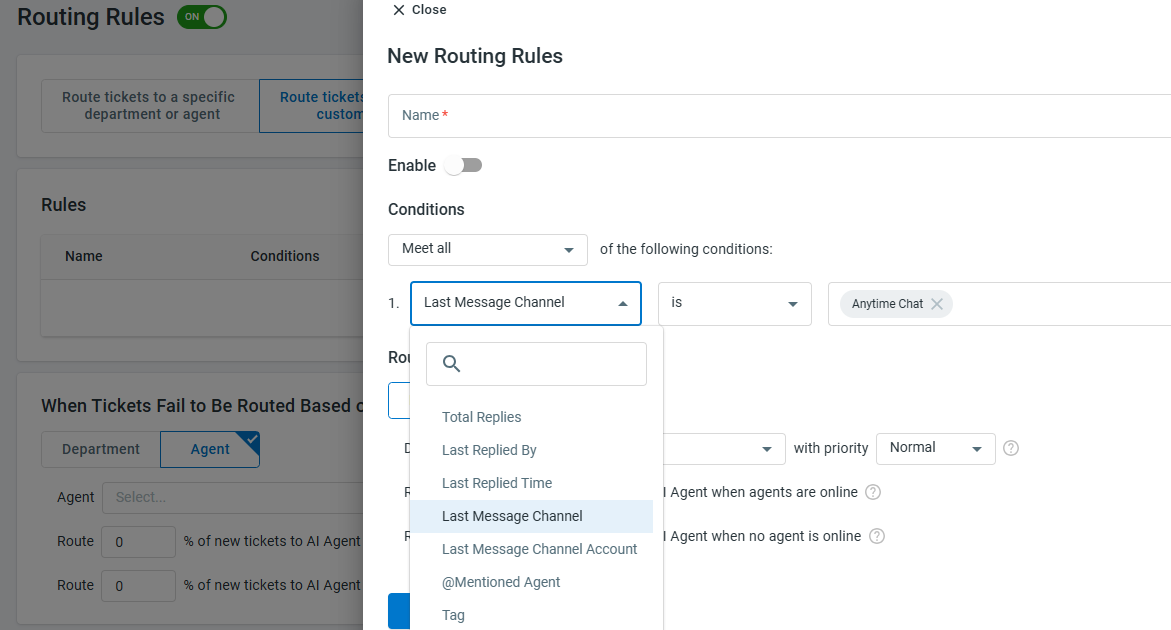
To use Channel, Channel Account, Last Message Channel, and Last Message Channel Account conditions in Routing Rules, navigate to Ticketing & Messaging > Settings > Routing Rules and create a new rule using one of these conditions.
For example, when Last Message Channel is selected as the condition, Anytime Chat appears as an available value.
To learn more about configuring Routing Rules in Ticketing & Messaging, see this article. - Triggers
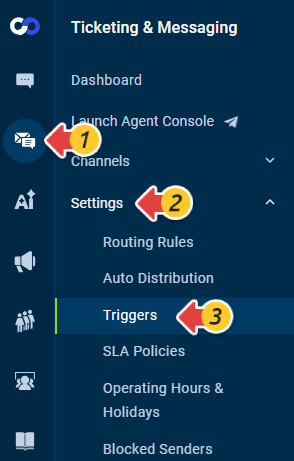
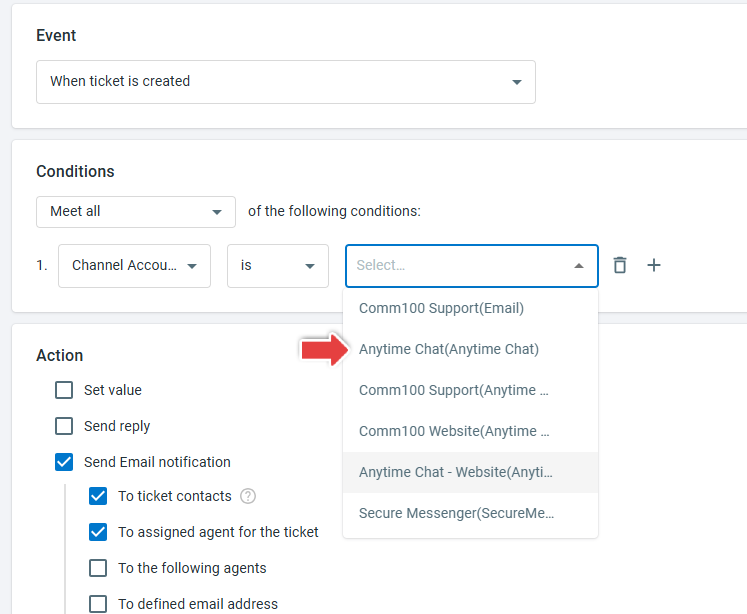
To use Channel, Channel Account, Last Message Channel, and Last Message Channel Account conditions in Triggers, navigate to Ticketing & Messaging > Settings > Triggers and create a new trigger using one of these conditions.
For example, when Channel Account is selected as the condition, all configured Anytime Chat accounts appear as available values.
To learn more about using Triggers in Ticketing & Messaging, see this article. - SLA Policies
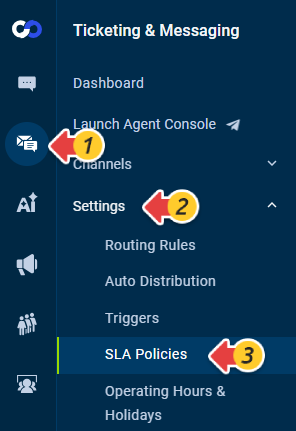
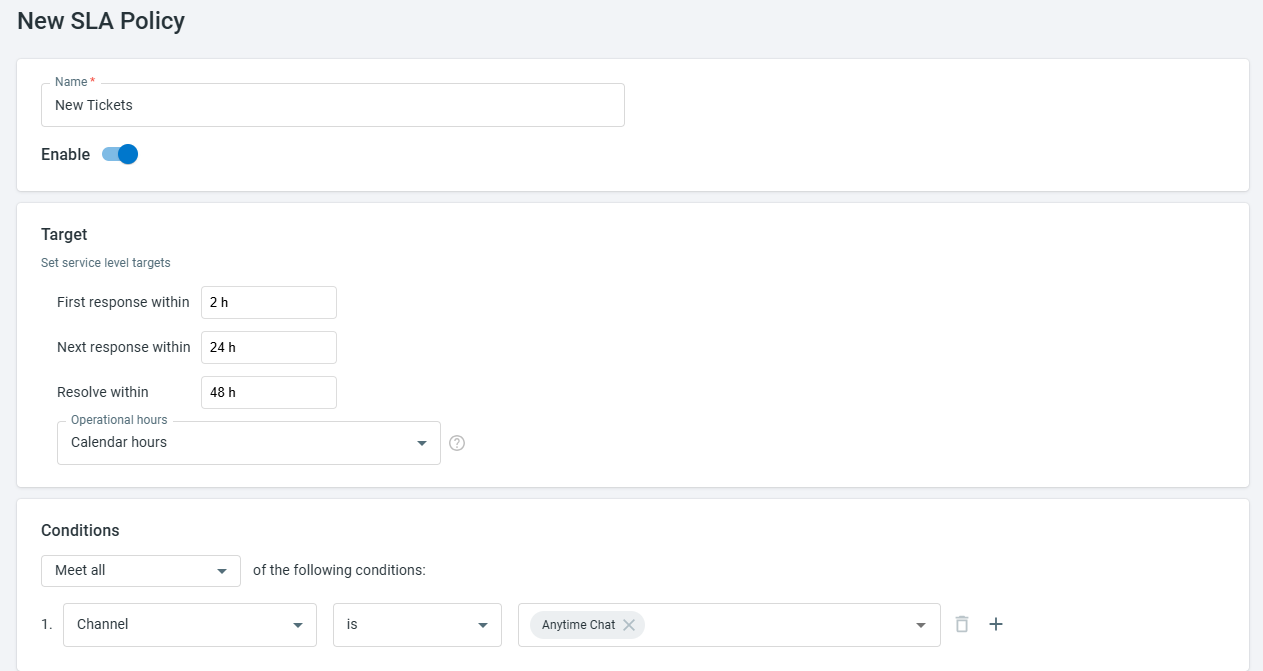
To use Channel, Channel Account, Last Message Channel, and Last Message Channel Account conditions in SLA Policies, navigate to Ticketing & Messaging > Settings > SLA Policies and create a new SLA policy using one of these conditions.
For example, when Channel is selected as the condition, Anytime Chat appears as an available value.
To learn more about using SLA Policies in Ticketing & Messaging, see this article. - Credit Card Masking
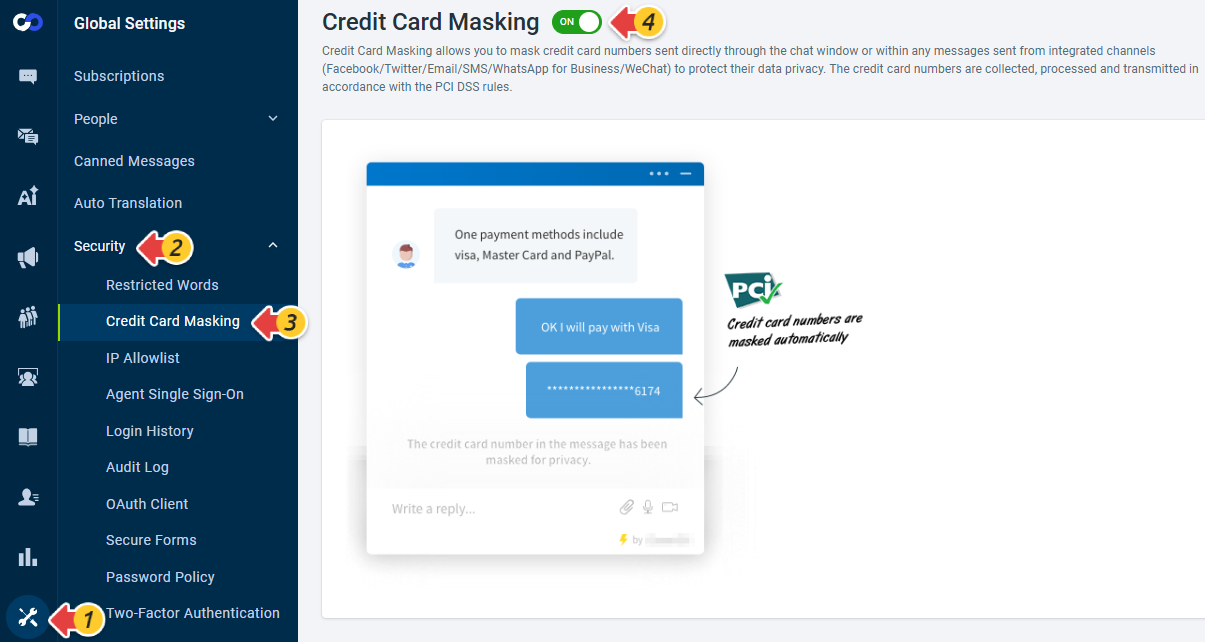
To mask credit card numbers in Anytime Chat tickets, navigate to Global Settings > Security > Credit Card Masking and turn on the Credit Card Masking toggle. - Audit Log
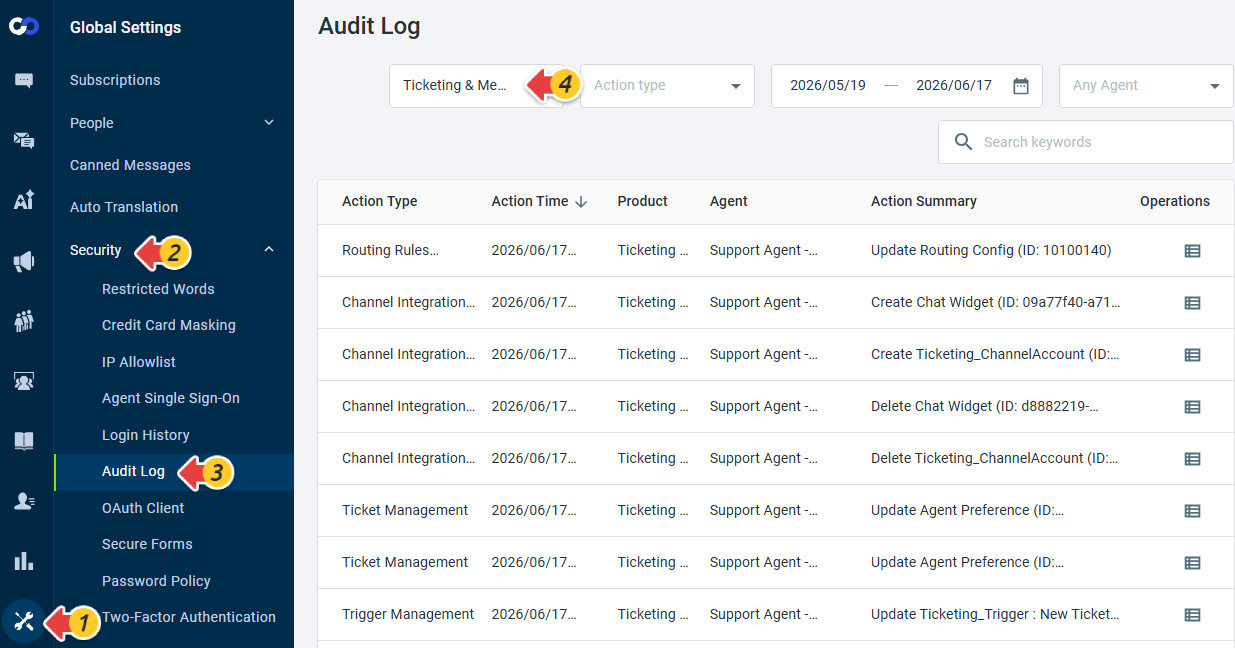
To review Anytime Chat configuration changes and track audit activities, navigate to Global Settings > Security > Audit Log. Select Ticketing & Messaging from the Product drop-down list and choose the appropriate Action type. - Reports
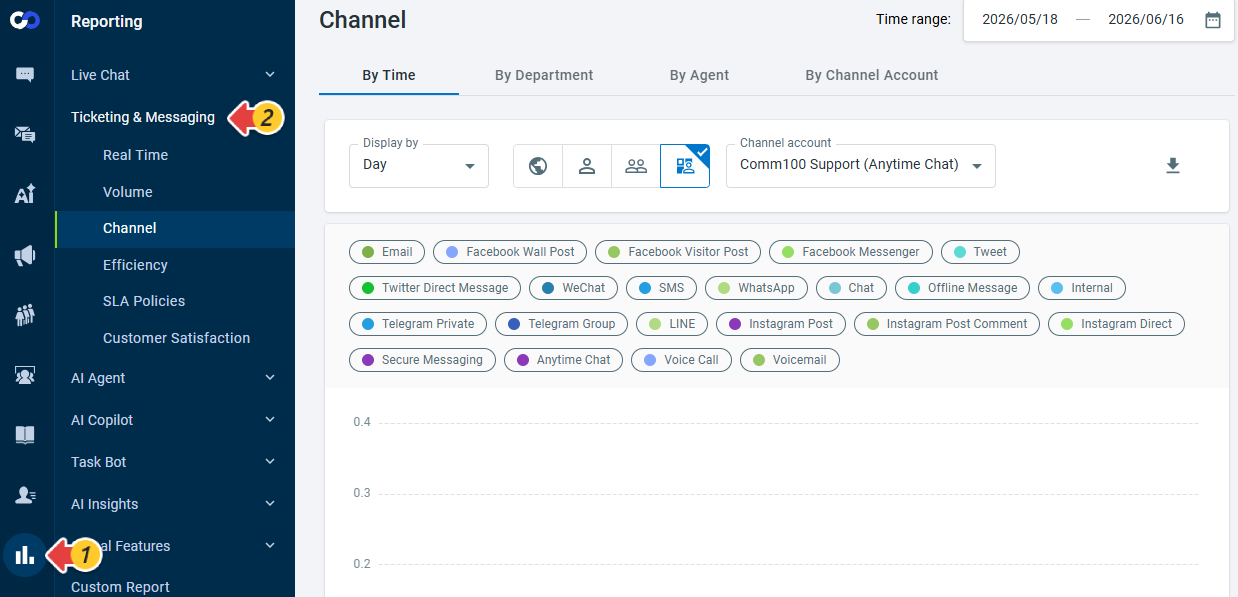
To view Ticketing & Messaging reports for the Anytime Chat channel, navigate to Reporting > Ticketing & Messaging. Reports such as Volume, Channel, Efficiency and Customer Satisfaction provide the channel-based reporting data.
To learn more about Ticketing & Messaging reports, see this article.
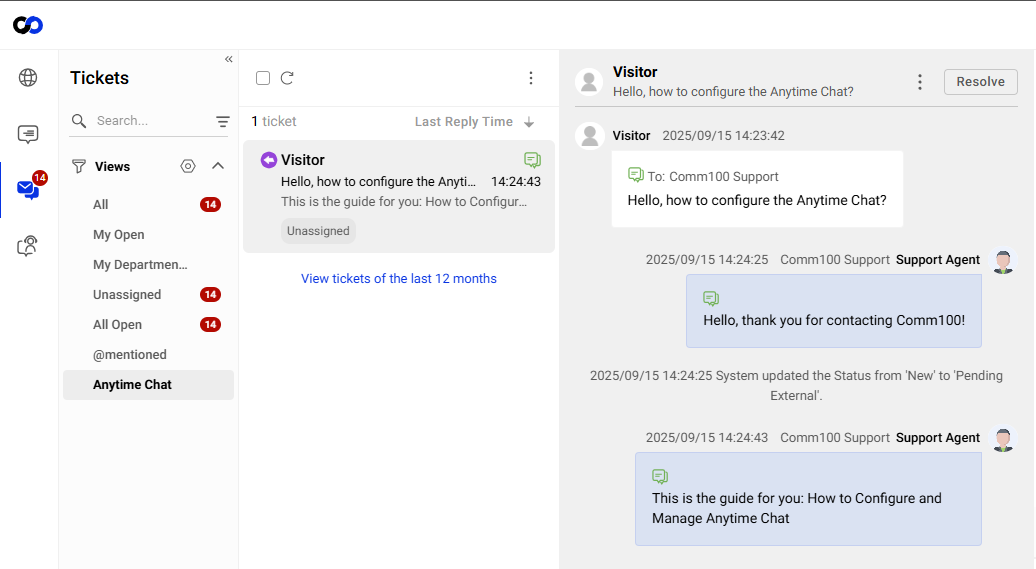
Once Anytime Chat has been configured and installed on your website, agents can manage and respond to Anytime Chat conversations directly from the Agent Console.
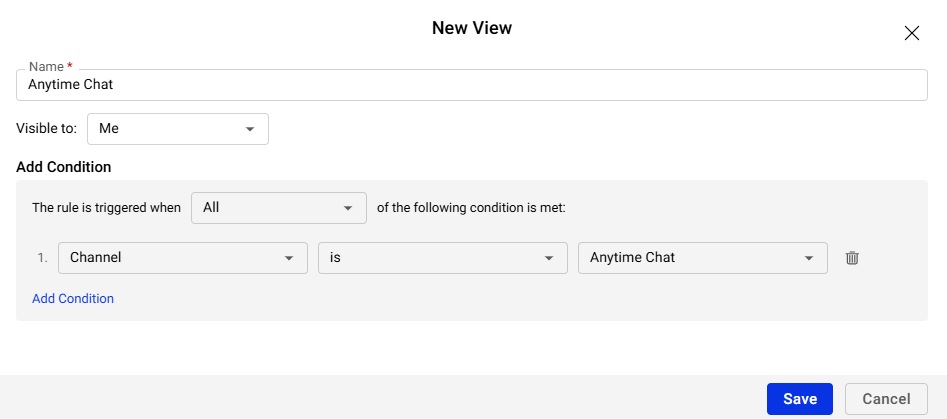
To help organize Anytime Chat tickets, you can create dedicated Views using conditions such as Channel, Channel Account, Last Message Channel, and Last Message Channel Account. This allows agents to quickly locate and manage tickets from the Anytime Chat channel separately from other communication channels.
To learn more about creating and managing Views in Ticketing & Messaging, see this article.