
This guide is designed for Ticketing & Messaging agents and anyone who uses Ticketing & Messaging to manage customer conversations daily. It introduces the key features and workflows agents need to handle tickets efficiently, collaborate with teammates, and provide effective customer support.
Ticketing & Messaging centralizes customer communications from multiple channels into a unified workspace, allowing agents to manage conversations, track customer information, and work more productively within the Agent Console.
In case you want to download this article, click Getting Started Guide for Ticketing & Messaging Agents.
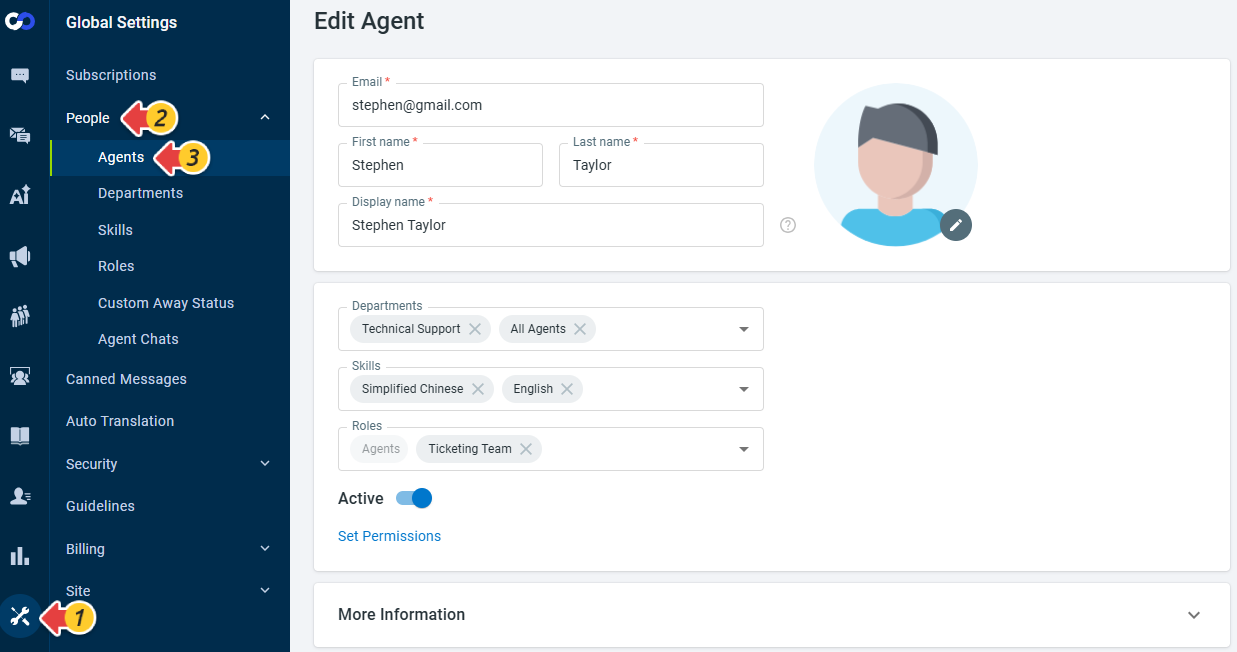
Before you begin handling tickets, you should configure your personal profile settings in the Control Panel. On the Edit Agent page, you can customize details such as your avatar, first name, last name, display name, and other profile information. To access these settings, go to Global Settings > People > Agents.
You can access the Agent Console through your web browser or by installing the Comm100 desktop app on your computer. To learn more about Comm100 Agent Apps, see this article.
Set Your Status
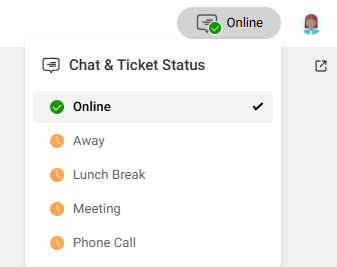
To begin handling tickets, log in to the Agent Console and set your status to Online. When you are away from your desk or taking a break, change your status to Away. At the end of your shift, click Log Out.
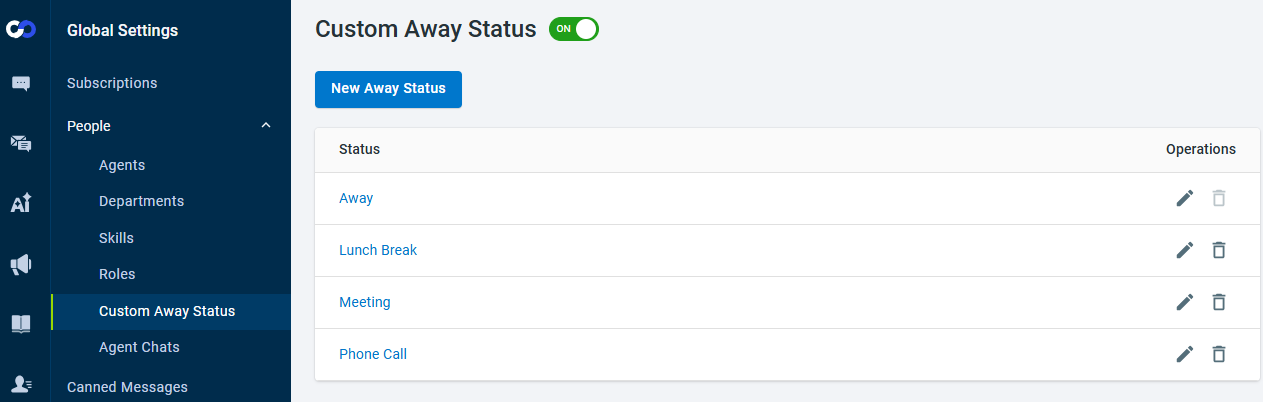
Admins can also create additional custom statuses using the Custom Away Status feature in the Control Panel.
Set Your Preferences
The Preferences tab allows agents to customize settings for the Agent Console. Settings are organized by product or area, such as Global, Live Chat, and Ticketing & Messaging, and include options for notifications, information display preferences, email signatures, and Table View columns.
Global
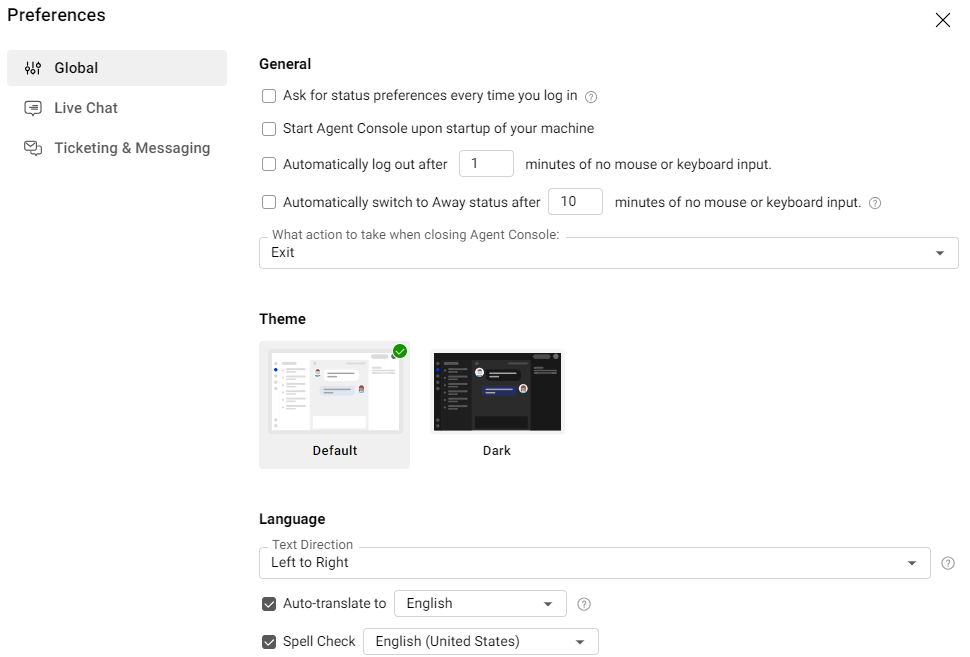
In the Global tab, you can configure general settings, select a theme, and manage language preferences.
- General
- Ask for status preferences every time you log in - When this option is selected, there will be a pop-up window for you to choose the status preferences every time you login.
- Start Agent Console upon startup of your machine
- Automatically log out after X minutes of no mouse or keyboard input
- Automatically switch to Away status after X minutes of no mouse or keyboard input
- Theme
You can choose between the Default or Dark theme. - Language
Agents can configure language preferences for communicating with contacts. You can set the text display direction on the agent side and enable automatic language detection and translation for contact messages when different languages are used. To learn more about how to use Auto Translation for Ticketing & Messaging, see this article.
You can also enable spell check and select your preferred language. When a typo or spelling error is detected, a red wavy underline appears beneath the word. You can right-click the word to view and select suggested corrections.
Notification
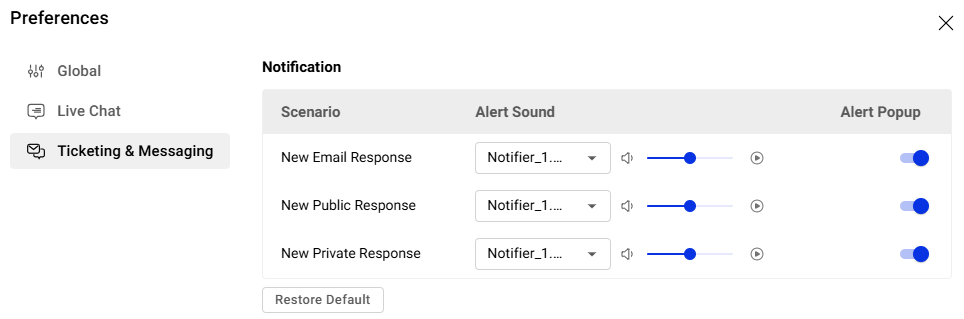
Use the Notification settings to set different alert sounds and popups to differentiate between a new email response, a new public response, and a new private response. This helps ensure that ticket requests and customer replies are not missed.
Information Display Preferences
These settings allow you to customize the information displayed in the ticket list and ticket details area. Available options include:
- Show ticket subject in the ticket list
- Show ticket assignee in the ticket list
- Show event logs in ticket message area
- Show sender, recipient and channel info in each message
- Show ticket age instead of SLA time in the ticket list
Email Signature
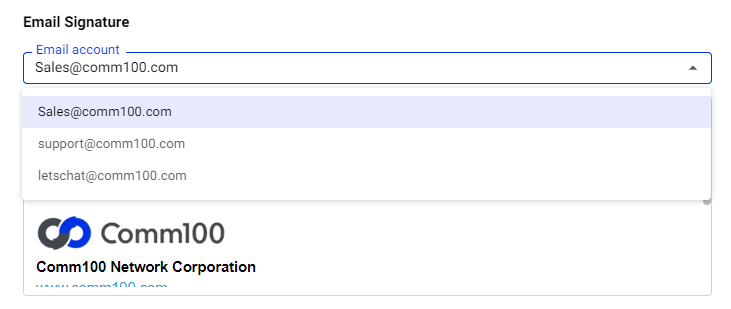
Email signatures help identify you and the organization you represent when communicating with contacts. If you use multiple email accounts for different roles or departments, you can create and manage multiple ticket signatures accordingly.
To learn more about designing email signatures, see this article.
Views & Tags Area
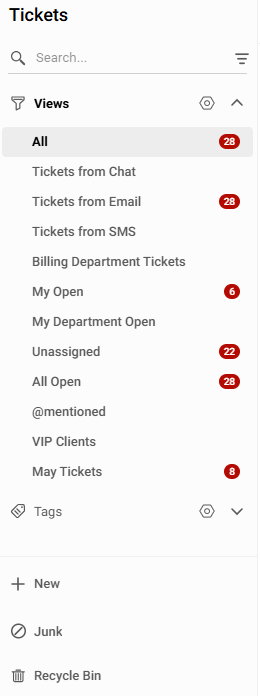
Comm100 Ticketing & Messaging includes several with system default Views—All, My Open, My Department, Unassigned, All Open, and @mentioned, allowing you to locate tickets on predefined conditions. You can also create and manage custom views to organize tickets per your business needs. Views can be public or private, if they are public, they can be seen by all Agents, if they are private this will be limited to the Agent who created it.
You can also create and manage Tags to categorize tickets and organize inquiries more efficiently. In addition, the search bar allows you to quickly locate tickets you want to work on. From this area, you can also create Email, SMS, and Internal tickets, as well as access tickets in the Junk and Recycle Bin lists.
Ticket List area
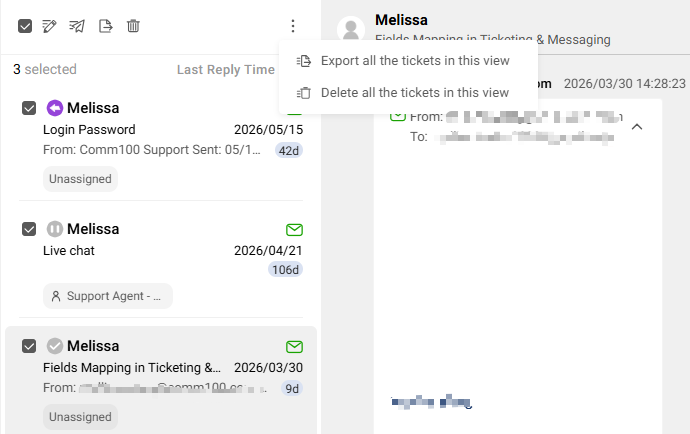
The Ticket List area displays tickets from multiple communication channels. From this area, agents can perform batch operations on selected tickets, including updating assignees, priorities, and statuses, as well as exporting or deleting tickets. In addition, you can sort the ticket list by different criteria, such as Next SLA breach, Last Reply Time, Last Updated Time, Priority, Status. Sorting can be applied in either ascending or descending order.
Reply Area
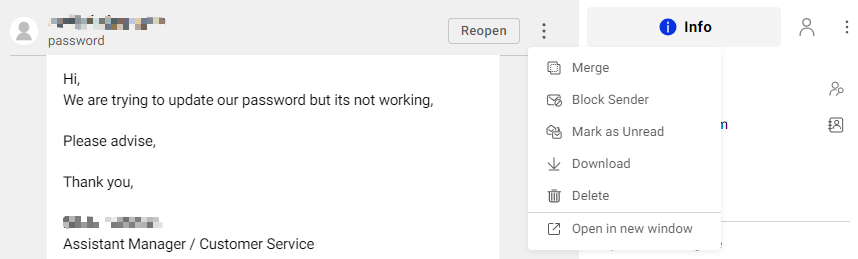
The reply area displays the ongoing conversation between you and your contact. By clicking the three dots, you can perform additional ticket actions such as Merge, Block Sender, Mark as Unread, Download, Delete, and Open in New Window. Clicking Resolve closes the ticket and changes the button to Reopen, allowing the ticket to be reopened later if additional follow-up is required.
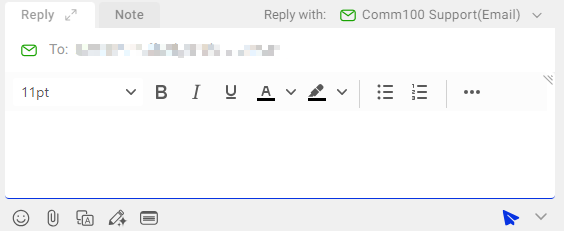
When replying, you can also use features such as emojis, file attachments, auto-translation for contact messages, reply enhancement, and secure forms.
In addition, you can switch between the Reply and Note tabs during a conversation. The Note tab highlights the editor in yellow, indicating that any content added will remain internal and visible only to agents. Contacts cannot view internal notes.
Action Area
The Action area has the following tabs—Info, Help Content, Contact, and History. This area allows agents to view ticket details, update contact information, review ticket history, and share resources such as canned messages, knowledge base articles, and AI Agent responses with contacts.
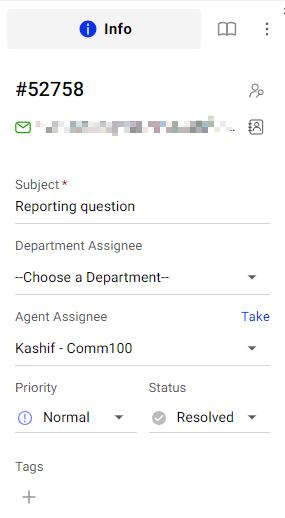
In addition, it takes control of your inbound support tickets and ensures the correct department and agent handles them.
Create Views
Comm100 Ticketing & Messaging comes with system default Views—All, My Open, My Department, Unassigned, All Open, and @mentioned, allowing you to locate tickets on predefined conditions. In addition, you can also create custom Views to locate tickets as per your business needs. The Views help you narrow down the tickets in your ticketing system and only display the tickets which require your attention.
To learn more about creating Views, see this article.
Use @Mention
When working on a ticket, you may need to get other agents involved if you want them to follow up with a case and reach out to the customer or want to provide visibility to others. The @mention feature allows you to collaborate with other agents more efficiently and keep them in the loop by using a simple @ symbol in your ticket Note field.
To learn more on @mention, see this article.
Other Actions – Merge, Block Sender, Mark as Unread, and Delete
Merge Tickets
You can merge the history of a source ticket with a target ticket. The merge operation is irreversible. After the merge, the target ticket keeps its property values. Future incoming emails, chat transcripts, and offline messages to the source ticket will automatically be attached to the target ticket. Your future search of the source ticket brings up the target ticket.
To learn how to merge tickets, see this article.
Block Sender
You can block senders across different channels from Agent Console if you receive unsolicited ticket messages. To learn more about block senders, see this article.
Mark as Unread
You can mark the ticket message as unread in case you want to work later. A blue vertical bar appears next to the ticket in the ticket list area.
Delete
You can move the ticket to the Recycle Bin if it is irrelevant.
Respond Tickets
You can view and reply to tickets in the reply area of the Agent Console. You can see the ticket history simply by scrolling up. You can reply by using the text input area at the bottom of the ticket view. If you respond via email, you can click the icon to expand the text input area and access options to edit formatting.
It is also possible to add notes that the customer won't see and tag other colleagues using the @ key to send them a notification about a ticket that will show in their @mentioned filter.
If your customer has several different contact details for different channels listed on their Contact record, you can choose which channel to reply with by selecting it from the drop-down list. Once you're done, click Send. In addition, if you have several different means of replying, for example, three email addresses, you can reply from the default email that the visitor contacted or if you needed to reply with another email, you could choose that from the drop-down list to the top-right of the reply box.
Once you have replied to the customer, you can click Resolve to close the ticket.
Create an Internal Ticket
You can create internal tasks as tickets in Agent Console and assign them to other agents in your team. Canned Messages can be used in Internal Tickets. You can also define the priority and apply ticket tags to locate and review them later.
To learn more about creating an internal ticket, see this article.
Tag Messages
If you handle many inquiries in your Comm100 Agent Console, you may want to further organize them by assigning keywords or tags. You can attach one or more customized keywords or phrases to each message, making it easier to group them and review them later.
To learn more about adding tags to messages, see this article.
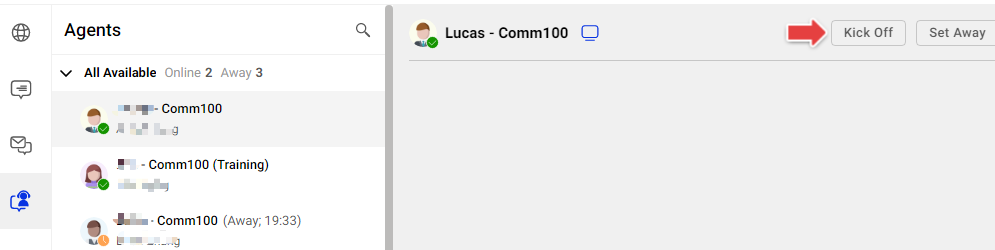
Kicking off an agent immediately ends their active chats and logs them out of the Agent Console.
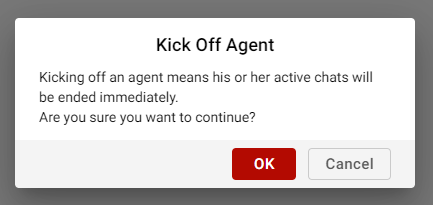
Setting an agent’s status to Away changes their availability status while keeping them logged in to the Agent Console. Any ongoing chats assigned to the agent will continue normally.