Views help you organize customer tickets based on predefined conditions, making it easier to track and manage them in the Agent Console. When you receive a large volume of tickets each day, locating the ones that require attention can be challenging. Views allow you to categorize tickets according to your own rules and priorities.
For example, you can create a View for unresolved tickets assigned to you, or a View for pending tickets that are awaiting a response.
System Default Views
By default, the system provides the following Views. You can edit or delete these Views based on your requirements.
- All: Displays all tickets from integrated channels in the Comm100 Ticketing & Messaging system.
- My Open: Displays tickets whose Status is not Resolved and Assignee is @Me.
- My Department Open: Displays tickets whose Status is not Resolved and Department Assignee is @My department.
- Unassigned: Displays tickets that meet all of the following conditions:
- Status is not Resolved
- Assignee is Unassigned
- Department Assignee is Unassigned
- All Open: Displays all tickets whose Status is not Resolved.
- @mentioned: Displays tickets whose @Mentioned Agent is @Me.
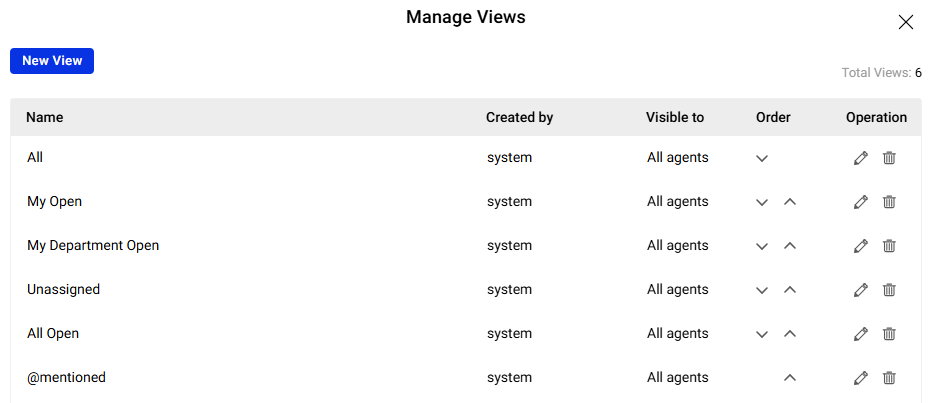
View Management Operations
Comm100 Ticketing & Messaging allows each agent to manage their own Views to suit individual workflows. You can create, reorder, edit, or delete Views as needed.
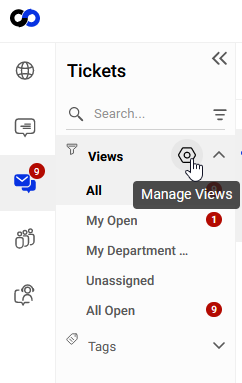
Click Manage Views to open the management panel, where you can perform the following operations.
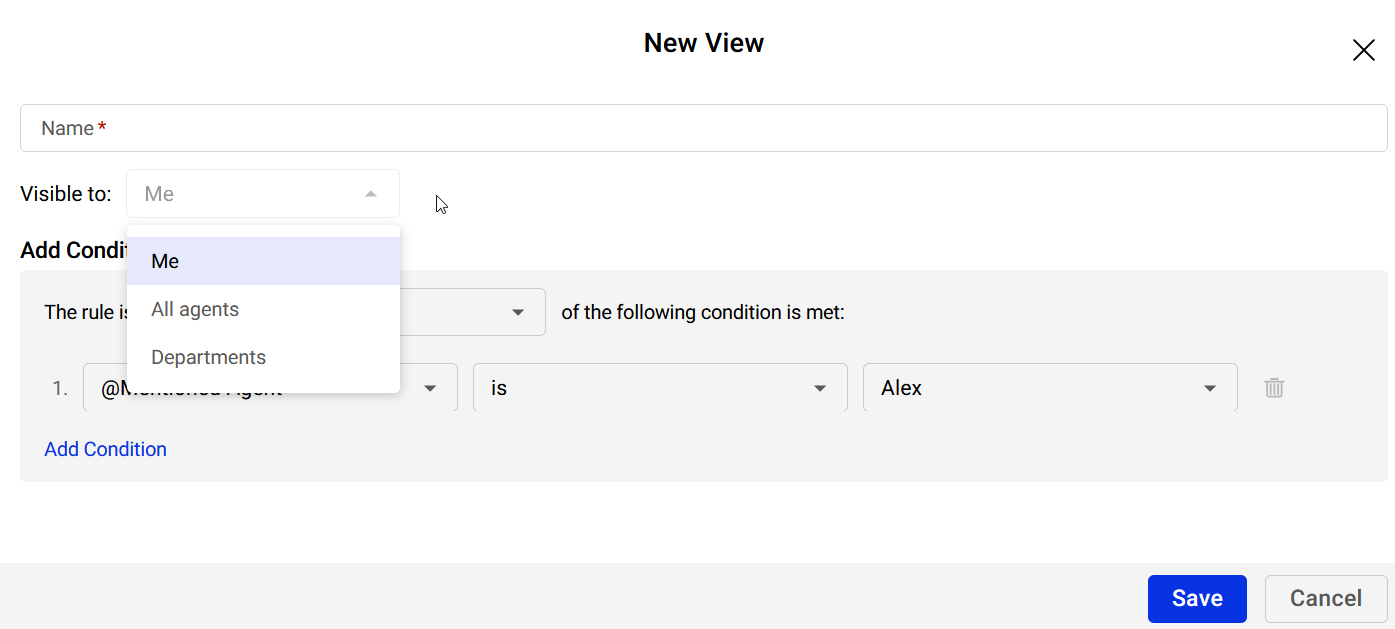
- Create a New View:
Define the View name, visibility, and rules for the new View. To create a View, click New View and complete the View settings. - Sort Views:
Adjust the order in which Views appear in the Agent Console. Select a View and click the Move Up or Move Down icons. - Edit Views:
Modify an existing View’s name, visibility, or rules. Click the Edit icon next to the View you want to update. - Delete Views:
Remove Views that are no longer needed by clicking the Delete icon.

Typical View Use Cases
Below are some common use cases and example condition settings. You can use these conditions individually or combine them to meet your specific needs.
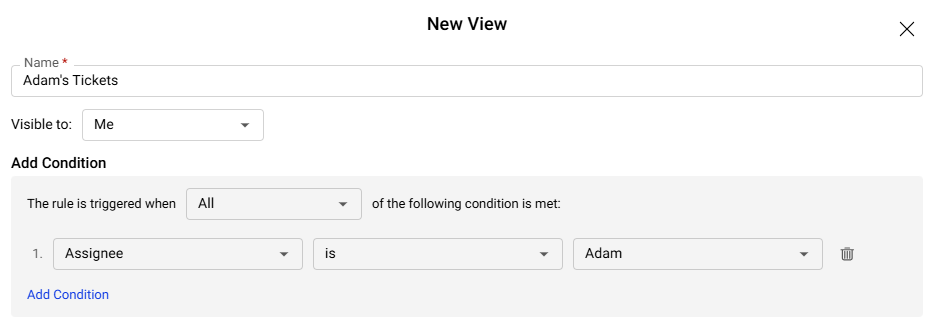
- Tickets Assigned to a Specific Agent
If an agent is out of the office and you need to monitor or manage their tickets, you can create a View that includes all tickets assigned to that agent.
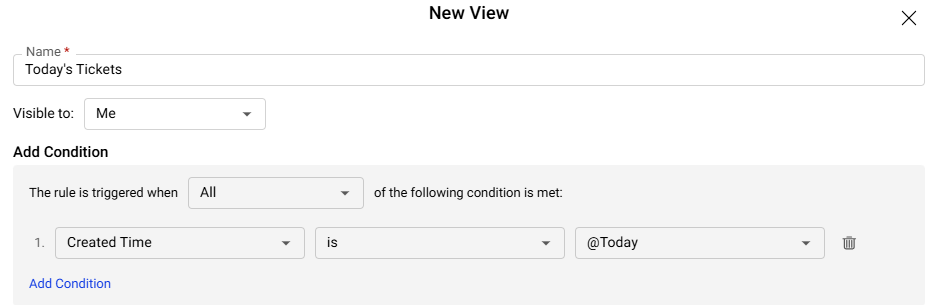
Sample Condition: Assignee is {agent name}. - Tickets Created Today
If you want to view all tickets created on the current day, you can filter tickets by creation time.
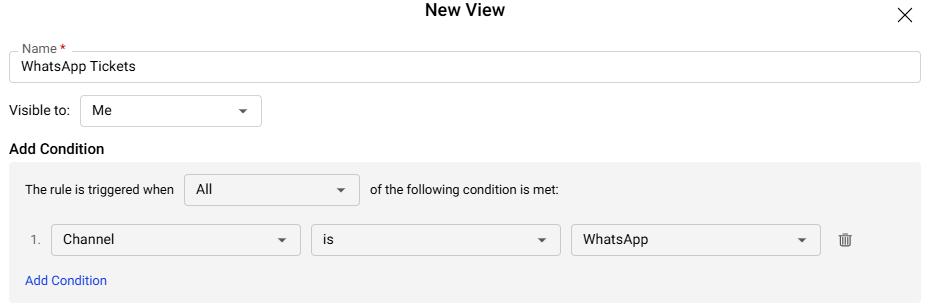
Sample Condition: Created Time is @Today. - Tickets Created from a Social Channel
If you want to track tickets from a specific social channel, such as Facebook or WhatsApp, you can create a channel-based View.
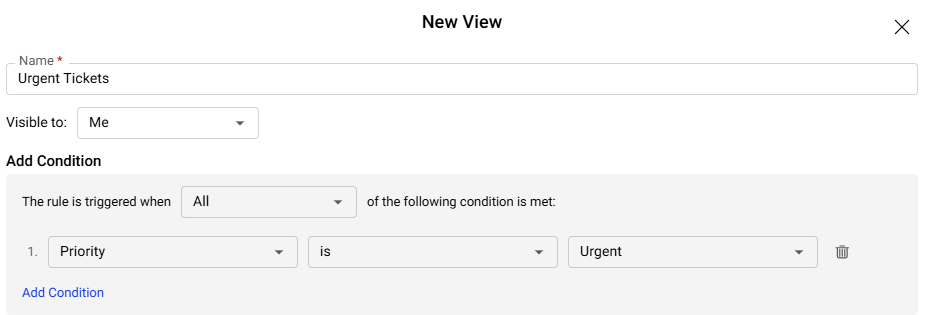
Sample Condition: Channel is WhatsApp. To learn more about creating Views for different channels, see this article. - Tickets with Urgent Priority
If you need to quickly identify high-priority issues, you can create a View for urgent tickets.
Sample Condition: Priority is Urgent.