When an agent leaves your organization or changes roles, you may need to remove their account from Comm100. Before deleting an agent, it is important to follow several best practices to ensure that ongoing customer communications, historical records, and reporting data remain intact.
This article outlines recommended steps to safely remove an agent without disrupting your support operations.
The Impact of Deleting Agents
Deleting an agent affects the data displayed in the Comm100 system, and an agent’s access on your integrated platform in some cases. Please be aware of the impact before making the decision.
Impact on History Chats
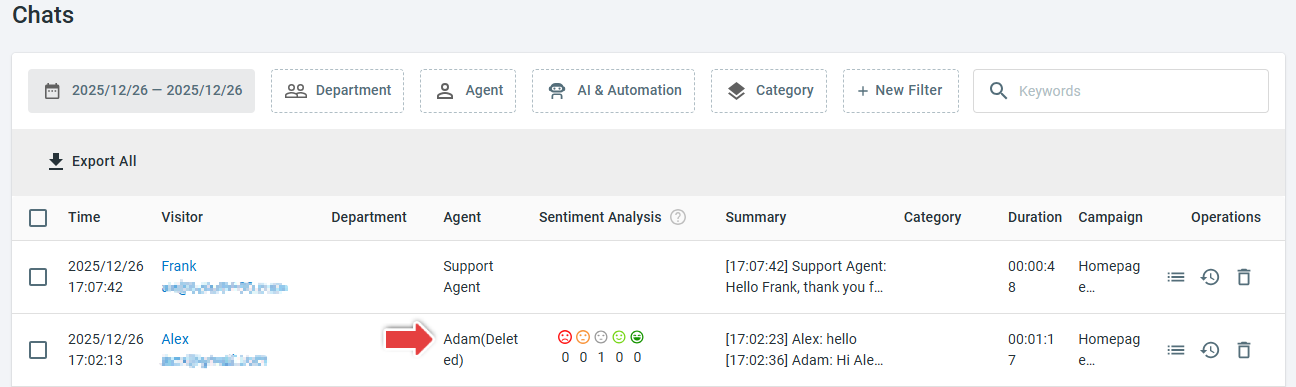
Chats handled by the deleted agent remain stored in the system and can still be viewed in chat history. However, once the agent is deleted, you will no longer be able to filter chat history or reports by that agent. If agent-specific chat data is required for future reference or analysis, we recommend exporting the data before deleting the agent.
You can find the deleted agent’s history chats from Live Chat > History > Chats, with the agent marked as deleted.
Impact on History Tickets
Tickets previously handled by the deleted agent are retained in the system and remain accessible. However, the deleted agent will no longer appear as an option for filtering or reporting. To preserve agent-level ticket data for auditing or analysis purposes, make sure to export the relevant information before deletion.
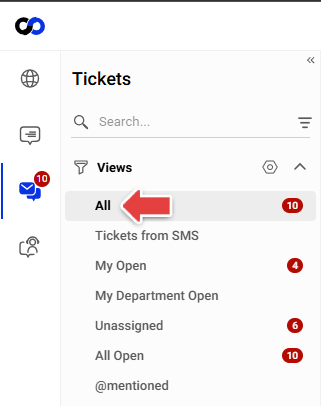
On the Agent Console, all the tickets appear in the default All View. If you delete the default All view, you need to make sure there is a View that includes the tickets assigned to the deleted agent; otherwise, you will be unable to track the history tickets.
To learn more about the Views in the Ticketing & Messaging, see this article.
Impact on Reporting Statistics
Comm100 provides various reports covering aspects of chat volume, agent performance, and visitor satisfaction. You can view live chat and ticket reports from multiple perspectives, such as by time, by department, by campaign, and by agent.
For reports that show overall chat statistics based on the site, deleting an agent does not change the total numbers. For example, in the Real Time report, the total number of chats remains unchanged after the agent is deleted.
However, similar to the case of history chats, the agent will disappear from the Control Panel after deletion. As a result, you will no longer be able to view that agent’s historical data separately. In some cases, you may notice that the sum of chats handled by each agent does not equal the total chat count.

For reports that measure agent performance, which are calculated based on existing agents, deleting an agent will directly affect the numbers. For example, in the Workload report, totals, averages, and percentages are calculated based only on current agents. Historical chats handled by deleted agents are not included in these calculations.

Impact on Mapped Cisco Agents
If you are using Comm100 Live Chat with Cisco Finesse, and the agent you want to delete is mapped to a Cisco agent, deleting the Comm100 agent will break the mapping relationship, and the previously mapped Cisco agent will be denied access to Comm100 Agent Console. To learn more about mapped Cisco agents, see this article.
Actions to Take Before Deleting Agents
Before performing the delete action, you must ensure that the agent will no longer be involved in your service system. This helps prevent interruptions to your workflows and ensures that customer requests continue to be handled properly. To prepare for deleting an agent, you should reassign any ongoing tickets currently assigned to the agent, update routing rules so future chat requests and tickets are assigned to other team members, and review system settings and configurations that may reference the agent.
Reassign the Agent's Tickets
Reassign the agent’s tickets that have not been resolved to ensure effective follow-ups.
Follow these steps to reassign the agent’s ongoing tickets:
- Log in to Comm100 Agent Console.
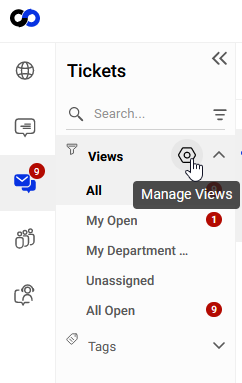
- In the Ticketing & Messaging tab, click Manage Views.
- Click New View in the Manage Views window.
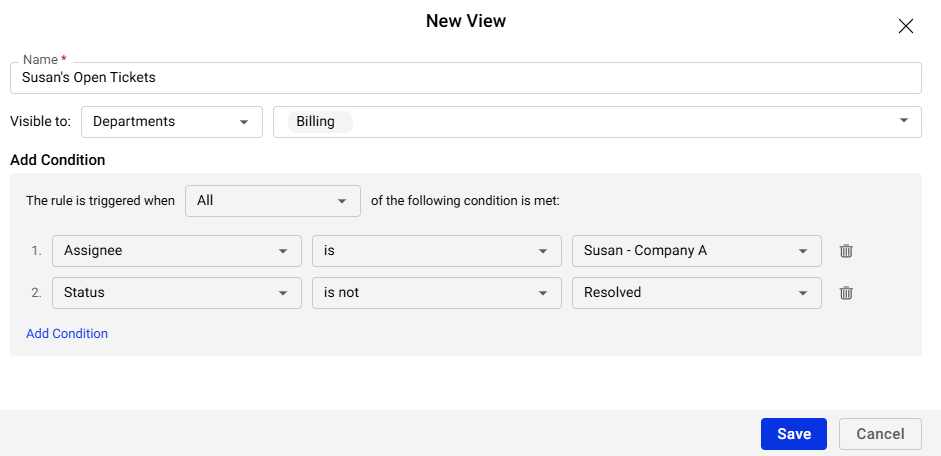
- Create a View for the unresolved tickets assigned to the agent using Assignee and Status as the conditions. The following shows an example.
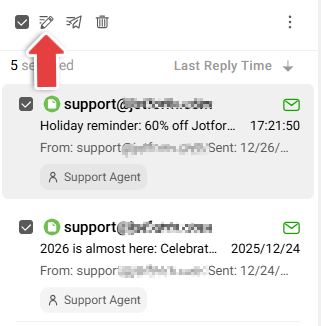
- Select all the tickets in the View, and click the Edit button.
- Select another agent in the Agent Assignee dropdown list.
- Click OK. The agent’s unresolved tickets are now reassigned successfully.
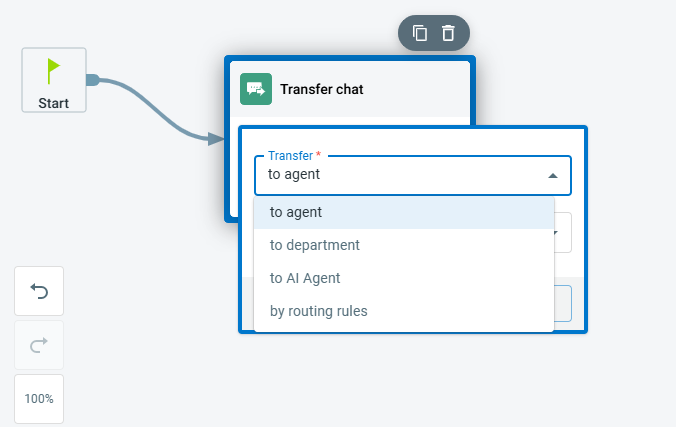
Change Routing Rules
Update routing rules that reference the agent to ensure that new chats and tickets are assigned to other agents. If routing rules continue to reference a deleted agent, incoming requests may not be handled properly.
Follow the steps to change routing rules:
- Log in to Comm100 Control Panel.Note: You need to use an account with the permission to manage agents. Admin account is recommended. To learn how to manage agent permissions, see this article.
- From the left navigation menu, go to the corresponding menu based on your needs.
- To reassign an agent’s chats, go to Live Chat > Campaign > Routing Rules. If you are using multiple campaigns, make sure to choose the correct campaign from the drop-down list.
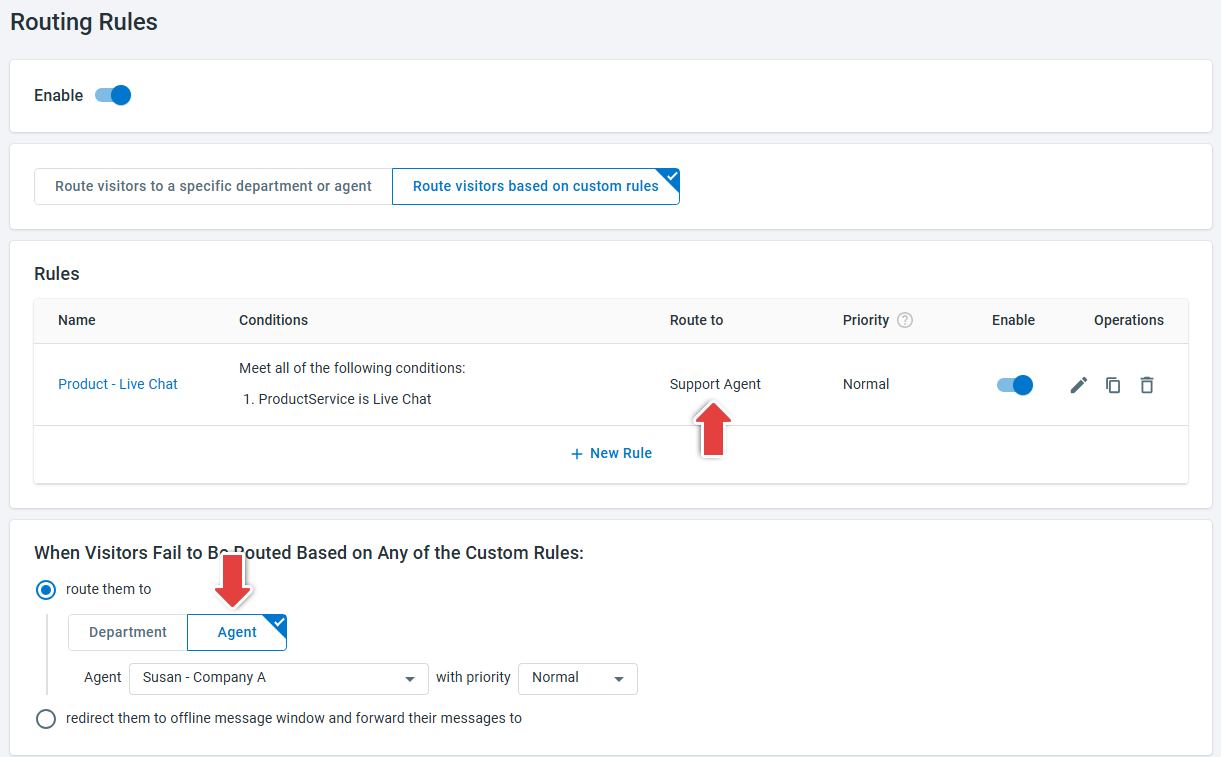
- To reassign an agent’s tickets, go to Ticketing & Messaging > Settings > Routing Rules.
- In the Routing Rules list, locate the custom rule that routes chats or tickets to the agent you want to delete. If you don't have any custom rules, check the Route Visitors to section if the agent is bound there.
- Click the edit button in the Operations column.
- In the Edit Rule drawer, select another agent from the drop-down list and click OK.
- In the When Visitors Fail to Be Routed Based on Any of the Custom Rules section, make sure the chats are not being routed to the agent to delete.
The routing rules are now changed successfully.


Check Settings in Related Modules
Apart from reassigning the agents’ chats and tickets, you also need to check other settings which may involve the agent, and make necessary modifications before deleting agents.
- Live Chat Shift Arrangement
Check agent schedules in Live Chat > Settings > Shifts. Make sure your team will stay organized to serve your customers after removing the agent. - Segmentation Settings
In Live Chat > Settings > Segmentation, check if the agent is being notified for a visitor segment and make necessary modifications. - Trigger Actions
In Ticketing & Messaging > Settings > Triggers, check that the agent is not involved in the Action settings of a Trigger. - SLA Policy Conditions
In Ticketing & Messaging > Settings > SLA Policies, check that the agent is not used as a condition of an SLA policy. Deleting an agent used in an SLA condition may cause the policy to become invalid. - AI Agent and Task Bot Actions
If you are using AI & Automation solution, you also need to check its action settings. On the Control Panel, check the settings of AI Agent and Task Bot, make sure that the agent is not involved in any actions. If the agent belongs to a specific department, make sure the department has other active members. - Notifications and Reports
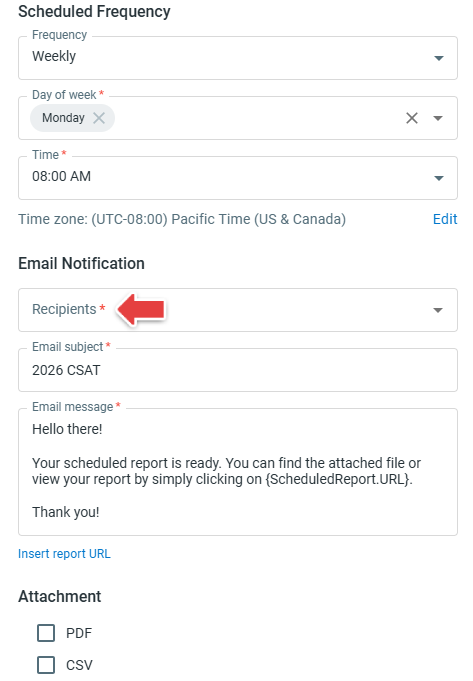
Check whether the agent is configured to receive email notifications, reports, or alerts, and update these settings to ensure messages are redirected to the appropriate team members. For example, verify settings where the agent may receive chat transcript emails, custom report deliveries, or other system notifications. Update the recipient addresses as needed to prevent important communications from being missed after the agent is deleted.
The screenshot below shows an example configuration for receiving a custom report.