In Ticketing & Messaging, triggers allow you to automatically update your tickets or send follow-up messages based on predefined conditions.
A trigger includes the following configurations:
- Event
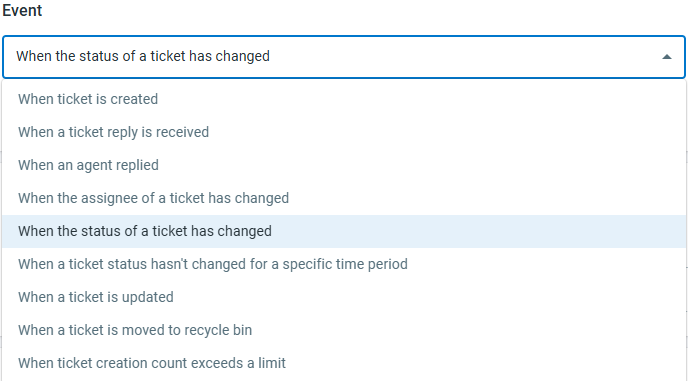
An event defines when the trigger should run. Comm100 allows you to configure triggers for the following events:- When a ticket is created
- When a ticket reply is received
- When an agent replied
- When the assignee of a ticket has changed
- When the status of a ticket has changed
- When a ticket status hasn't changed for a specific time period
- When a ticket is updated
- When a ticket is moved to recycle bin
- When ticket creation count exceeds a limit
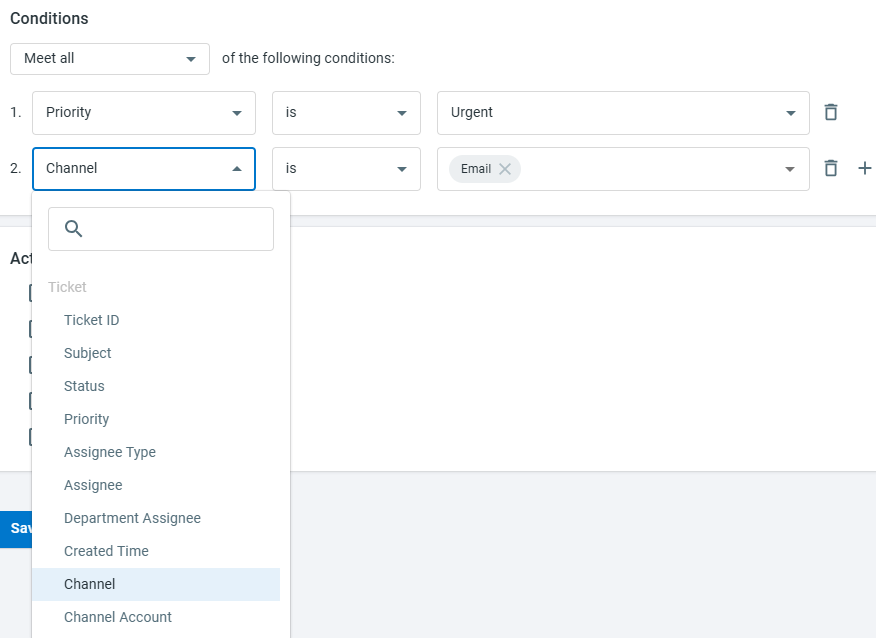
- Conditions
Conditions determine whether the trigger should execute. You can use Ticket fields and Contact fields as conditions for the trigger to be fired. - Action
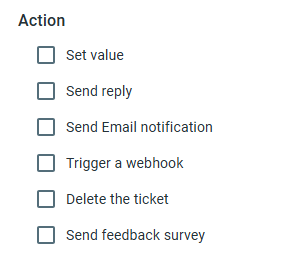
Actions define what should happen when the conditions are met. Comm100 supports the following trigger actions. See Trigger actions for more details.- Set value - Change ticket properties such as subject, priority, status, assignee, tags, and more.
- Send reply - Send an automatic reply to the ticket contact across Ticketing & Messaging channels such as SMS, email, WhatsApp, and Telegram.
- Send email notifications - Send email notifications to ticket contacts, the ticket assignee, specific agents, or defined email addresses.
Trigger a webhook – Send ticket information to a third-party system via webhook.
Delete the ticket – Automatically delete tickets that match the trigger conditions. This is commonly used to filter out spam or unwanted emails.
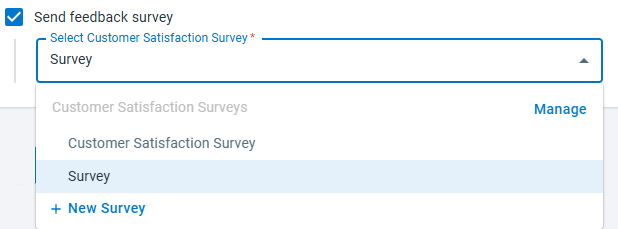
Send feedback survey – Automatically send a customer feedback survey after a ticket is resolved or updated.
This article introduces how to create and configure triggers in Ticketing & Messaging.
Step-by-Step Instructions
To set up a trigger, follow these steps:
- Log in to the Comm100 Control Panel.
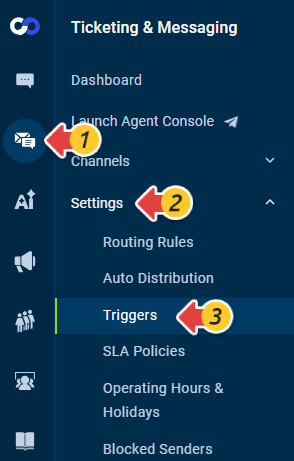
- From the left navigation menu, go to Ticketing & Messaging > Settings > Triggers.
- Click New Trigger.
- On the New Trigger page,
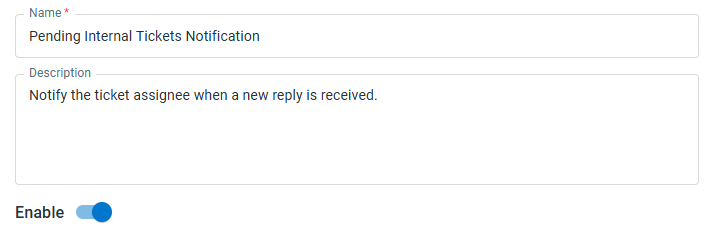
- Enter a Name for the trigger
- (Optional) Add a Description explaining the purpose of the trigger.
- Turn on the Enable toggle if you want the trigger to take effect immediately.
- Select the Event that will activate the trigger.
- Add conditions for ticket. When these conditions are met, the actions configured in the next step will be executed. You can add multiple conditions by clicking the plus icon.
- Configure the Action that should occur when the conditions are met.
- Click Save.
You have successfully created a trigger. You can set up multiple triggers with different conditions and manage them by enabling, disabling, editing, copying, or deleting them as needed.
Trigger actions define the operations that are executed automatically when a trigger runs. Actions may include updating ticket fields, sending replies, notifying agents, or integrating with external systems.
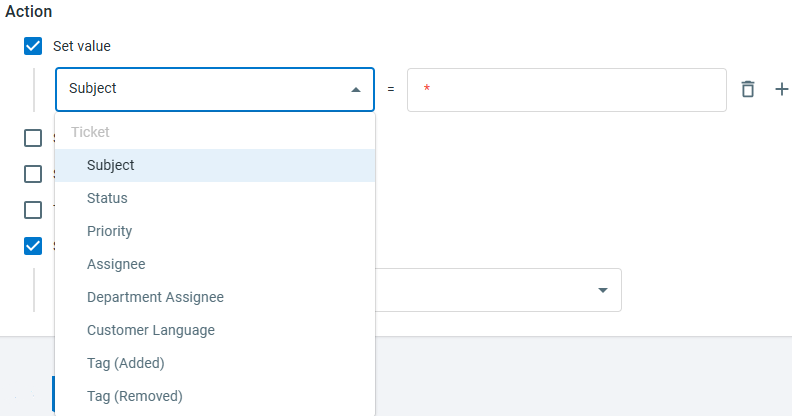
Set Value
The Set Value action allows you to update the ticket priority, assignee, status, and even add or remove a tag. To change these values, select the desired ticket field and choose the corresponding value from the drop-down list.
Send reply
The Send Reply action automatically sends a message to the ticket contact. You can send the reply message to contacts across all channels, including email, SMS and messaging platforms like WhatsApp and Telegram. The message supports plain text and can include dynamic information fields.

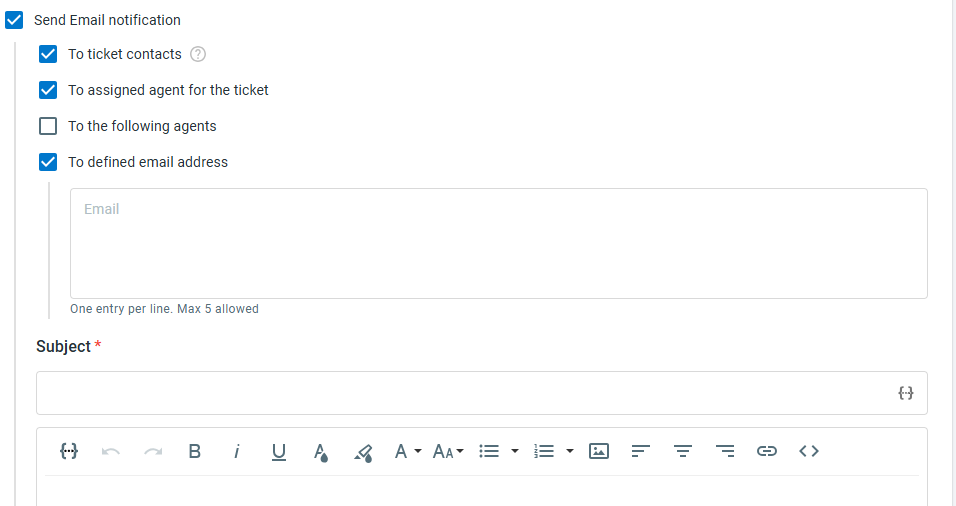
Send Email Notification
This action sends an email notification when the trigger is activated. Notifications can be sent to ticket contacts, ticket assignee, specific agents or defined email address. You can define the email subject and email body using HTML or plain text, and dynamic information fields are also supported.
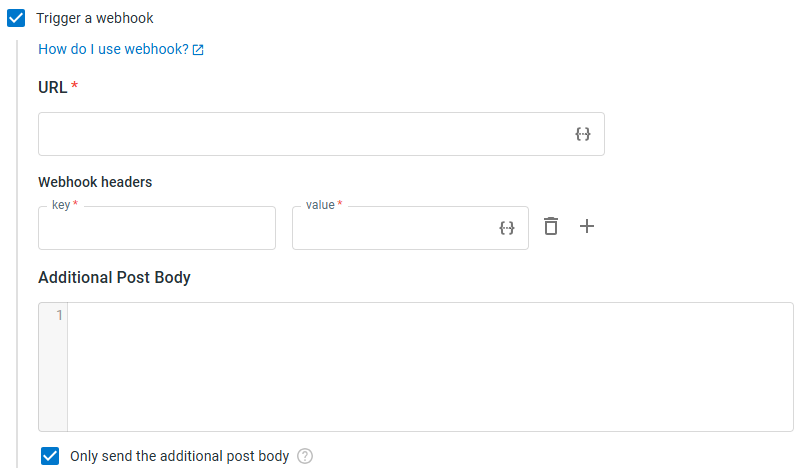
Trigger a Webhook
The Trigger a Webhook action sends real-time ticket data to a third-party system when the trigger runs. Comm100 provides predefined data for each trigger event. You can also include additional information or exclude predefined fields. To learn more about webhooks in Ticketing & Messaging, see this article.
To configure a webhook, complete the following configurations:
- Enter the URL where the event data should be sent. It is a mandatory field.
- In the Webhook headers section:
- Click +New Webhook Header.
- Provide the Key and Value for Webhook header.Note: Empty Key and Value is not allowed for the Webhook headers.
- In the Additional Post Body section, enter the additional webhook body JSON if needed. You can use the dynamic info fields to construct the JSON body.
- (Optional) Select Only send the additional post body if you want to send only the custom JSON body instead of the default data.
Once configured, the external system will receive a callback whenever the selected event occurs.
Delete the Ticket
You can delete the ticket when the event "When ticket is created" or "When a ticket reply is received" occurs. For example, you can configure conditions to identify spam or unwanted emails and automatically delete them to save agents’ time.
Send Feeedback Survey
You can automatically send a customer satisfaction survey after a ticket is resolved or updated. This allows you to collect feedback directly from customers. To learn how to set up the survey, see this article.