
When configuring a Topic or Event, you can use the Condition action in a By Workflow response to direct the AI Agent to different actions based on predefined rules. Conditions can evaluate conversation data, Variables, visitor or ticket information, Custom Variables, Pre-chat fields, and system-level information.
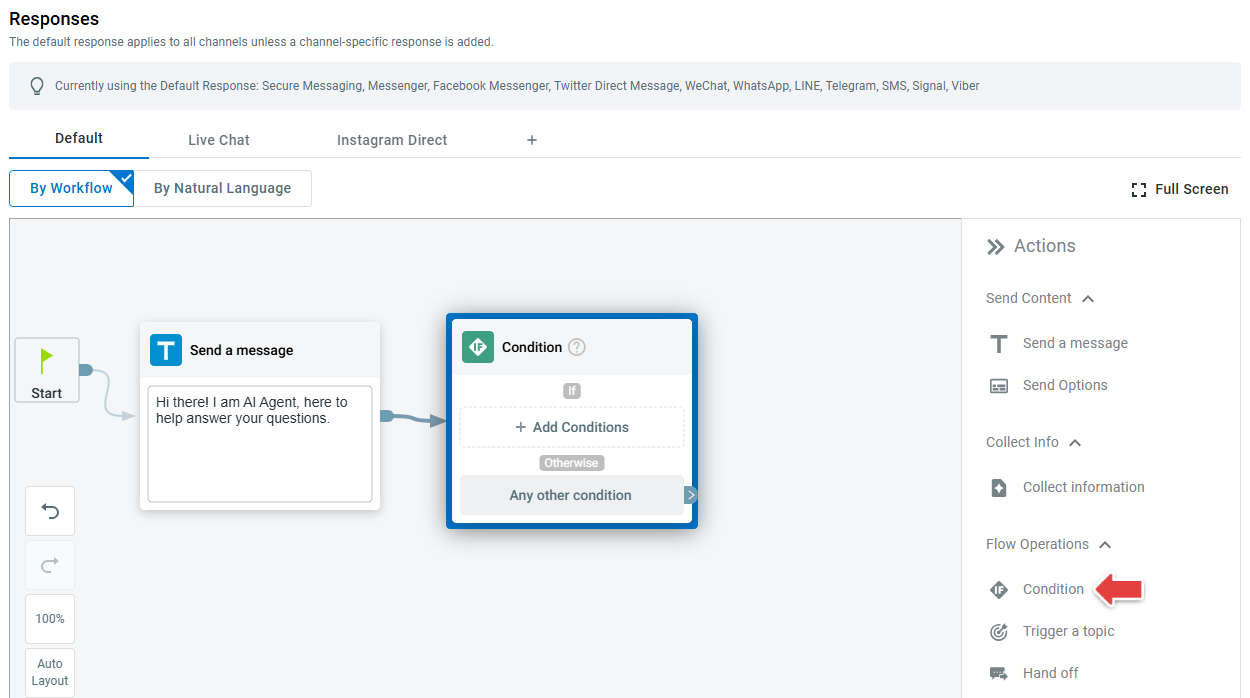
You can create conditions using the following types of fields:
- AI Agent: Information dynamically captured by the AI Agent during the current conversation, such as visitor messages and triggered Topics.
- Variable: Data stored in Variables during the current conversation, including information collected through actions such as Collect name, Collect email, and Collect information.
- Visitor: Visitor information available from Live Chat, such as the visitor's IP address and number of visits. This field type is available for Live Chat only.
- CustomVariable: Customer information passed from your own system through Custom Variables. You need to set up Custom Variables before using them in a Condition.
- PreChat: Information collected through Pre-chat fields. This field type is available for Live Chat only.
- Ticket: Ticket and contact information available in Ticketing & Messaging, such as Ticket ID and Contact Name. This field type is available for Ticketing & Messaging channels only.
- Global: System-level information, such as time and agent status.
Note: To learn more about the fields available, see how to set up custom variables, visitor information fields, how to add fields in the pre-chat survey.
Step-by-Step Instructions
To set up the Condition action, follow these steps:
- Log in to your Comm100 Control Panel.
- From the left navigation menu, go to AI & Automation > AI Agent > Topics. If you have multiple AI Agents, make sure to choose the correct one from the drop-down list.
- Open the Topic you want to edit, and scroll down to the Responses section.
- If multiple channels are configured for the AI Agent, select the channel you want to configure. Then select By Workflow.
- Add a Condition action at the point in the response flow where you want to create different branches.
- Click Add Conditions on the Condition card.
- On the New Conditions drawer, set up the rules. You can add multiple rules and select Meet all, Meet any, or Use logic expression to define how the rules are evaluated.
Note: To learn more about how to set up logical expressions, see this article.
- (Optional) To add another condition branch, hover over an existing branch and click the plus icon that appears.
- Add the actions you want the AI Agent to perform after each condition branch and the Otherwise branch.
Condition branches are evaluated from top to bottom:- If more than one branch matches, the AI Agent follows the first matching branch.
- If none of the configured branches match, the AI Agent follows the Otherwise branch.
In the following example, multiple branches direct visitors to different support channels based on the conditions they meet. - Click Save.


