
AI Agent Test Center enables you to validate your AI Agent by creating reusable test cases, executing them in batches, and reviewing the test results. It helps you verify that your AI Agent matches the correct Topics and returns the expected responses, allowing you to test changes consistently and identify issues before deploying them to production.
AI Agent Test Center consists of two sections:
- Test Cases – Create and manage reusable test cases.
- Test Runs – Execute test cases and review test results.
Create a Test Case
- Log in to your Comm100 Control Panel.
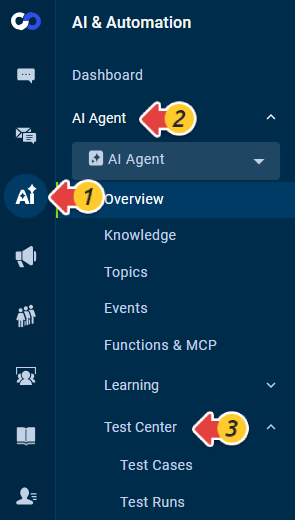
- From the left navigation menu, go to AI & Automation > AI Agent > Test Center.
- Click Test Cases.
- Click Create.
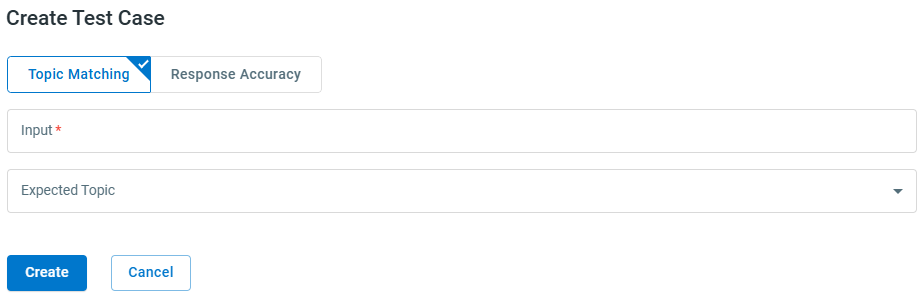
- In the Create Test Case drawer, select one of the following test case types:
- Topic Matching - Enter the Input, then select the Expected Topic that the AI Agent should match. Input is the visitor message or question to test.
- Response Accuracy - Enter the Input and the Expected Response that the AI Agent is expected to return. Input is the visitor message or question to test.
- Click Create.
- Topic Matching verifies whether the AI Agent matches the expected Topic. Use this test type when you want to verify that a request is routed to the correct Topic. It does not evaluate the response content.
- Response Accuracy evaluates whether the AI Agent's response matches the expected response. For Topics that return fixed messages, the expected response is typically the Topic's configured response. For AI-generated or Knowledge Base responses, enter the response you expect the AI Agent to provide.
- Response Accuracy evaluates only the first text response returned by the AI Agent. If a Topic returns multiple text messages, consider using Topic Matching when your goal is to verify that the correct Topic is matched.
- You can create both a Topic Matching test case and a Response Accuracy test case for the same input if you want to verify both the matched Topic and the generated response.
You can also search, filter, import, and export test cases for easier management.

Create a Test Run
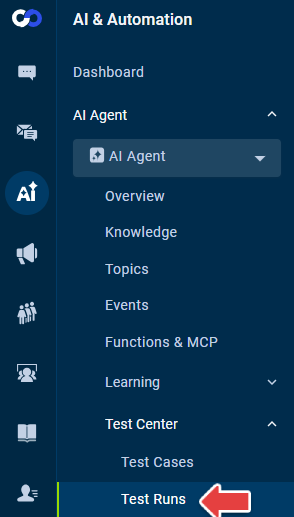
- Click Test Runs.
- Click New Test Run.
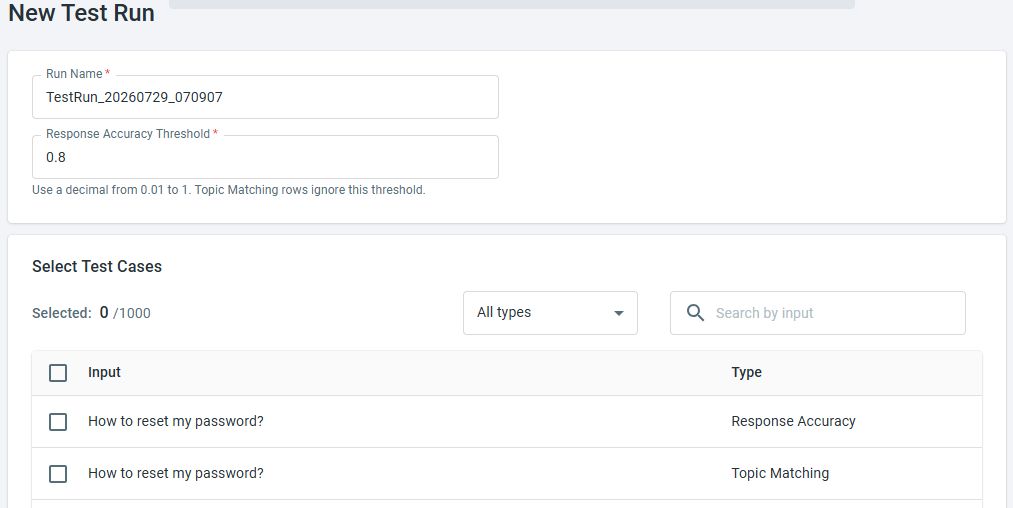
- In the New Test Run page, configure the following settings:
- Run Name: Enter a name for the test run.
- Response Accuracy Threshold: Specify the minimum score required for a Response Accuracy test case to pass. Enter a decimal value between 0.01 and 1. This setting does not apply to Topic Matching test cases.
- Select Test Cases: Select one or more test cases to include in the test run. You can filter by test case type or search by input to quickly locate the test cases you want to run.
- Click Run.
After the test run starts, you can monitor its Status, Completed, and Passed values on the Test Runs page. When the status changes to Completed, click Open Results in the Operations column to review the results of each test case.

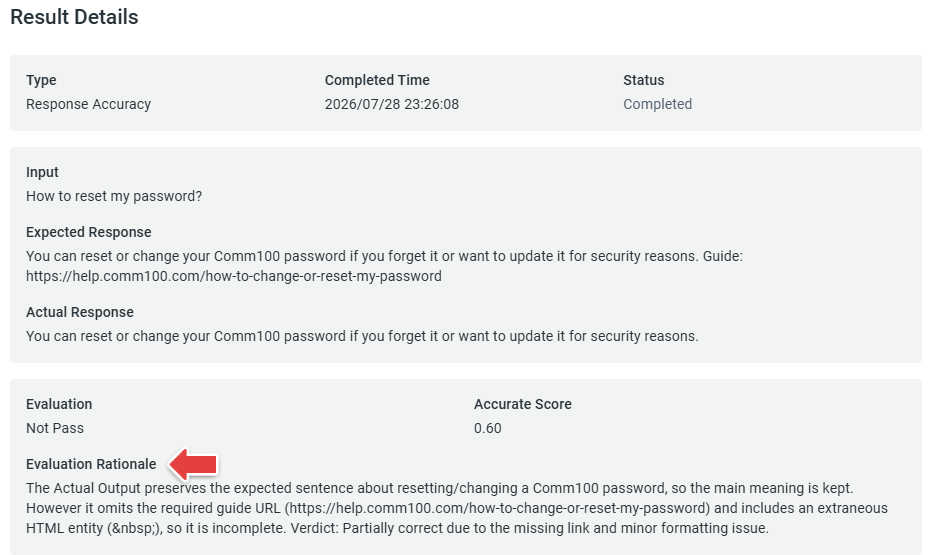
If the Evaluation result is Not Pass, click Details to review the Evaluation Rationale and understand why the test case failed.
After making appropriate changes, such as modifying the expected response or adjusting the response accuracy threshold, you can click New Run from This in the Operations column to create another test run based on the existing configuration.

- Test run results are retained after execution, allowing you to review historical test runs and compare results over time.
- Creating a new test run from an existing one creates a separate test run and does not overwrite the previous results.