A Function is a predefined or dynamic task that the AI Agent can invoke during a conversation. Functions and MCP Servers allow the AI Agent to go beyond its knowledge base by retrieving real-time data, processing complex tasks, interacting with external systems, and executing advanced workflows directly within topic instructions using natural language.
Comm100 supports the following types of integrations and processing methods:
- API Function: Connects to external APIs and web services through REST/HTTP endpoints, allowing the AI Agent to retrieve or send real-time data.
- LLM Function: Uses large language models to process complex tasks and unstructured data, enabling the AI Agent to perform advanced reasoning or data interpretation without relying on external APIs.
- MCP Server: Connects the AI Agent to external tools and live business systems through MCP-compatible servers, allowing it to retrieve real-time data or perform approved actions during a conversation.
With these capabilities, you can build powerful AI-driven workflows that integrate external systems, intelligent processing, and live business tools.
API Function
To set up an API Function, follow these steps:
- Log in to your Comm100 Control Panel.
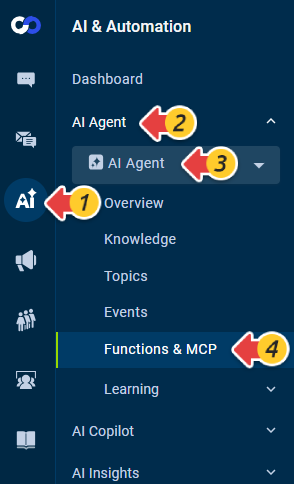
- From the left navigation menu, go to AI & Automation> AI Agent > Functions & MCP. If you have multiple AI Agents, make sure to select the correct one from the drop-down list.
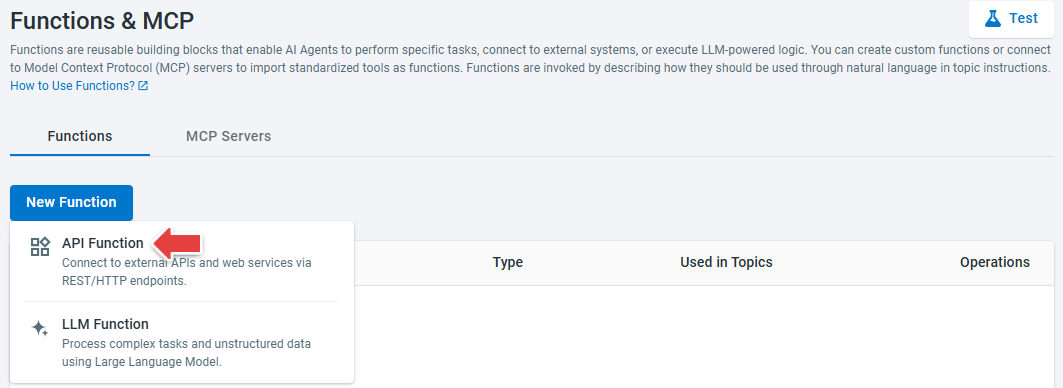
- Click New Function.
- Click API Function.
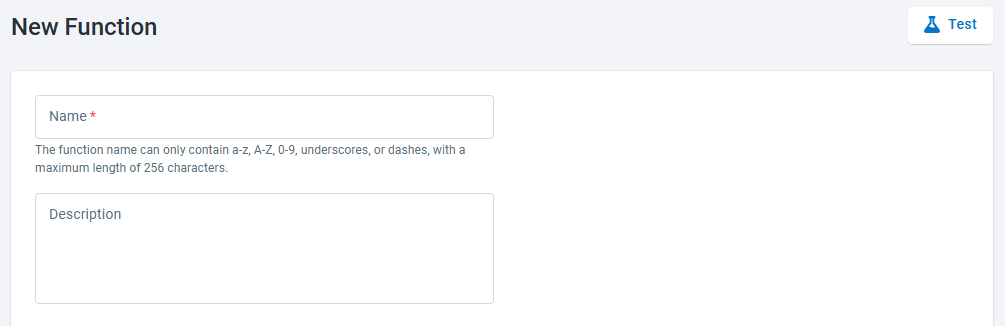
- On the New Function page, input the Function name and description. Provide a meaningful name and description to help the AI Agent understand what the function is used for.
- (Optional) Provide the Input parameters for the Function to process.Note: If an input parameter is set to required, the AI Agent will attempt to extract the value from the conversation. If the AI Agent cannot find it, it will ask the user to provide the value.
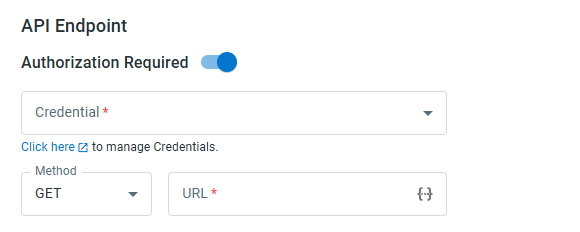
- Configure the API Endpoint settings.
- If the API endpoint requires authentication, turn on the Authorization Required toggle, and choose the credential from the drop-down list.
- Choose the GET or POST method, and input the endpoint URL.
- Provide the HTTP Header and HTTP Body.
- (Optional) Add the output fields. Typically, the AI Agent can interpret the meaning of each JSON field returned by the API endpoint. If the field name cannot convey the field's intended meaning, you can define the output field and provide a description to help the AI Agent understand. You can also store the field value as a variable for later use.
- Click Save.

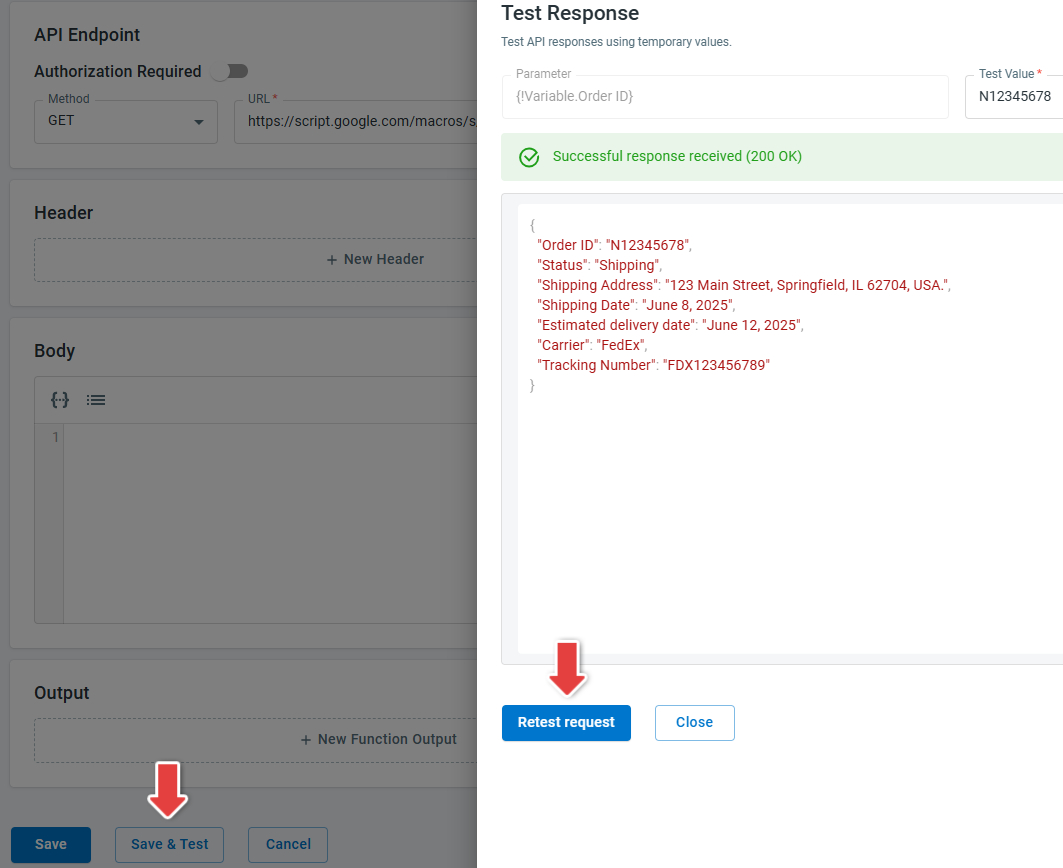
To ensure the Function is properly configured, you can use the Save & Test to verify its functionality during setup. Simply provide test values for any parameters used in the API query, header, or body, then send the request. You’ll immediately see the response, including whether it was successful or not. If you need to adjust any parameter values, you can modify them and rerun the test as needed.
LLM Function
To set up an LLM Function, follow these steps:
- Log in to your Comm100 Control Panel.
- From the left navigation menu, go to AI & Automation> AI Agent > Functions & MCP. If you have multiple AI Agents, make sure to choose the correct one from the drop-down list.
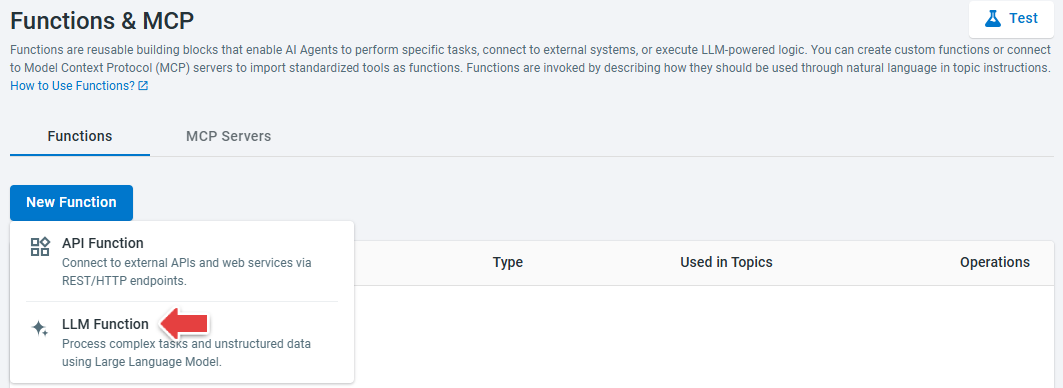
- Click New Function.
- Click LLM Function.
- On the New Function page, input the Function name and description. Provide a meaningful name and description to help the AI Agent understand what the function is used for.
- (Optional) Provide the Input parameters for the Function to process.Note: If an input parameter is set to required, the AI Agent will try to find the input value from the conversation. If the AI Agent cannot find it, it will ask the user to provide the value.
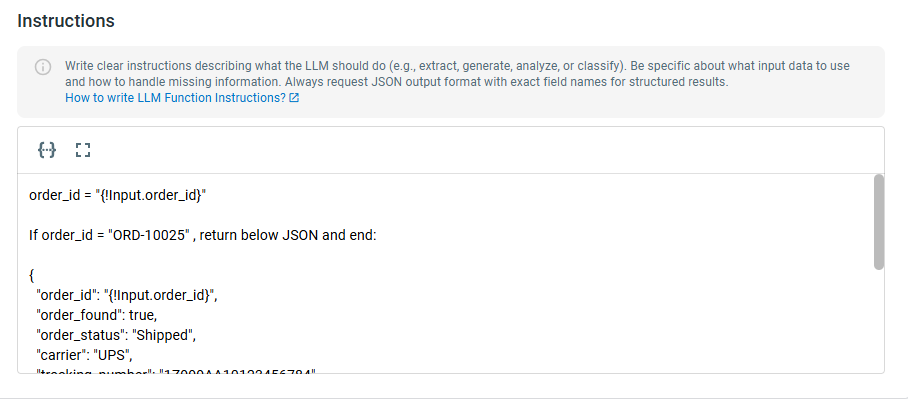
- Provide the Instructions for the Function. These instructions should clearly describe what the LLM should do (for example, extract, generate, analyze, or classify), specify which input data to use, and explain how to handle missing information.
To learn how to write LLM Function Instructions, see this article. - (Optional) Configure Save to Variable. You can extract specific values from the LLM’s JSON response using JSONPath and store them as variables for later use.
- Click Save.

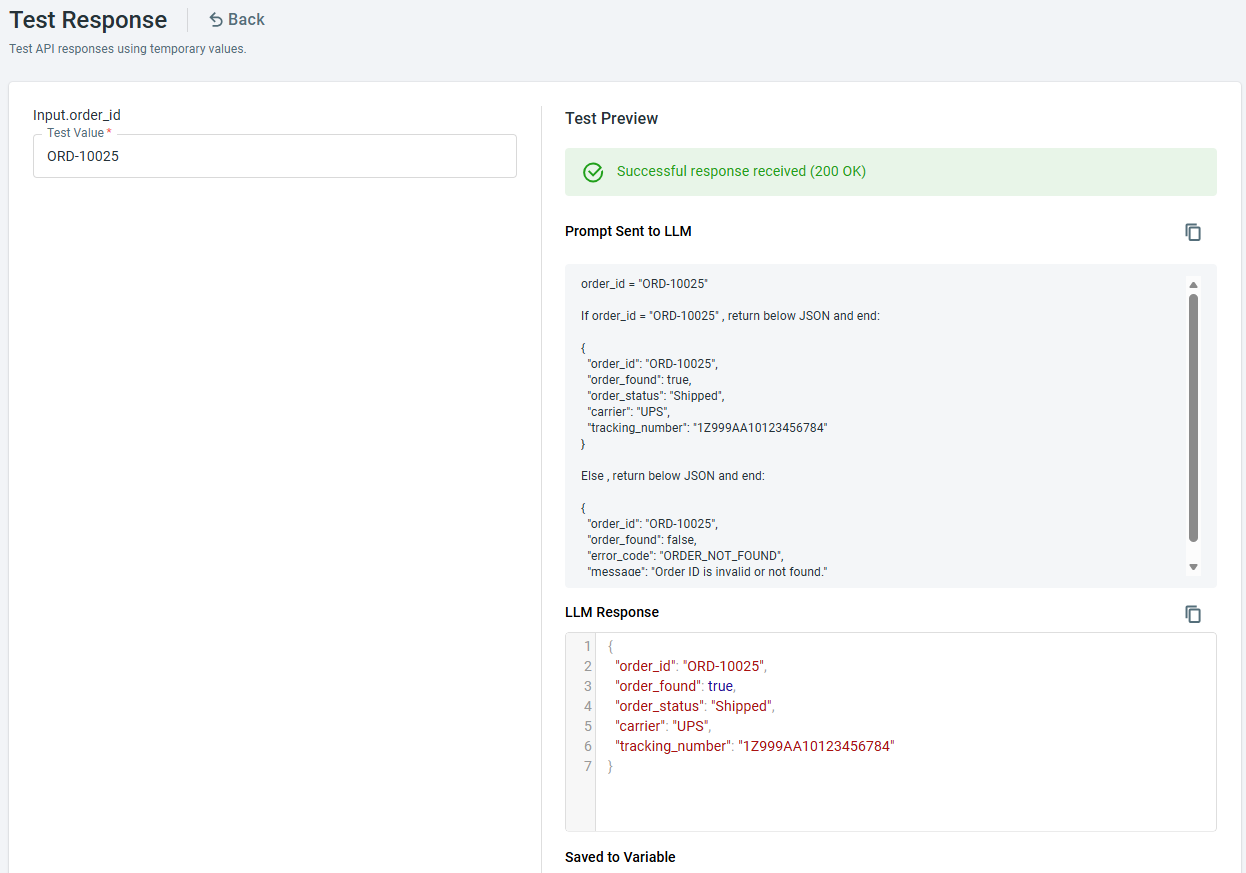
To ensure the Function is properly configured, you can use Save & Test to validate its behavior during setup. Simply provide sample values for the input parameters and run the test to review the response. This allows you to quickly confirm whether the function works as expected and identify any issues. If needed, you can adjust the parameters or instructions and rerun the test until the results are accurate and consistent.
MCP Servers
To set up an MCP server, follow these steps:
- Log in to your Comm100 Control Panel.
- From the left navigation menu, go to AI & Automation> AI Agent > Functions & MCP. If you have multiple AI Agents, make sure to choose the correct one from the drop-down list.
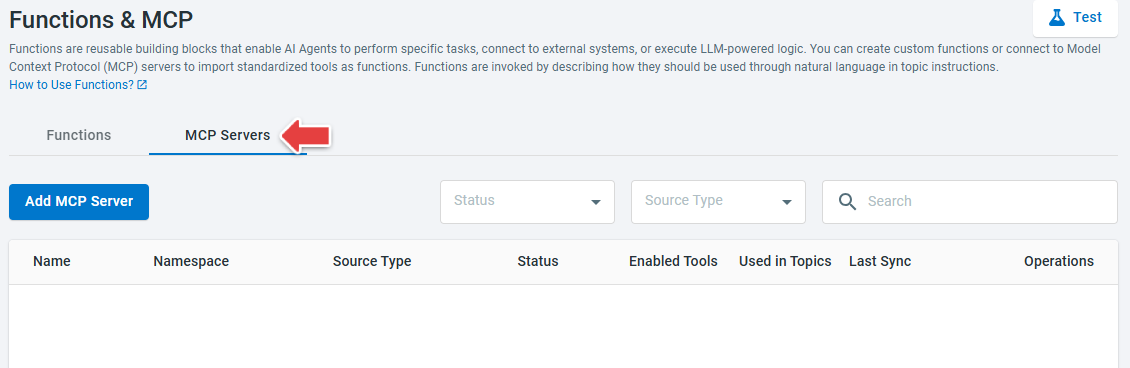
- Click the MCP Servers tab.
- Click Add MCP Server.
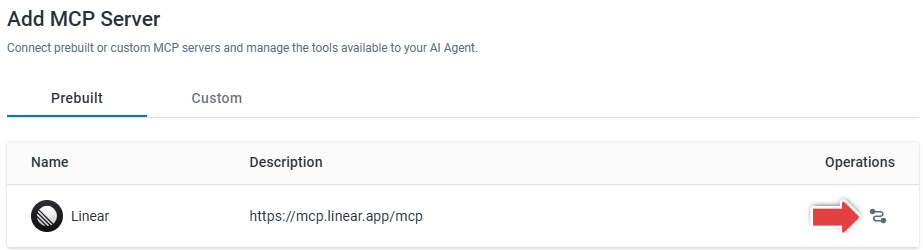
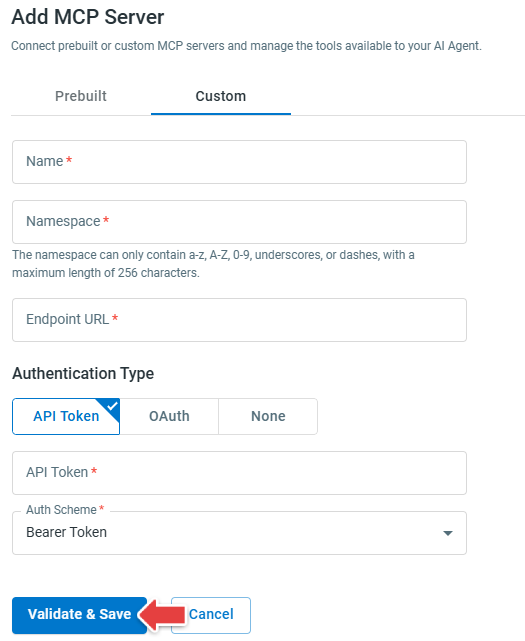
- Configure the server using either a prebuilt integration (such as Linear) or a custom Endpoint URL.
- Complete the setup based on the server type:
- Prebuilt Server: Click Connect under the Operations column and provide the required information.
- Custom Server: Enter the required information, and click Validate & Save.
- Prebuilt Server: Click Connect under the Operations column and provide the required information.