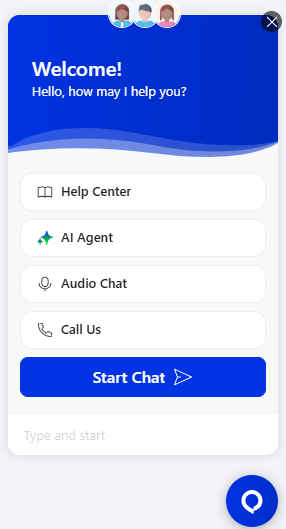
With Comm100 Live Chat, you can automatically invite visitors to chat with you based on predefined rules by using Auto Invitations. In addition to inviting visitors to start a live chat, you can add Shortcuts that provide other engagement options, such as requesting an audio or video chat, starting an AI Agent Topic, opening a webpage or social channel, or making a phone call.
Note: If you are also using Auto Distribution,
be aware of the following circumstances:
- If Auto Distribution is disabled, the auto invitation appears normally.
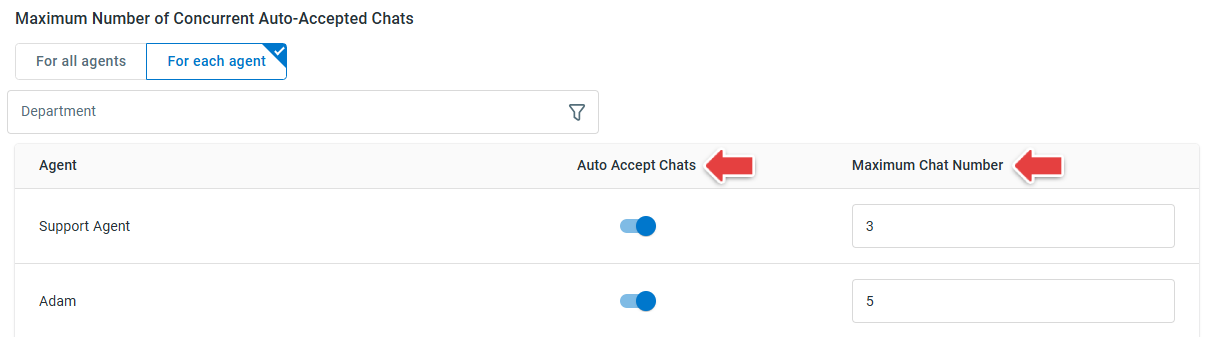
- If Auto Distribution is enabled, then auto invitation can appear only when:
- Auto Accept Chats is enabled for agents,
- The maximum chat number of online agents is greater than 0,
- For online agents, the ongoing chat number has not reached their maximum chat number.
To learn by video, visit our video tutorial: Proactively Invite Visitors to Chat.
Step-by-Step Instructions
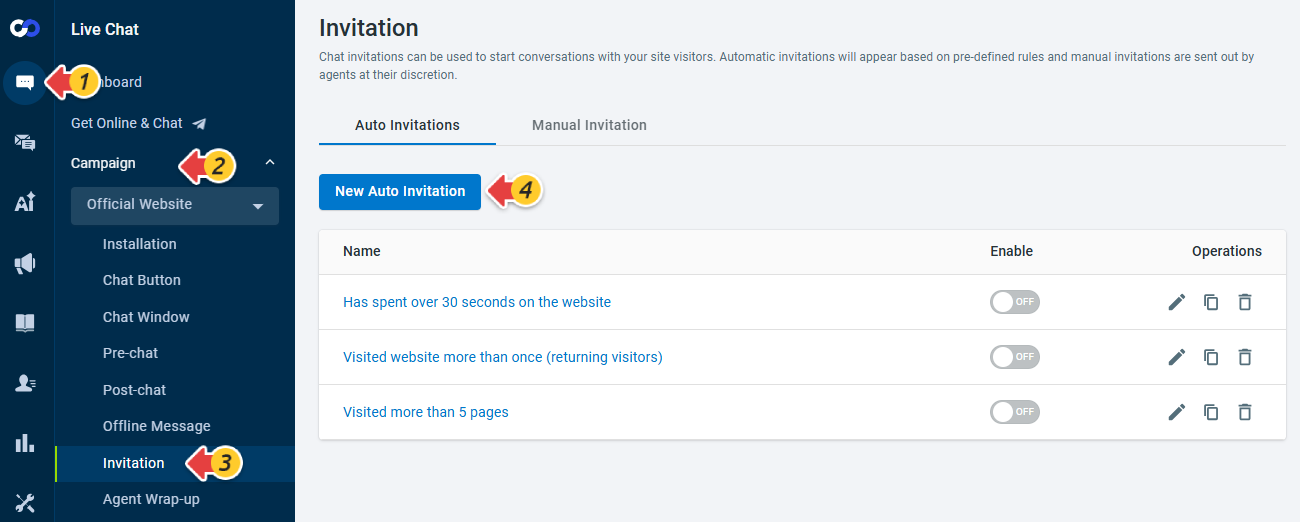
- Log in to your Comm100 Control Panel.
- From the left navigation menu, go to Live Chat > Campaign > Invitation.
- On the Auto Invitations tab, click New Auto Invitation.
- On the New Auto Invitation page, enter a name for the invitation and turn on Enable.
Note: If you are using the Live Chat Startup package, you can only use the predefined invitation rules listed on the page. If you are using the Live Chat Plus or Live Chat Ultra packages, you can define your own advanced rule-based Invitation rules. To learn more about Comm100 product packages, visit here. - Under Invitation Style, select Bubble or Greeting Message.
- Bubble: For the Adaptive Chat Button, the Bubble appears above the Chat Button. For Image or Text Link button types, you can configure where the Bubble appears.
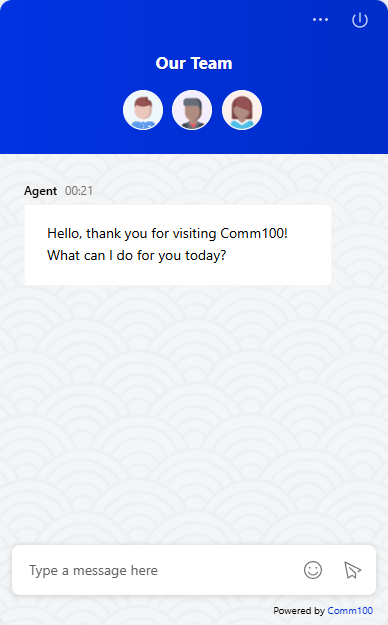
- Greeting Message: Opens the Chat Window automatically when the Auto Invitation is displayed and shows the invitation text and Shortcuts as a greeting message. If the Pre-chat Window is enabled, it is
skipped automatically.
- Bubble: For the Adaptive Chat Button, the Bubble appears above the Chat Button. For Image or Text Link button types, you can configure where the Bubble appears.
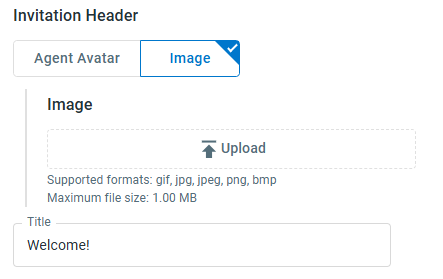
- If you selected Bubble, under Invitation Header, select Agent Avatar or Image. In Title, enter an optional title to display above
the invitation message.
Note: The Title is available only for Bubble invitations. If you switch from Bubble to Greeting Message, the saved Title is retained but not displayed.
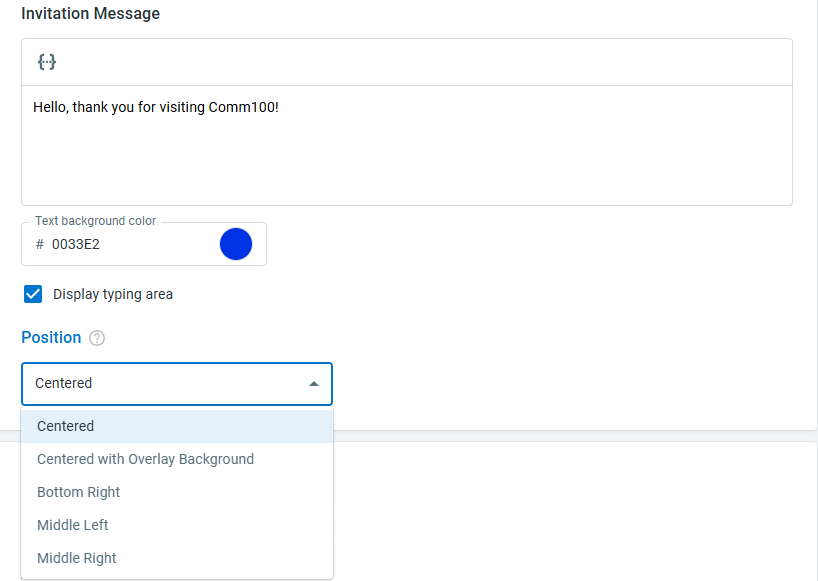
- Enter the Invitation Message and configure the available display options as needed. For Bubble invitations, you can set the Text background color and
select Display typing area if you want visitors to be able to type a message directly in the invitation. If you are using the Image or Text Link chat button, choose the position
where the invitation should appear.
- Under Shortcuts, click Add Shortcut to add visitor-facing actions to the Auto Invitation.
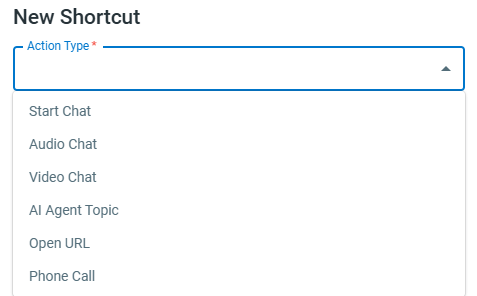
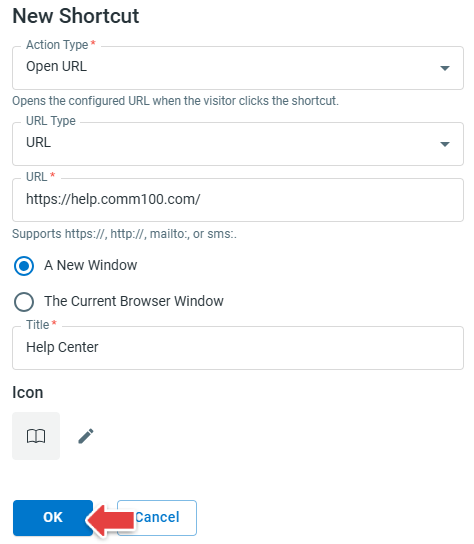
- On the New Shortcut drawer, select an Action Type. For each Shortcut, you can customize its Title and built-in icon. Configure any additional
settings based on the selected action:
- Start Chat: Starts a text chat. No additional settings are required.
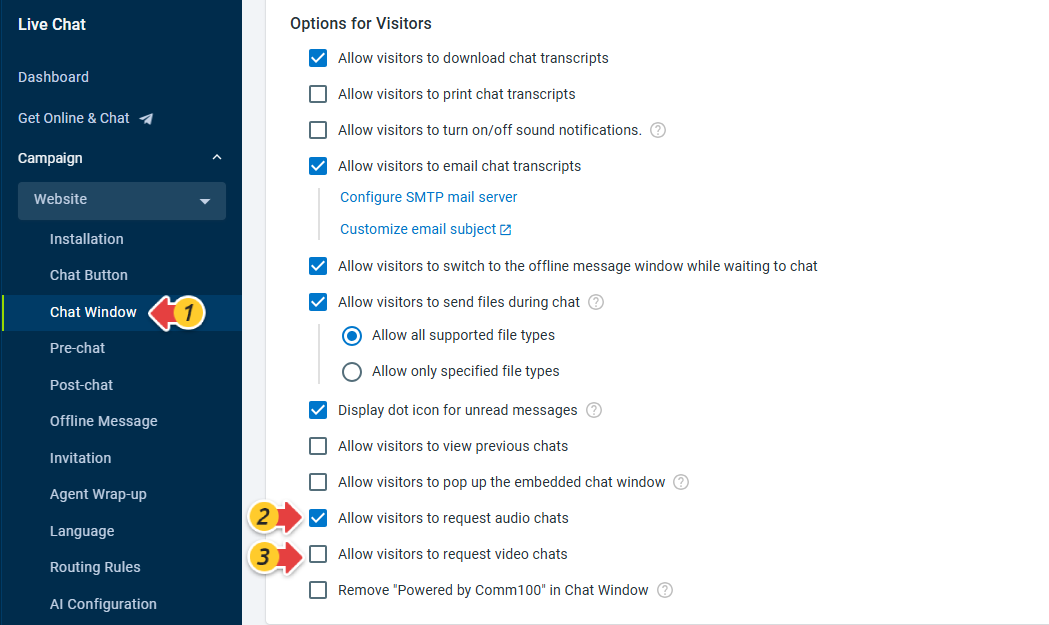
- Audio Chat: Allows the visitor to request an audio chat. The corresponding Audio Chat capability and Campaign visitor-request option must be enabled.
- Video Chat: Allows the visitor to request a video chat. The corresponding Video Chat capability and Campaign visitor-request option must be enabled.
- AI Agent Topic: Starts an AI Agent chat and runs a selected Topic. The Campaign must have an enabled AI Agent.
- Open URL: Opens a webpage or another supported destination. Enter the Target URL using https://, http://, mailto:, or sms:. Common URL prefixes are available for WhatsApp, Telegram, Messenger, Instagram, and X. For http:// and https:// URLs, select whether to open the destination in A New Window or The Current Browser Window.
- Phone Call: Opens the visitor's device dialer. Enter the phone number in Target Phone Number.
- Click OK to add the Shortcut. After adding multiple Shortcuts, arrange them in the order you want them displayed.
Note:
- Bubble invitations support up to five Shortcuts, while Greeting Message invitations support up to six.
- Start Chat, Audio Chat, and Video Chat can each be added only once to an Auto Invitation.
- Multiple AI Agent Topic Shortcuts can be added, but the same Topic cannot be selected more than once.
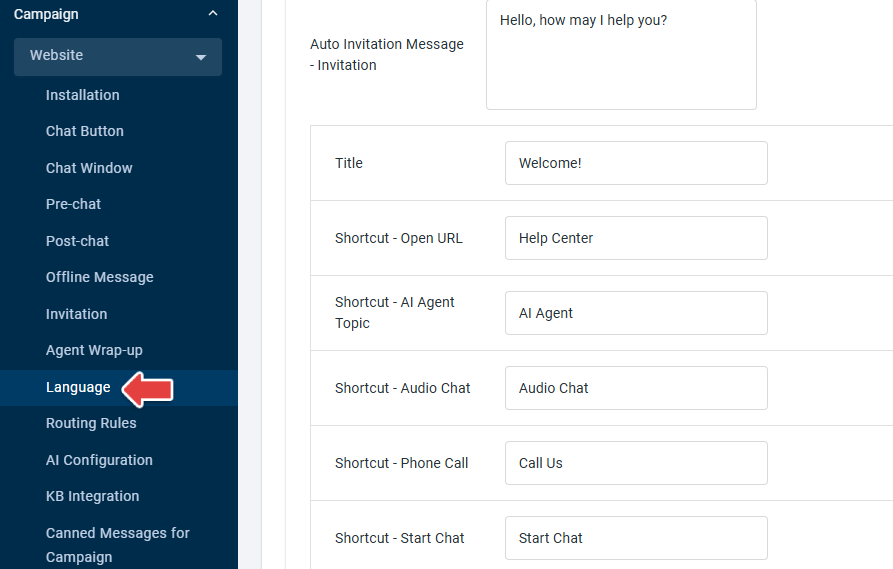
- The Title used for Bubble invitations and Shortcut titles can be translated using the existing Campaign Language settings.
- Existing Auto Invitations continue to work as before if no Shortcuts are configured.
- Define the invitation conditions based on when you want the Auto Invitation to appear.
- Based on your requirements, you can enable the following options:
- Only pop-up once per site visit: With this option selected, your invitation will appear only once during a visitor’s session.
- Hide invitation on mobile: With this option selected, your invitation will not appear on mobile websites.
- Click Save.
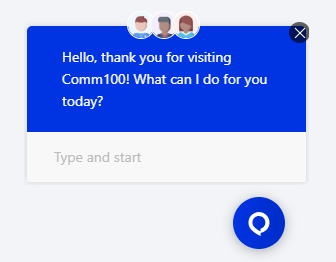

Once saved, the Auto Invitation is displayed when its configured conditions are met. Visitors can then respond through the invitation or select one of the configured Shortcuts to start a chat or access another available engagement option.