Comm100 Agent Console offers personalization at different levels to improve efficiency and extend user experience. You can set up your preference for settings including the theme color, keyboard shortcuts, notification alerts, and so on.
This article introduces the customizations available for the Agent Console.
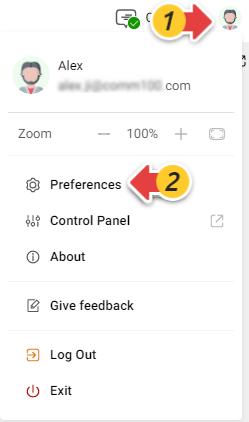
After logging in to the Agent Console, click your avatar in the top right corner, then choose Preferences to open the Preferences popup. In the popup, you can customize your Agent Console at different levels: Global, Live Chat, and Ticketing & Messaging.
Global
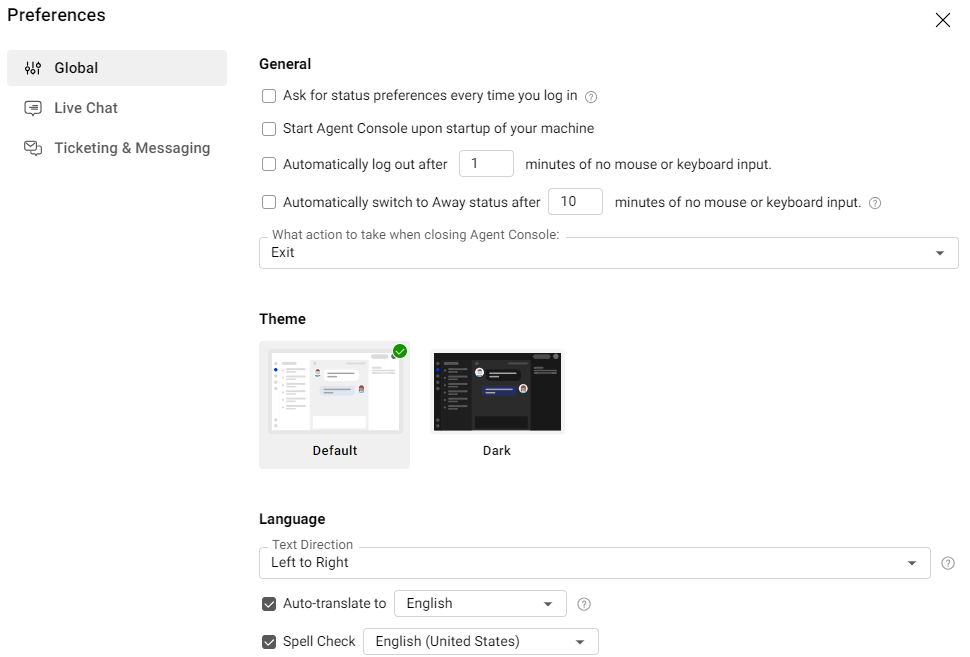
In the Global tab, you can set your preference for general settings concerning aspects such as login and status, theme color, and language settings.
General
- Ask for status preferences every time you log in
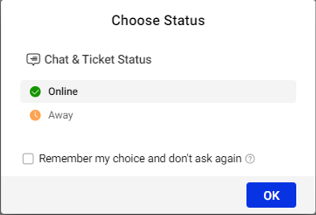
When enabled, a popup appears at your every login asking you to choose your online or away status. This option is enabled by default. - Start Agent Console upon startup of your machine (available on Desktop App only)
Disabled by default. You can enable it as needed. - Automatically log out after X minutes of no mouse or keyboard input (available on Desktop App)
Automatically log out after X minutes of inactivity on the Agent Console (available on Web agent Console)
When enabled, the system automatically logs you out after a set period of inactivity, either when no mouse or keyboard input is detected (Desktop App) or when there is no activity in the Agent Console (Web Console). This option is disabled by default. You can enable it and set the idle duration as needed. - Automatically switch to Away status after X minutes of no mouse or keyboard input (available on Desktop App)
Automatically switch to Away status after X minutes of inactivity on the Agent Console (available on Web agent Console)
When enabled, the system automatically changes your status to Away after a set period of inactivity, either when no mouse or keyboard input is detected (Desktop App) or when there is no activity in the Agent Console (Web Console). This option is disabled by default. You can enable it and change the idle duration as needed. - What action to take when closing Agent Console (available on Desktop App only)
Choose to exit or minimize your Agent Console when you click the close button.
Theme
By default, the Agent Console uses a light theme color, you can switch to a dark theme.
Language
- Text direction
Choose Right to Left or Left to Right for your Live Chat language base on the language you use for Live Chat. The default language direction is from Left to Right. - Auto-translate to
When enabled, the system detects if a visitor is using a different language. You can then click Turn On to begin translation. This setting applies to Live Chat only. To learn how to use auto translation for Live Chat, see this article. - Spell Check
When enabled, the system identifies misspellings in your entry, allowing you to correct your input quickly by choosing from the suggestion list. You can select your preferred language for spell check in the Desktop App. To learn more about using spell check, see this article.
Live Chat
In the Live Chat tab, you can set up automatic chat actions, keyboard shortcuts, and notifications for different chat events. You can also customize the visitor list to show.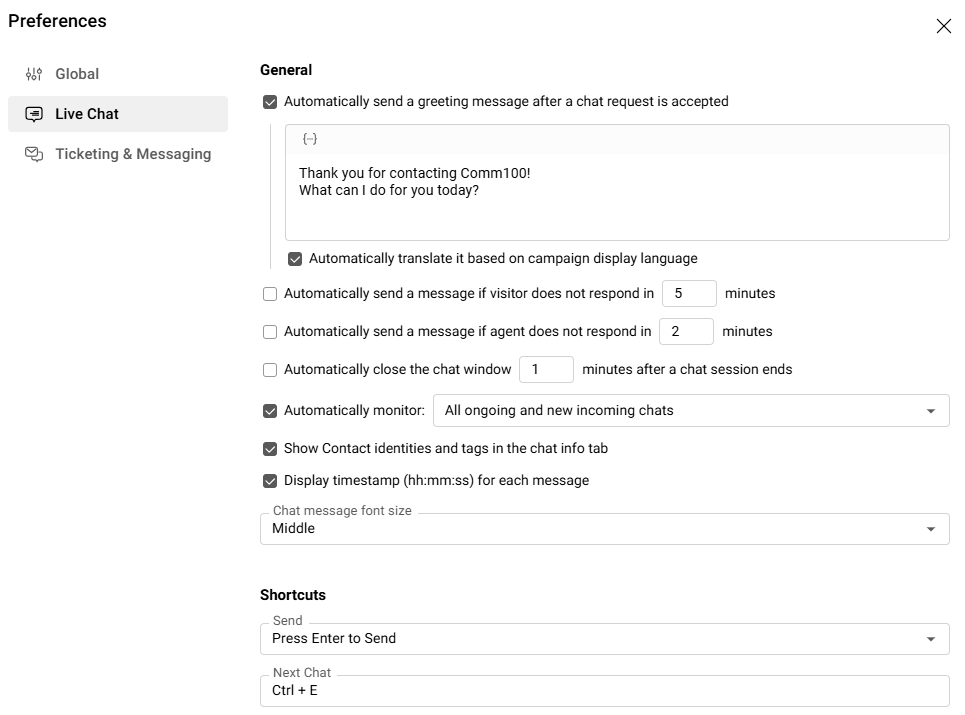
General
You can set up automatic actions for specific circumstances, for example, sending an automatic message when the chat gets started.
- Automatically send a greeting message after a chat request is accepted
Disabled by default. When enabled, the system automatically sends a greeting message to your visitor once the chat gets started. You can edit the wording and insert macros to make a more personalized greeting.Note: The system default greeting message only works nicely if the pre-chat form is configured to ask the visitor’s name as a mandatory option. - Automatically send a message if visitor does not respond in X minutes
Disabled by default. You can edit the message wording and set the duration as needed. - Automatically send a message if agent does not respond in X minutes
Disabled by default. You can edit the message wording and set the duration as needed. - Automatically close the chat window X minutes after a chat session ends
Enabled by default. When enabled, your chat window automatically closes 1 minute after the chat is ended by you or by the visitor. You can change the duration or disable it as needed. - Automatically monitor: Disabled by default. When enabled, ongoing chats handled by other agents also appear in your chat list. You can choose:
- Automatically monitor all ongoing and new incoming chats:
When enabled, all ongoing chats and new incoming chats appear in your chat list. - Automatically monitor only chats with agents who have same skills as me:
When enabled, the ongoing chats with agents who have same skills as you show in your chat list. To use this option, you need to define skills for agents first. To learn more about how to manage agents' skills, see this article.
- Automatically monitor all ongoing and new incoming chats:
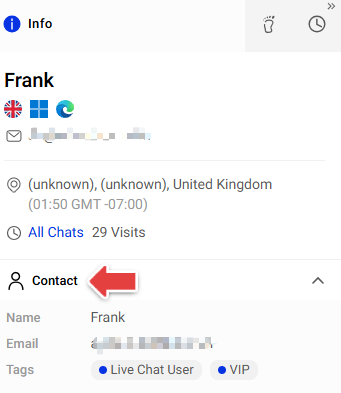
- Show Contact identities and tags in the chat info tab
Disabled by default. When enabled, the contact's identities and tags are displayed in the Contact section of the Info tab. - Display timestamp (hh:mm:ss) for each message
Disabled by default. When enabled, a timestamp is displayed for each visitor and agent message in hh:mm:ss format, providing more precise conversation tracking and timing visibility. - Chat message font size
Choose the message font size in your chat window.
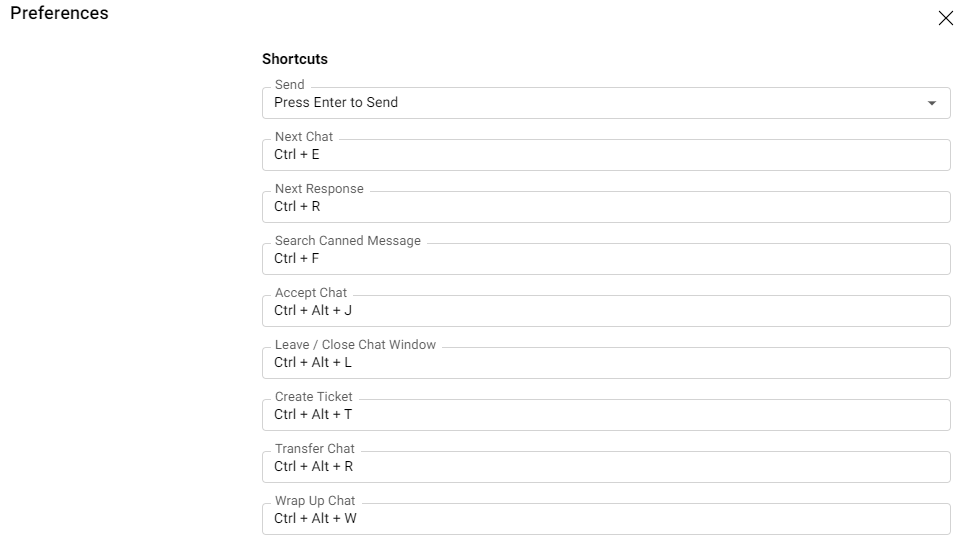
Shortcuts
To provide higher accessibility and improve efficiency, Agent Console supports a wide range of keyboard shortcuts. You can customize shortcuts for actions such as Send, Next Chat, Next Response, Search Canned Message, Accept Chat, Leave / Close Chat Window, Create Ticket, Transfer Chat, Wrap Up Chat, Ban Visitor, and Send Secure Form.
For sending a message, you can choose Enter or Ctrl + Enter as the shortcut. When one option from the drop-down is selected for sending, the other will be used for forcing a line break.
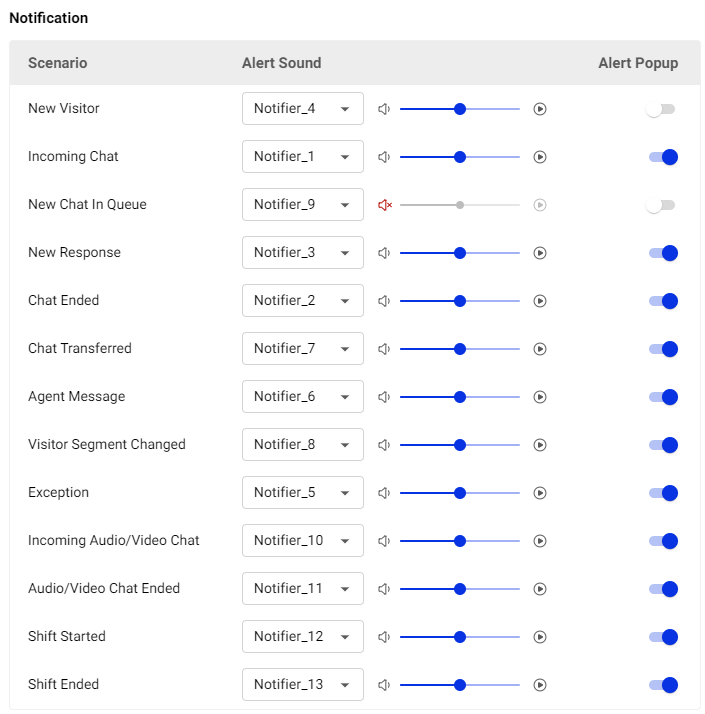
Notification
You can enable or disable alert sound and alert popup for different live chat scenarios, including New Visitor, Incoming Chat, New Chat in Queue, New Response, Chat Ended, Chat Transferred, Agent Message, and more. You can also select the notifier tone and adjust the alert volume.
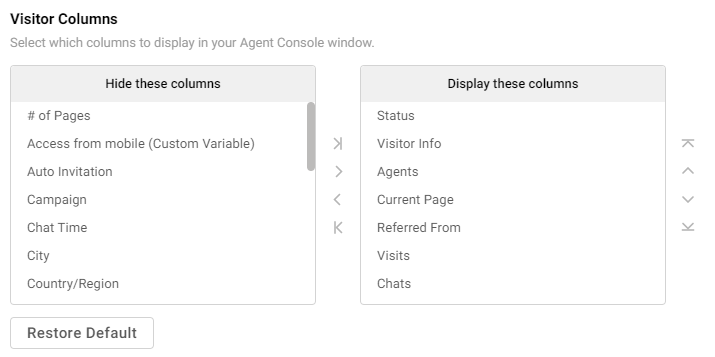
Visitor Columns
In the Visitor Columns tab, you can select which columns to hide or display in the Visitors tab in your Agent Console, as well as adjust their display order.
Ticketing & Messaging
In the Ticketing & Messaging tab, you can configure notifications for different message events, customize what information to be displayed, and set up email signatures for your integrated email accounts.
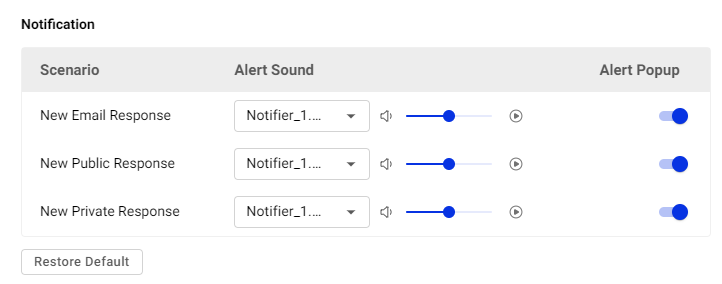
Notification
You can enable or disable alert sound and alert popup for New Email Response, New Public Response and New Private Response. You can also select the notifier tone and adjust the alert volume.By default, both alert sound and alert popup for these responses are enabled.
- New Email Response: Responses received via your integrated Email accounts.
- New Public Response: Responses received via your Facebook Visitor Post, Facebook Wall Post, or Twitter Tweet.
- New Private Response: Responses received via Facebook Messenger, Twitter Direct Message, WeChat Message, or SMS Message.
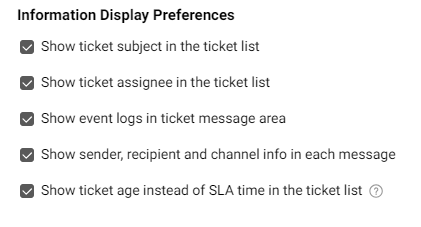
Information Display Preferences
You can choose what information you want to display in Ticketing & Messaging to keep the ticket list clean and focused on essential details.
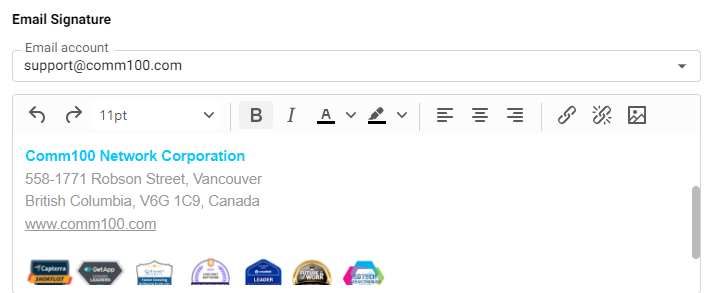
Email Signature
You can configure a unique signature for each integrated email account. When you reply to a ticket through email, the preset signature is added automatically, eliminating the need to insert it manually each time.