Comm100 supports unlimited agents and allows you to collaborate with other agents during a chat session. You can add multiple agents to your Comm100 account according to your needs.
Step-by-Step Instructions
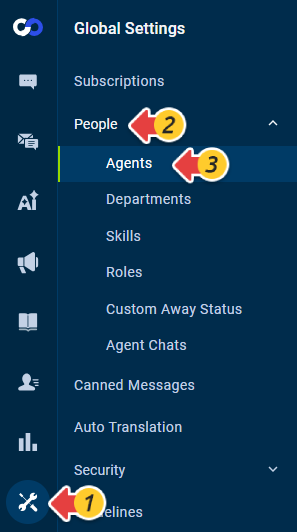
- Log in to your Comm100 control panel.
- From the left navigation menu, go to Global Settings > People > Agents.
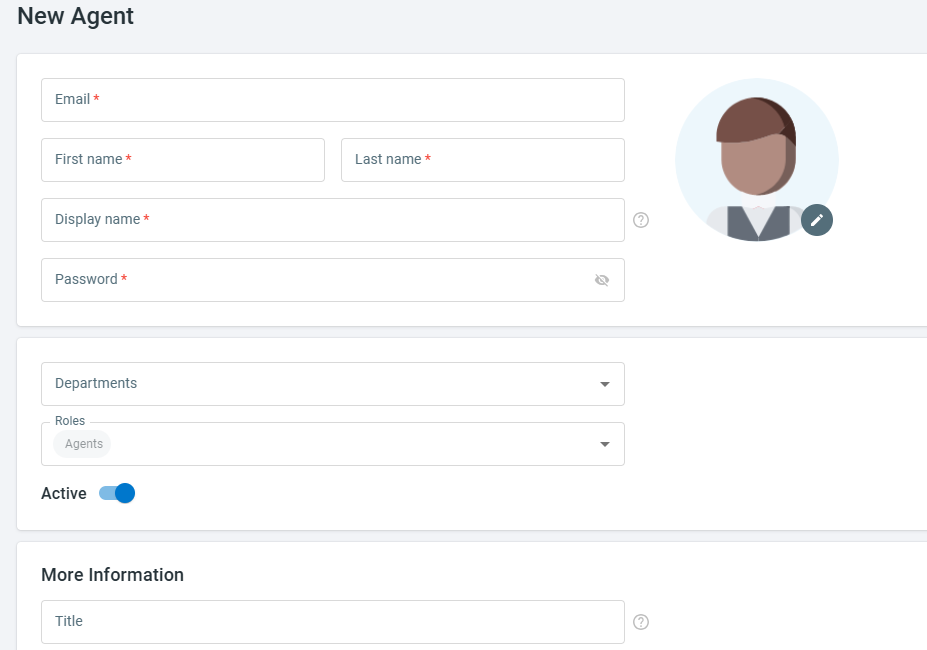
- Click New Agent.
- Enter the agent’s information. Click More Information to extend fields and add more information.
- Email: The agent's email address. The agent uses this email to log in to Comm100 system.
- First name and Last name: The agent's name.
- Display name: The agent's name that is shown to the visitors, which can be different from the agent's real name.
- Password: The password for the agent account.
- Departments: The business unit that the agent belongs to. To learn more about departments, see this article.
- Roles: The roles that the agent act as in your team. To learn more about roles, see this article.
- Active: Whether the agent is active. Only active agents can chat with visitors.
- More Information: In this section, you can add the agent's title, bio, meeting information, mobile number, time zone, and date & time settings.
- Click Save.

Note: Agents' Meeting Info can be a physical location or a virtual meeting URL like a Zoom link. You can insert an agent's Meeting info when customizing the email notifications sent to the invitees in the Booking system.
An agent is now successfully added.