Routing rules determine which department or agent is assigned a ticket when a customer reaches out and a new ticket is created. These rules are configured in the Comm100 Control Panel and ensure that tickets are automatically routed to the team member best suited to handle the request.
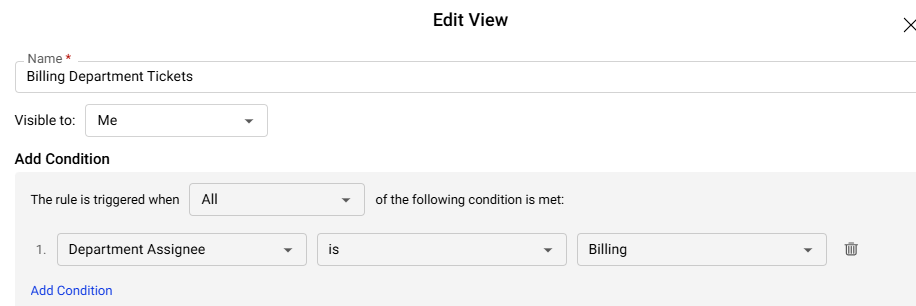
Agents can view routed tickets in the Agent Console by creating Views to filter tickets based on conditions such as department, assignee, or status. For example, an agent can create a View to display only tickets assigned to a specific department.
Using routing rules allows ticket assignments to be handled automatically instead of manually allocating tickets to agents.
For example, if your organization uses separate email addresses for Support and Sales, but manages both through Comm100, you can create routing rules so that messages sent to the Sales inbox are automatically assigned to the Sales team, while messages sent to the Support inbox are assigned to the Support team.
Step-by-Step Instructions
- Log in to your Comm100 Control Panel.
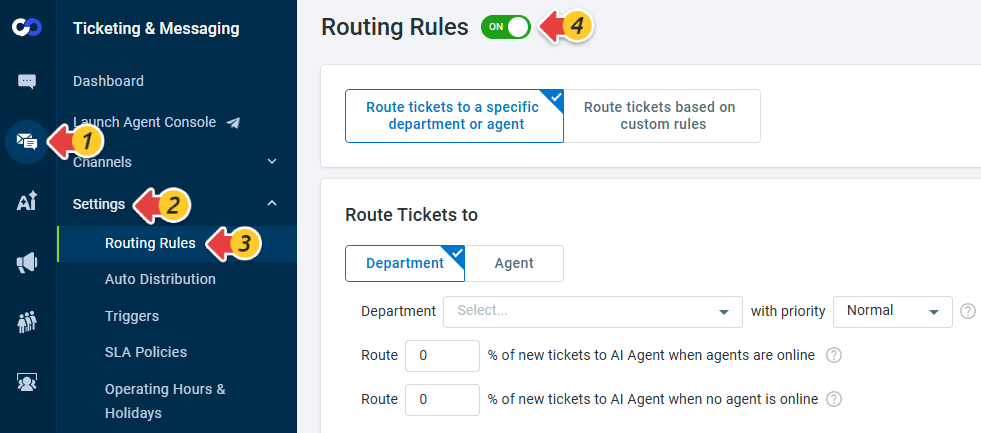
- From the left navigation menu, go to Ticketing & Messaging > Settings > Routing Rules.
- Turn on the Routing Rules toggle.
- If you want all tickets to be routed to a specific department or agent by default, do the following:
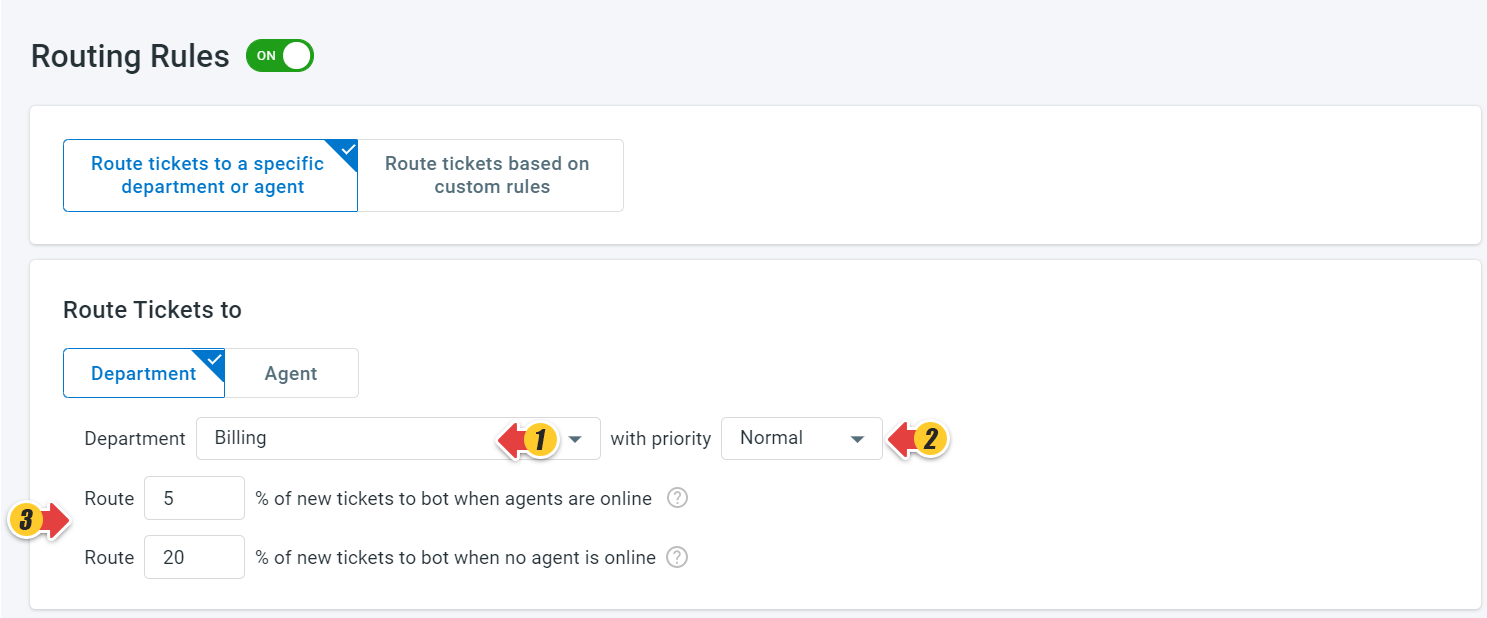
- Choose a department or an agent as the default assignee with a priority level.Note: The priority of the ticket is displayed on the Comm100 Agent Console. By default, a ticket is assigned with a Normal priority.
- You can also assign a limited percentage of new tickets to AI Agent when agents are online and offline.Note: You need to configure AI for the channel account to assign new tickets.
- Choose a department or an agent as the default assignee with a priority level.
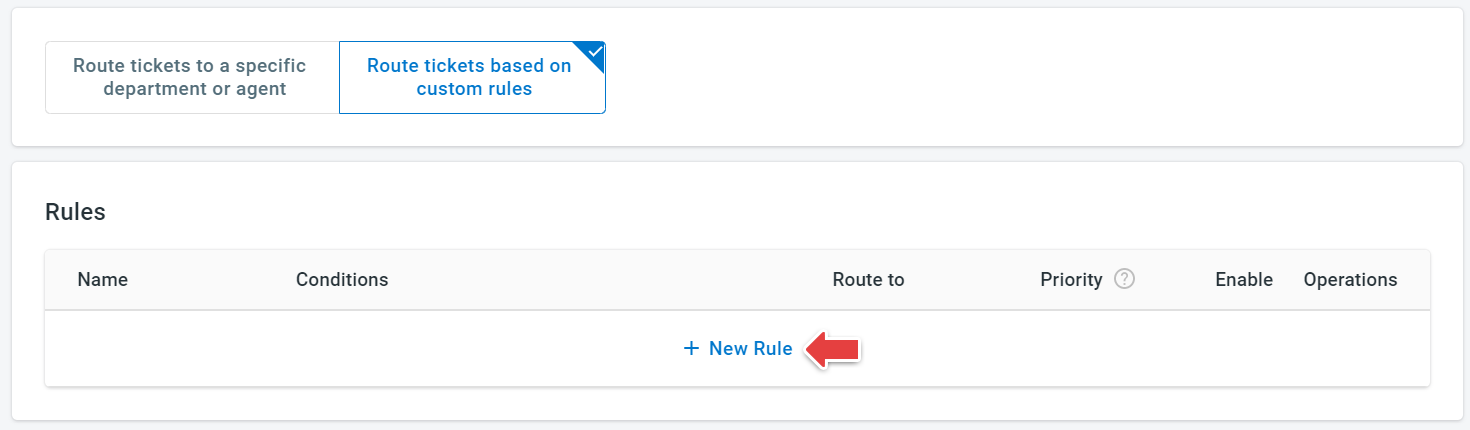
- If you want to route tickets based on custom rules, do the following:
- Click New Rule to create a custom rule.
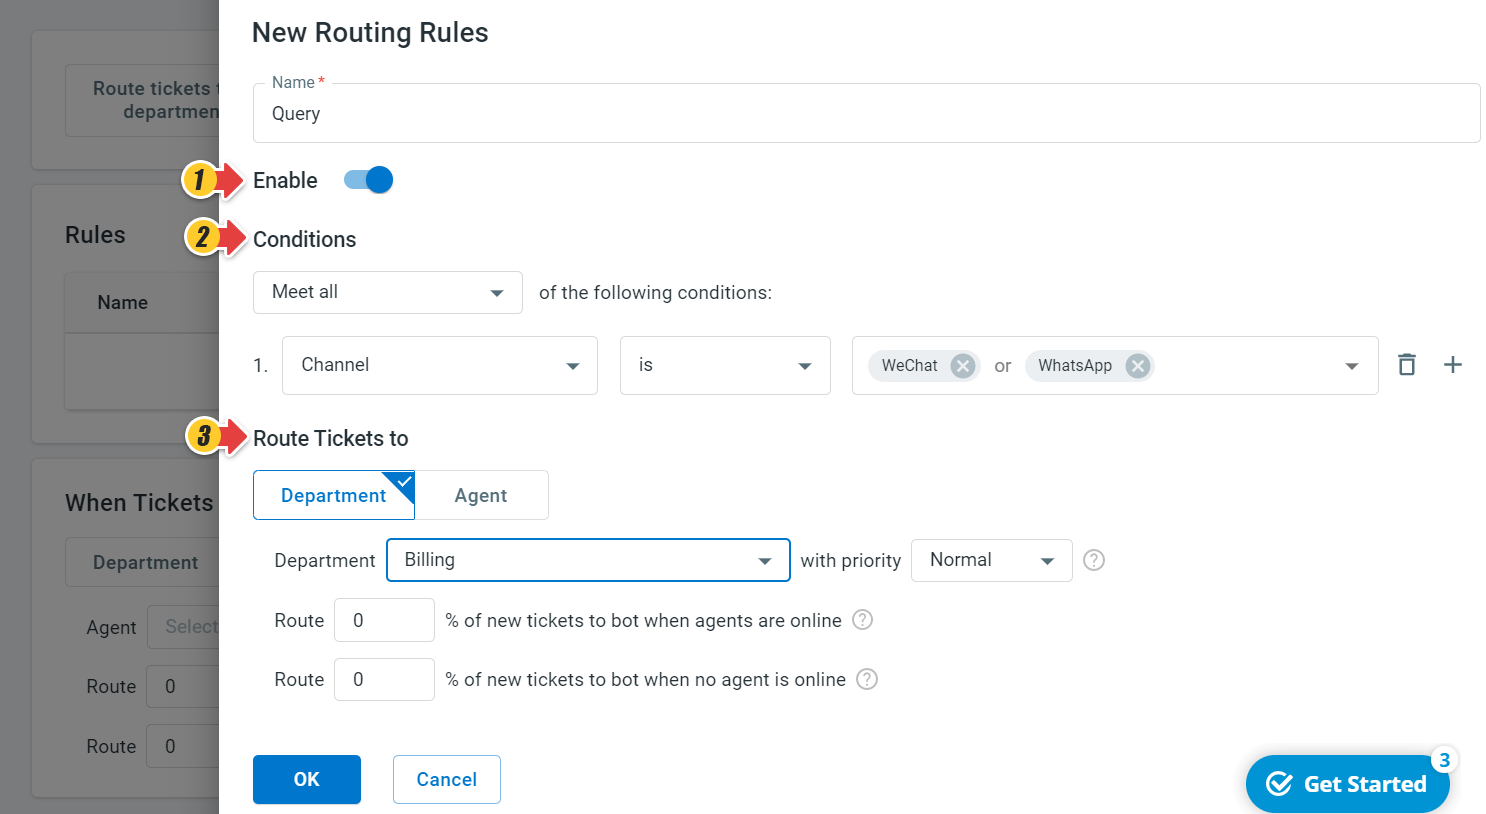
- In the New Routing Rules drawer, enter a Name for the rule and turn on the Enable toggle.
- Define the Conditions for the rule to trigger. Various conditions are available, such as Contact Identity, Contact Name, First Message Channel, First Message Channel Account, First Message of Ticket, Subject, and Ticket Id.
- Choose whether to route the ticket to a Department or Agent, and select the priority level.
- Click OK.
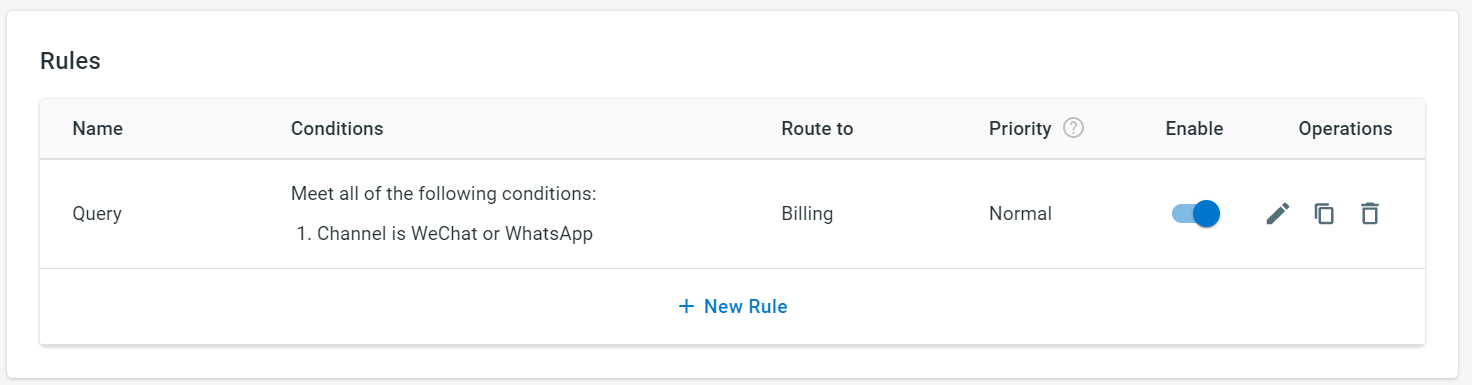
A new custom rule has been created. You can create and manage additional routing rules. Notice that you can set the order of precedence for the routing rules.
- Click New Rule to create a custom rule.
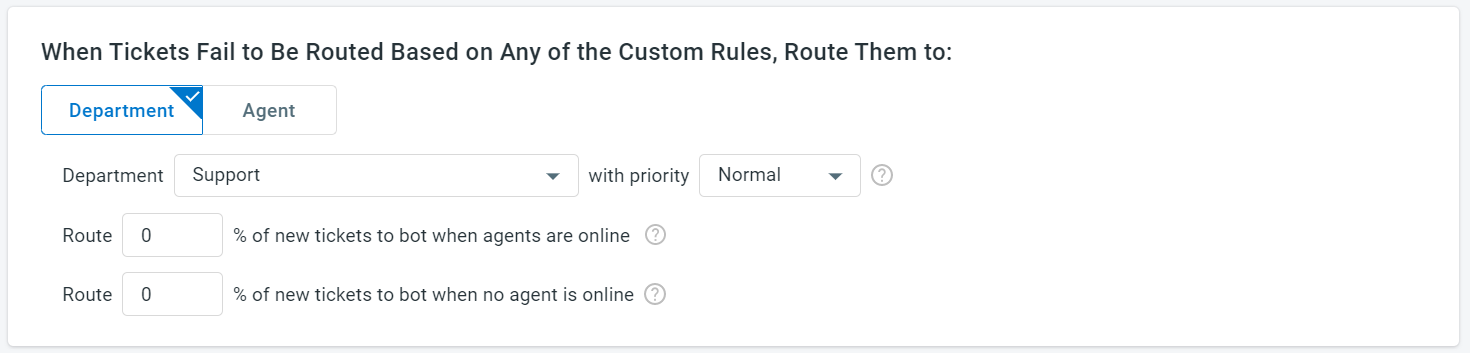
- If ticket fails to be routed based on any custom rules, you can assign them to a default department or agent.
- Click Save.
Once configured, new tickets will be automatically routed to the appropriate departments or agents according to your routing rules.