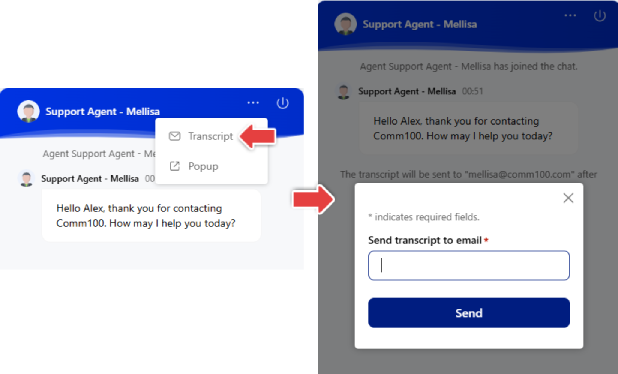
Comm100 Live Chat allows visitors to email chat transcripts to themselves during or after a chat session. This feature helps visitors keep a record of conversations for future reference.
When configuring this feature, you can customize key elements of the transcript email, including the email subject, sender address, and SMTP server. Once enabled, visitors will see an option in the chat window to send the transcript to a specified email address.
Step-by-Step Instructions
To set up email transcript emails to visitors, follow these steps:
- Log in to the Comm100 Control Panel.
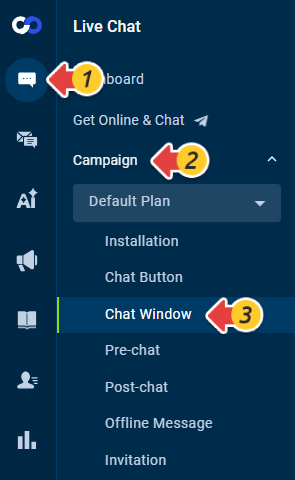
- From the left navigation menu, go to Live Chat > Campaign > Chat Window. If you have multiple campaigns, select the correct campaign from the drop-down list.
- On the Chat Window page, scroll down and expand the Options for Visitors section.
- Select the Allow visitors to email chat transcripts checkbox.
You are presented with the following options:- Configure SMTP mail server: By default, the transcripts are sent from Comm100 mail servers. SMTP server information may appear in the email depending on the recipient’s mail service provider. To prevent the Comm100 server from showing, you can use your own SMTP server. Using your own SMTP server also allows you to track statistics such as email delivery rate and open rate.
- Customize email subject: Modify the default subject line of the transcript email sent to visitors.
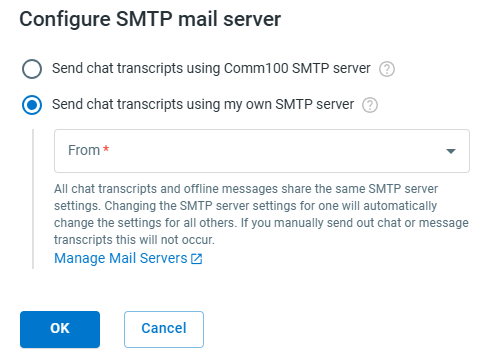
- (Optional) To change the SMTP server, click Configure SMTP mail server and select Send chat transcripts using my own SMTP server. You can choose an existing mail server, or click Manage Mail Servers to add a new one.Note: All automatic transcript emails and offline messages share the same SMTP server settings. Your changes apply to the transcripts and offline messages that are sent automatically. The emails sent out manually by agents are not affected.
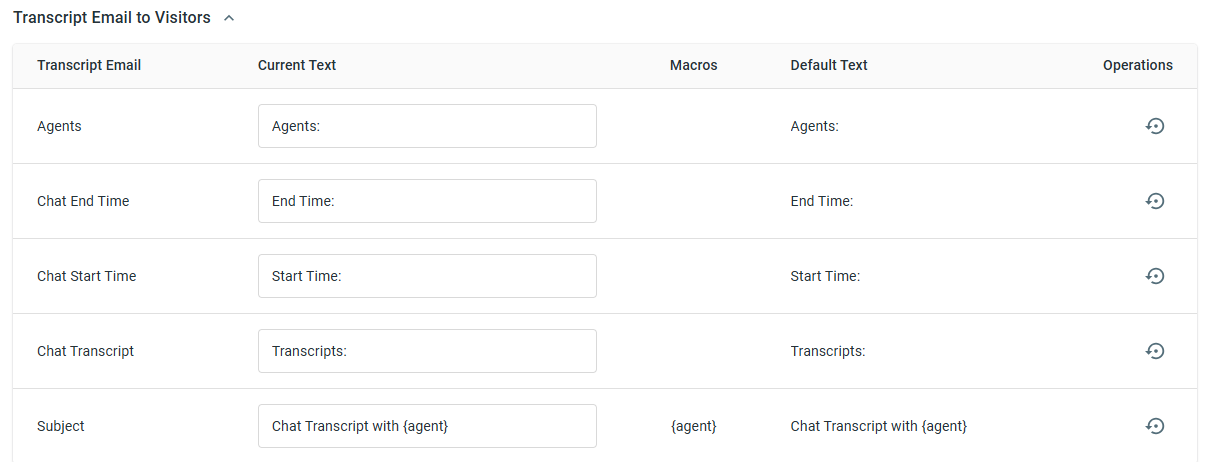
- (Optional) To change the predefined email subject, click Customize email subject. On the Edit Language page, locate the Transcript Email to Visitors section, update the email subject and other fields in the Current Text column as needed, and click Save.
- Click Save.